This is a step by step tutorial to sew a pouch with a faux fur fabric (you can substitute the material with plush or even canvas, cotton….. ) with a magnetic snap closure from a single pattern piece. It can be customised to the size you want and can be used as a organiser inside your bag, which is what I am doing.
Step 1 – Cut Faux fur
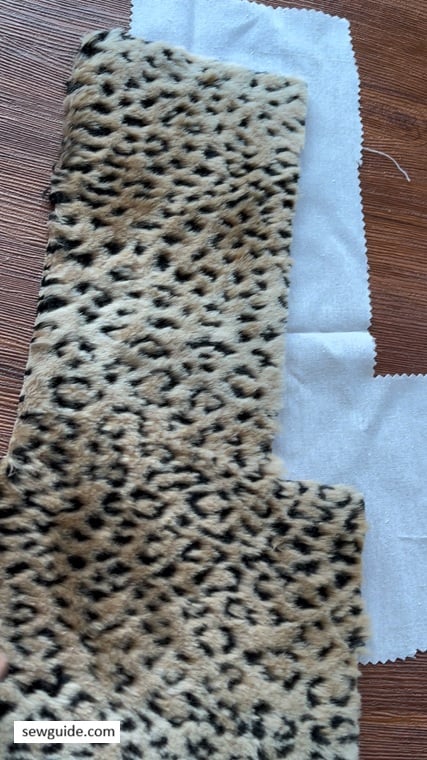
Faux fur looks super cool but it is a little bit difficult to manage at the cutting stage. For one, you cannot mark on the front side. But you can mark on the back, which is flat and woven. So when you cut, you have to cut it from the backing only. Which makes it awkward for the fur. What if you shave off the fur also. It is better to be cautious about this – Slide scissors under pile so you don’t accidentally chop fur fibers.
Checkout the video tutorial for this magnetic snap faux-fur pouch
And then there are the fur bits. They are everywhere in my sewing room. You will not realise the nightmare it is till you start cutting a piece of it. I bet a lungs detox is in store for me after cutting that small piece.
Cut out a faux fur fabric and lining of about 14 inch square. You also need a set of magnetic snap set.
From this square piece cut out the pattern as in the picture below.
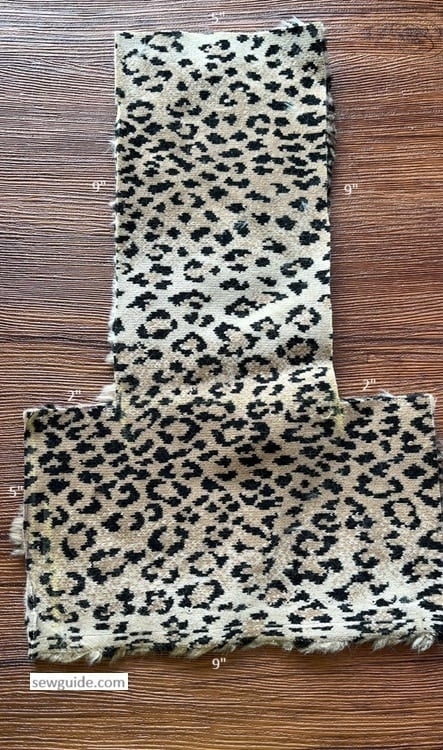
You can play with the size – The pattern I am using gives you a small clutch-size pouch. You can increase the width, but you will have to increase the length too correspondingly (except for the depth, 2″ here, which will remain unchanged)
Related post: Sewing with Faux-fur
Step 2 – Attach snaps
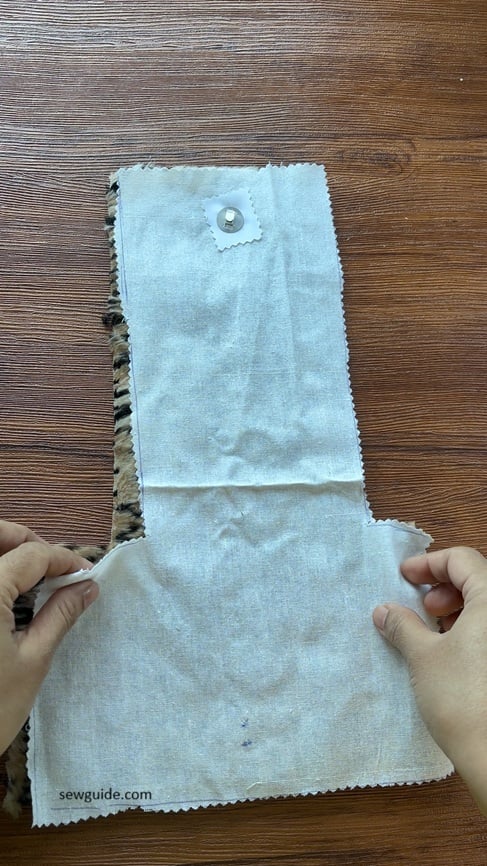
Mark snap placement on the lining.
On the lining piece, mark where the magnetic snap will go centering it horizontally such that the top of the mark is at least 1 inch down from the top edge of the lining.
I reinforced the area under the snap with a small square of scrap fabric on the wrong side. This prevents tearing. You can also use interfacing.
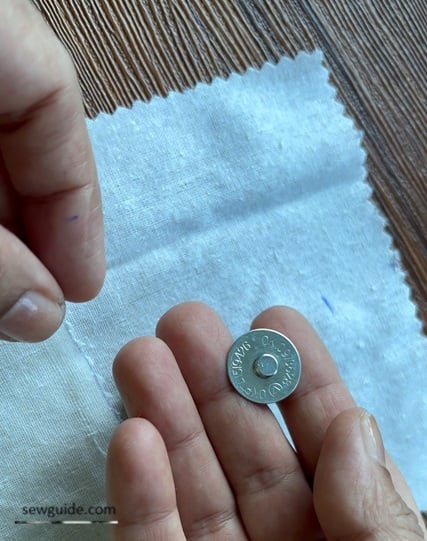
Install the projecting part of the magnetic snap on the lining. This is called the stud side of the snap pair in fastener terminology.
Cut two tiny slits for inserting the prongs.
Insert snap prongs from right side.
Place washer on back. Fold prongs flat against the washer (outward is standard, though inward also works).
You can attach the other side of the magnetic snap on the outer fabric where the flap would meet at this point. But I attached it after sewing the pouch. This may be a problem if you want to keep phone etc in your pouch as the metal can rub against it. As I am using it as a coin pouch for my cards and keys it didn’t matter.
Step 3 – Sew Outer and Lining Together
Place faux fur and lining right sides to the inside, as in the picture above.
Pin around edges. Stitch around perimeter with a small seam allowance.
Leave a 2″ turning gap along the bottom edge side.
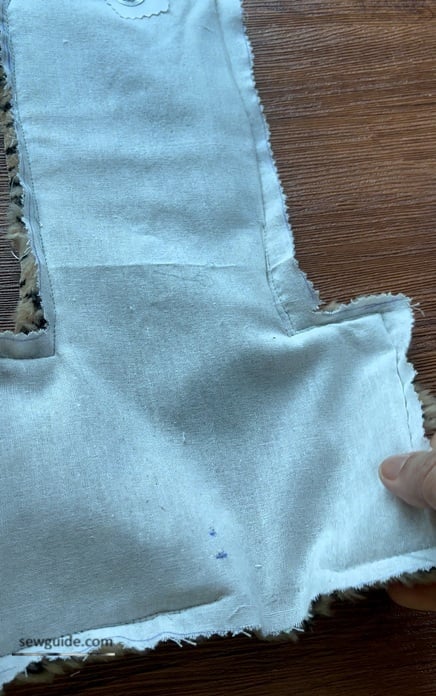
Trim corners for sharp edges. At this point you can sew the top corners rounded.
Step 4 – Turn the pouch right side out
Pull fabric through the gap gently.
Push corners out with blunt tool.

Fold raw edges of opening inward so seam looks continuous.
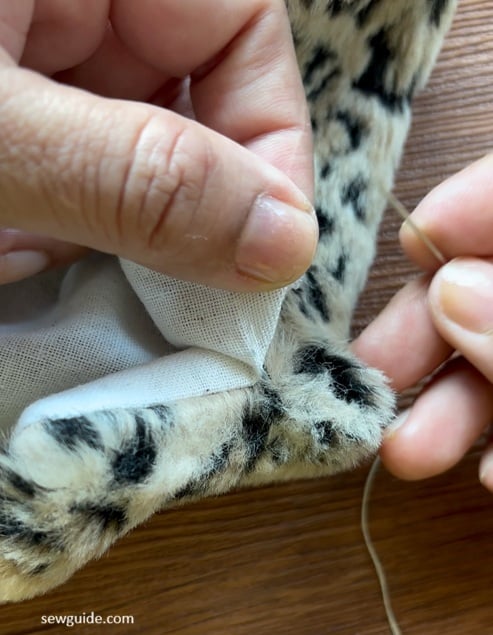
Step 5 – Hand stitch the opening closed
Use ladder stitch to close the gap:
Catch a tiny stitch from one folded edge.Then opposite edge.Pull thread, the hole and the seam disappears
Knot securely and hide thread tail inside.
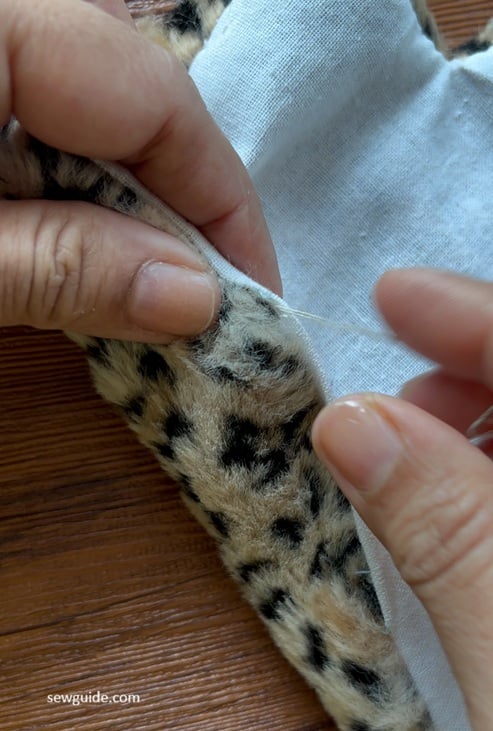
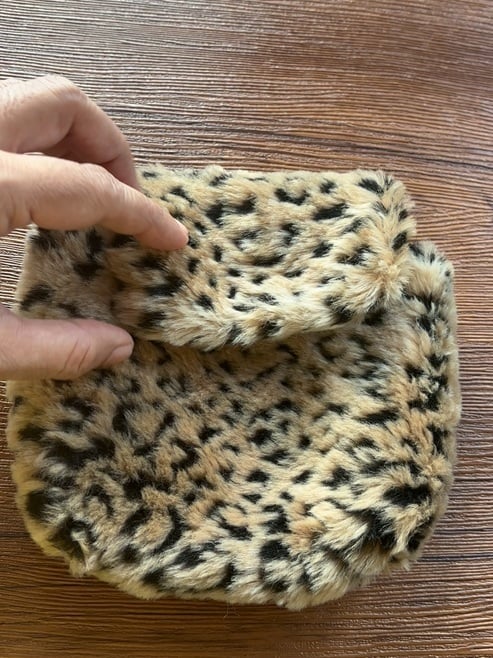
Step 6 – Form Pouch Shape
The side edges have to be stitched. You can top stitch the edges with Machine stitching but it will crush the pile and shows on fur. So I prefer hand stitching.
What we do here is to keep the side edges side by side butting them together ; for joining like this, the best stitch is a ladder stitch.
Align edges carefully.
Using hand sewing (ladder stitch or whip stitch inside seam allowance), stitch the side edges closed
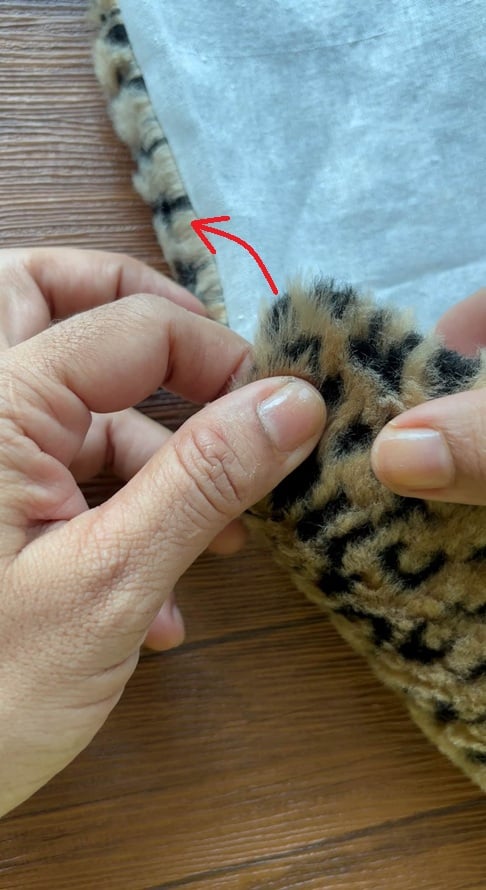
Keep stitches small and tight. If you make small and even ladder stitches it would not be leaving holes on the seam. If you are making large ladder stitches, it will not be stable enough, you will have to make an extra whip stitching to close the seam securely.
Remember to hide knots inside the seam.
Brush seam area gently with fingers-This hides stitches in the pile of your faux fur.
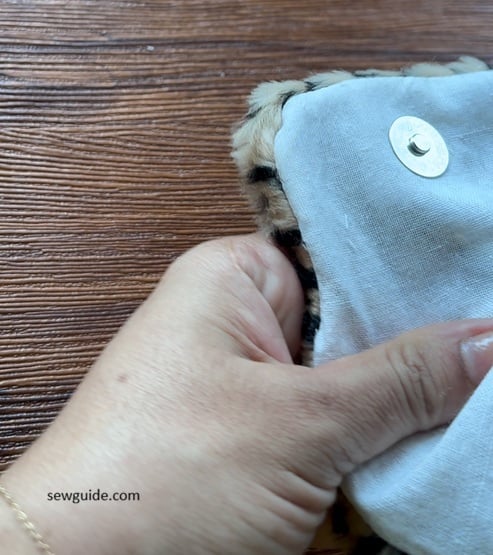
Step 7 – Attach the other snap
On the pouch you have to attach the socket side of your magnetic snap.
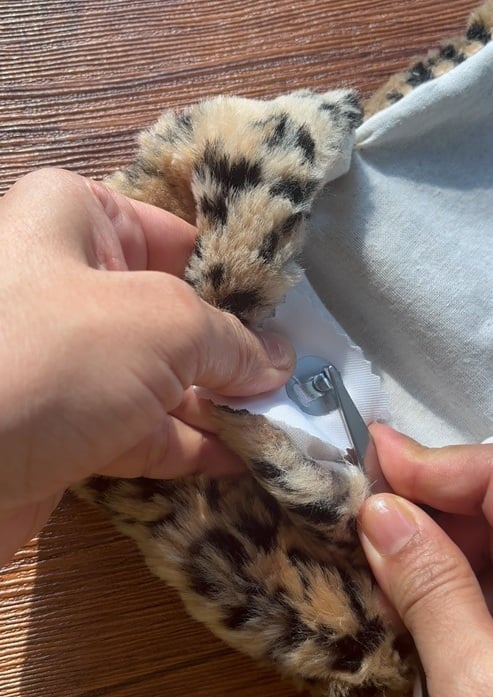
After attaching it, you can also stitch a small fabric square over the back of each snap for a clean finish.
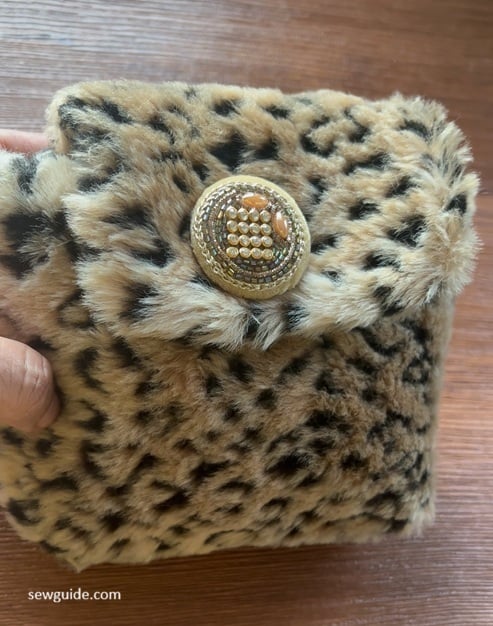
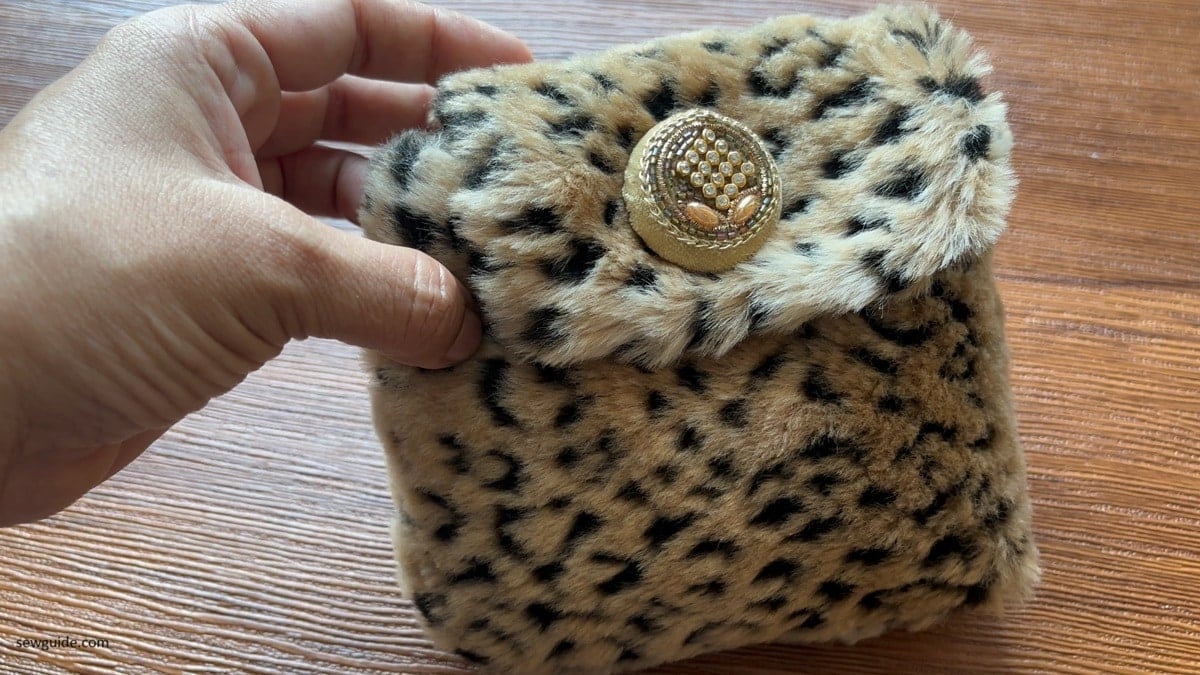
I added a blingy button on the flap – I think it made it a little prettier. Don’t you think so?