It’s that time of year when everyone’s hunting for thoughtful gifts. I didn’t even know “Make a Gift Day” was a thing—it is on celebrated on December 3rd – perfect timing with Christmas around the corner.
And honestly, pouches are always in demand. They’re cute, practical, and everyone can use one. Even better? They’re incredibly easy to sew.
A handmade gift that’s quick, useful, and guaranteed to make someone smile. Win-win.

Watch the video tutorial, if you are a visual learner you will like this better; pause and watch again if it is a little fast; pinch it and zoom if it is small on your screen – it is in a vertical format ; everything else is explained below :
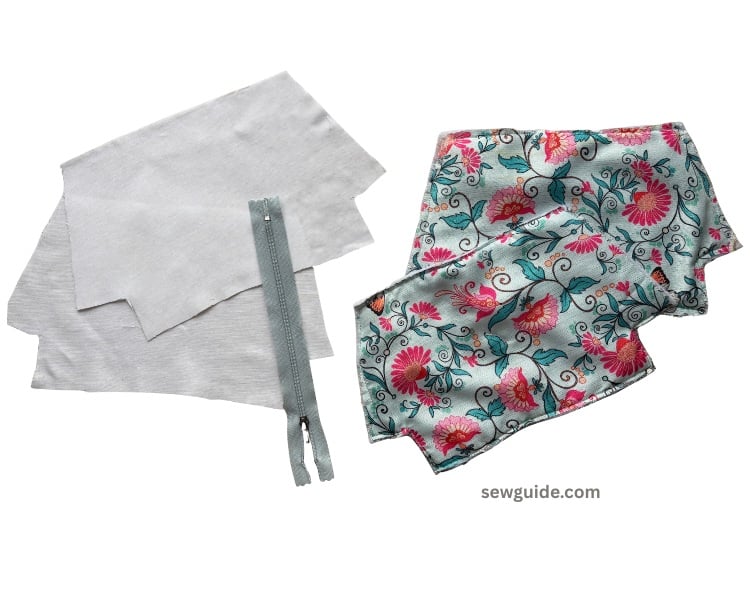
STEP 1 — Select your materials
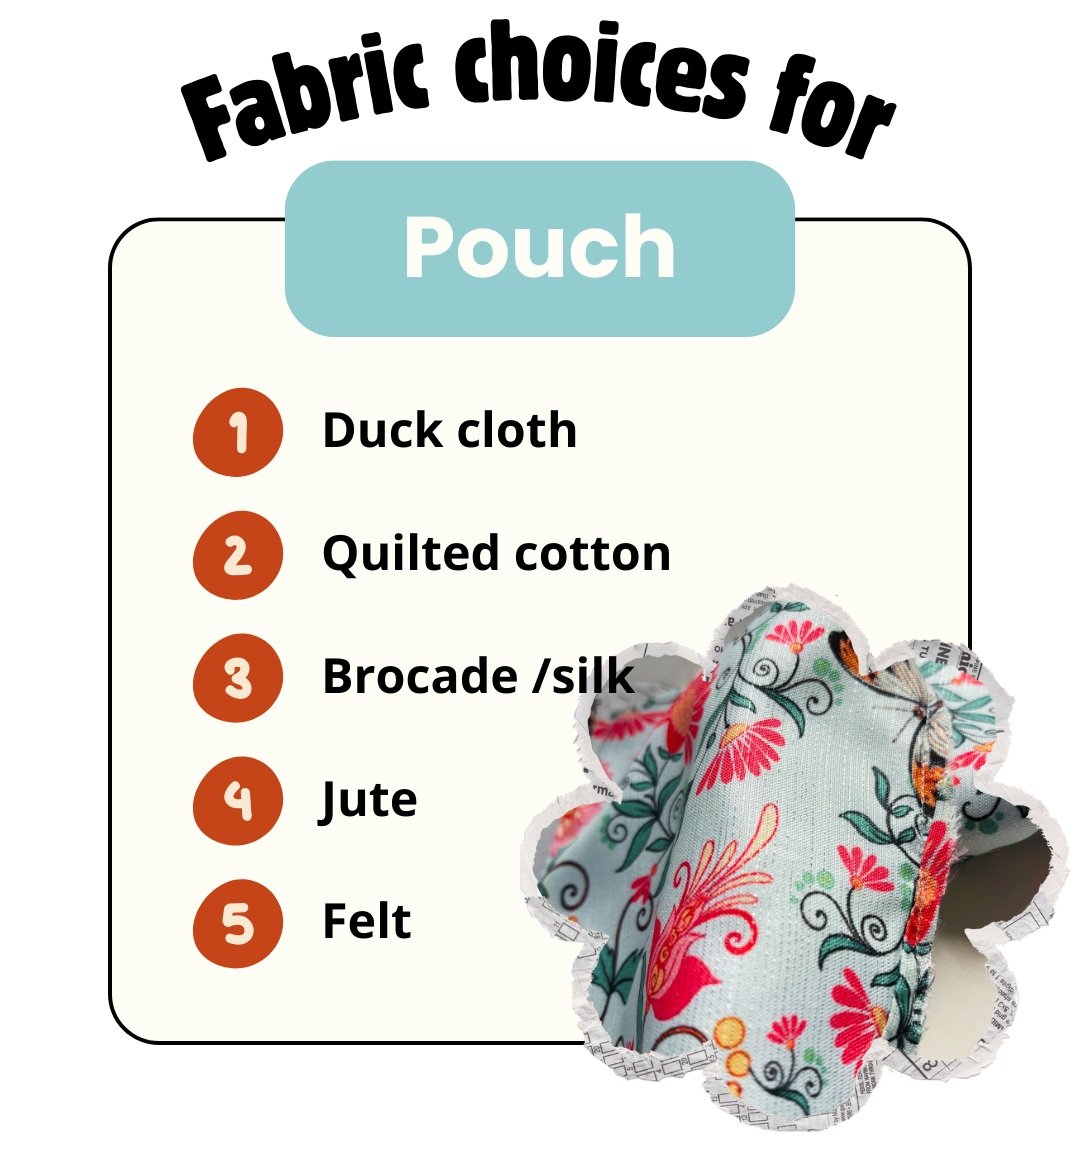
For a festive gift, you can choose classic Christmas colors like red and green, or simply pick shades you know the recipient will love. Choose fabrics like duck cloth, quilted cotton, brocade or silk, jute, or felt to create gift pouches in different styles and finishes
On the back of the outer fabric, I am using batting inside for added structure. The batting is sewn to the outer fabric and treated as one. I just sewed it together along the outside edge. You can quilt it in pretty patterns for added dimension.
For lining the pouch you can choose nylon for its waterproof quality or cotton for its sturdiness.
You also need a zipper 7 inch long zipper
Step 2. Cut the Sewing Pattern for the pouch
Cut out the fabrics in this pattern
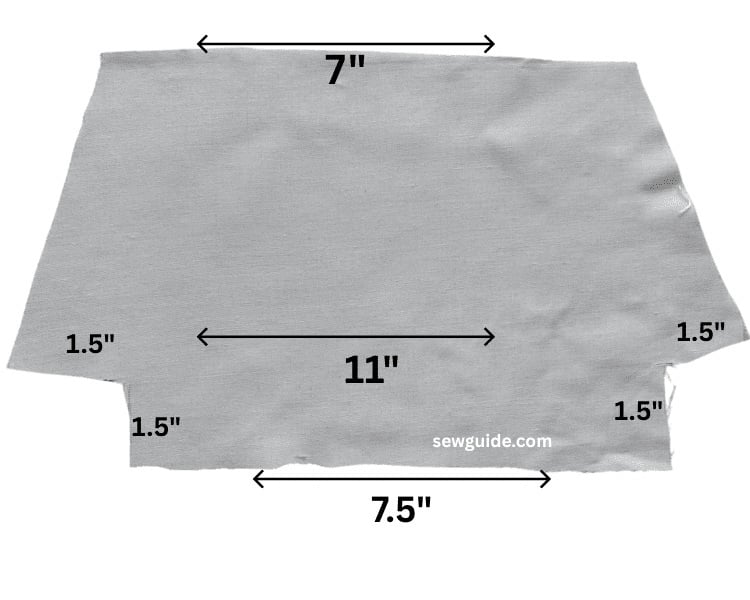
You need to cut 2 outer fabric from the same pattern
You also need 2 lining material and Batting also cut in the same pattern. I, then stitched the batting to the outer-fabric along the periphery and treated the layers as one.
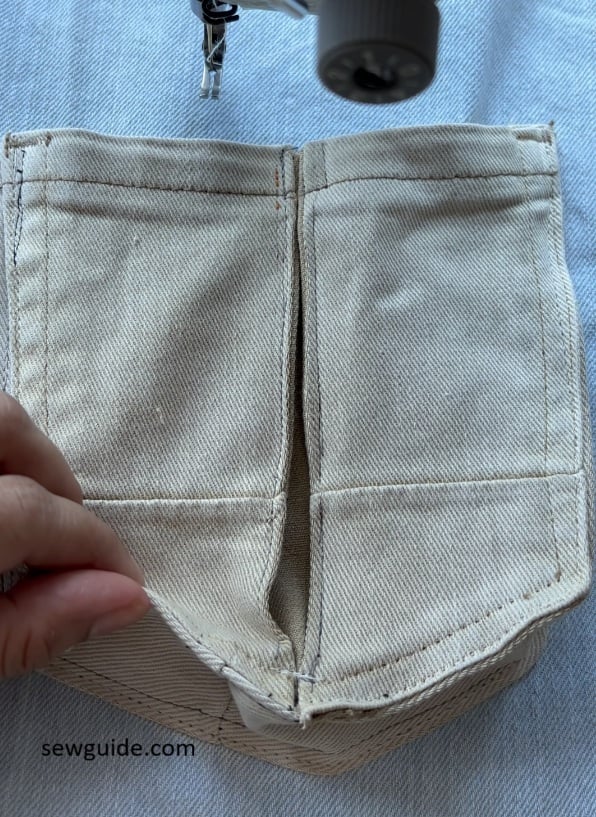
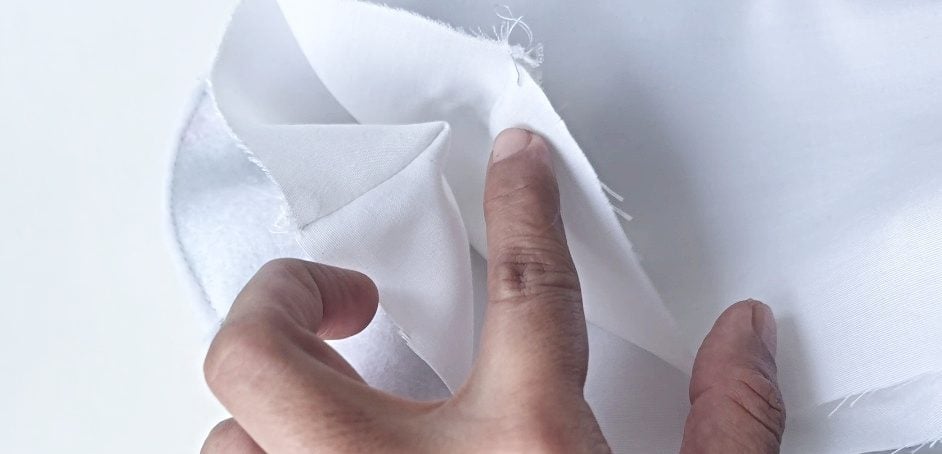
Step 3. Box the corners
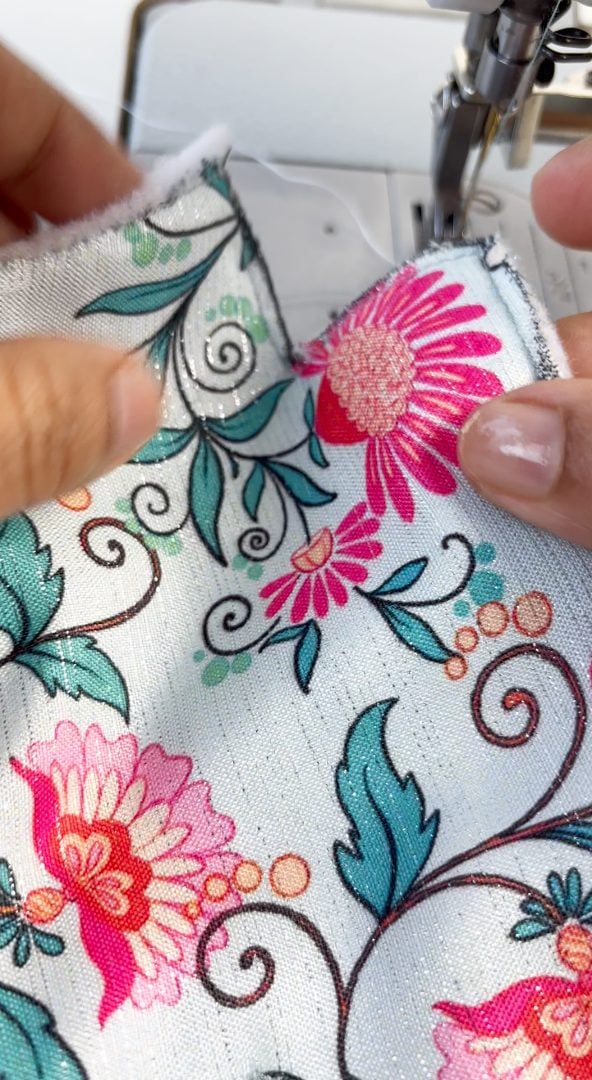
Sew the edges of the cut edges together to get a flat bottom
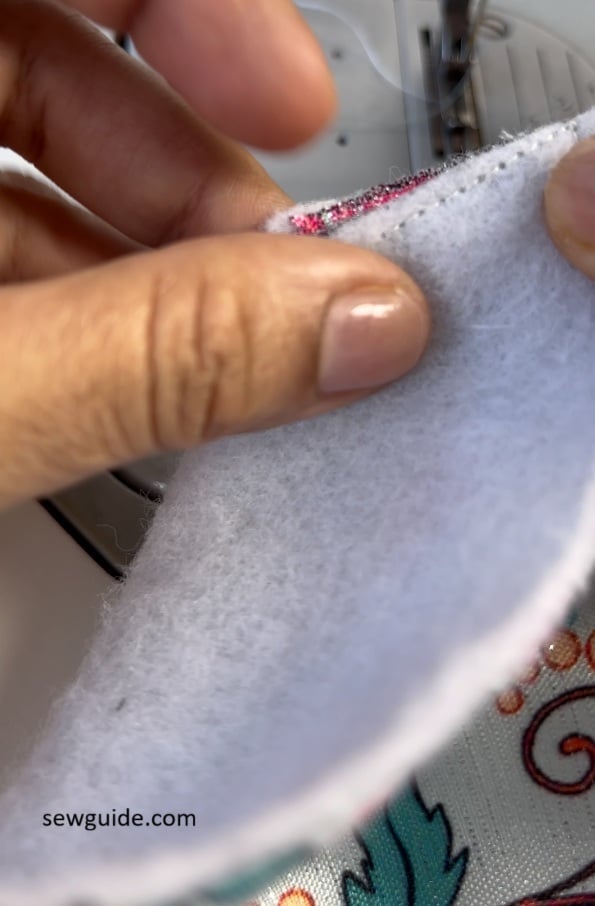
This is how it will look.

Do this for all the pattern pieces. For the lining too.
Step 4. Sew one edge
Make your fabric “sandwich” with the outer fabric and lining with the zipper placed inside
Place fabrics in this order:
- Outer fabric (right side UP)
- Zipper (right side DOWN)
- Lining fabric (right side DOWN)
All top edges are aligned.
Clip or pin in place.
STEP 5 — Sew the edges
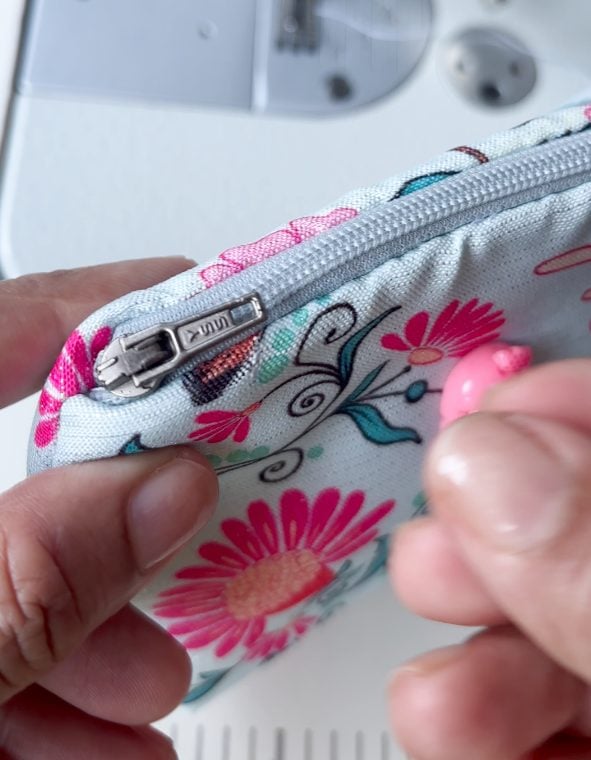
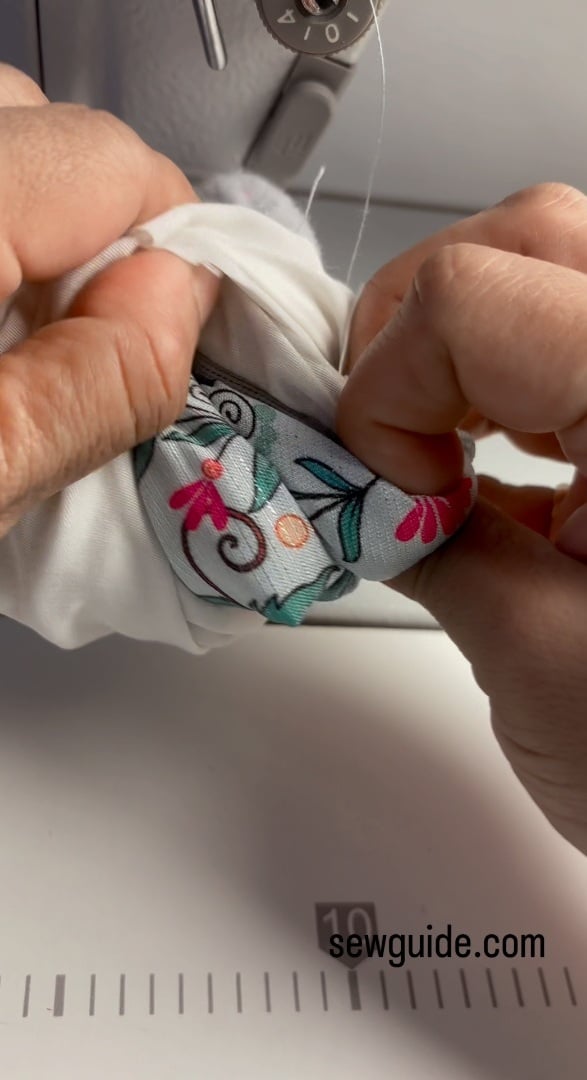
Use a zipper foot for sewing the edges. You have to sew close to the zipper teeth.
Keep the zipper pull out of the way by stopping with the needle down and then lift presser foot and then slide the pull past the needle; continue sewing.
STEP 6 — Fold and press
Flip fabrics so the outer fabric and lining are on each side of the zipper (right sides outward).
Press the seam flat.
Topstitch along the edge to keep fabric from curling into the zipper.
STEP 7 — Attach the second side
Repeat the same sandwich in this order:
- Outer fabric (right side UP)
- Zipper (right side DOWN)
- Lining (right side DOWN)
Sew along the zipper.
Press and/or topstitch again. You will get your zipper in between like this.
STEP 8
VERY IMPORTANT: Open the zipper halfway so you can flip the pouch later.
Lay the pouch flat:
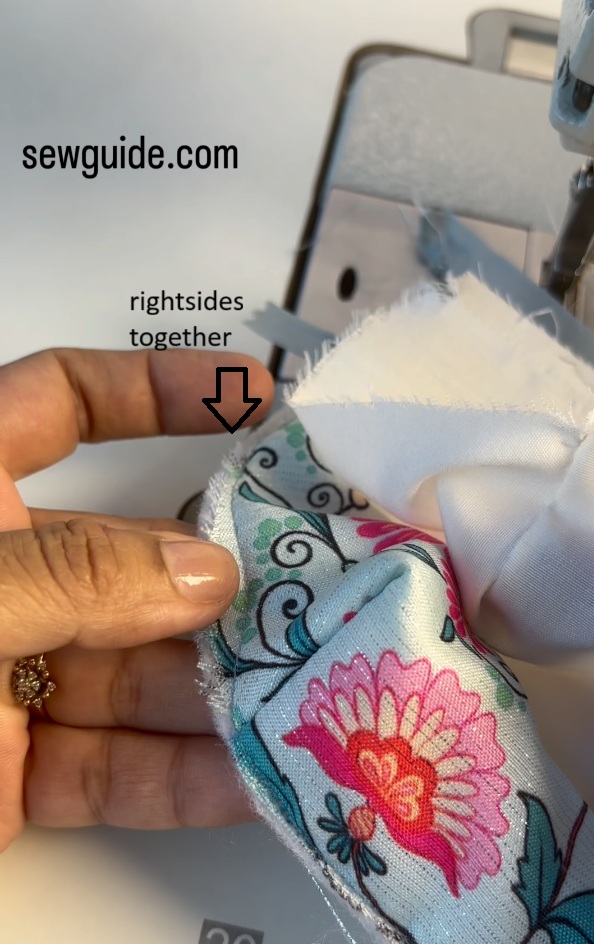
Flip the outer fabrics to one side ; they will now be right sides together
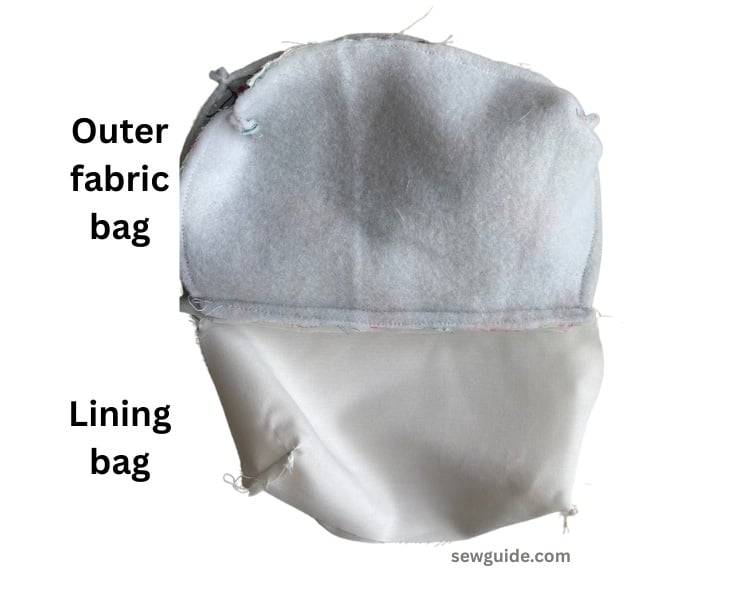
Do the same thing for the Linings – to the other side of the zipper, right sides together
Align seams and edges
Clip all around.
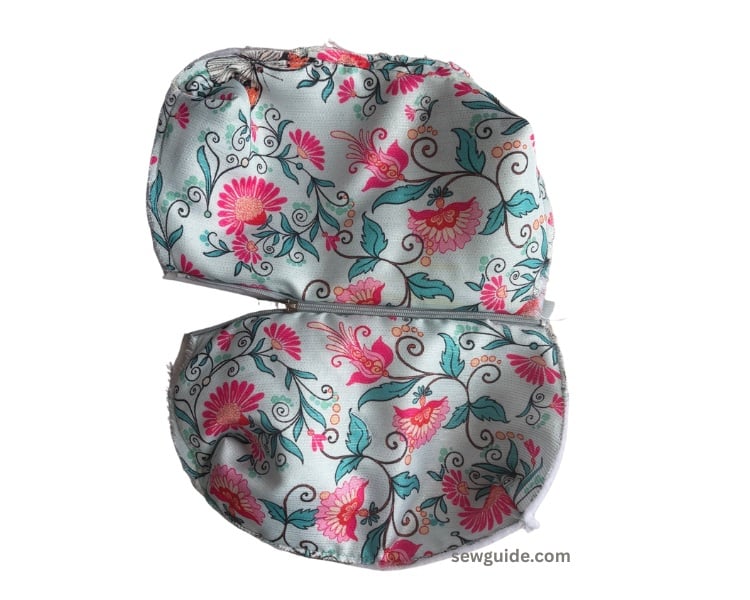
Sew around the whole perimeter, leaving a 2–3 inch opening at the bottom of the lining.
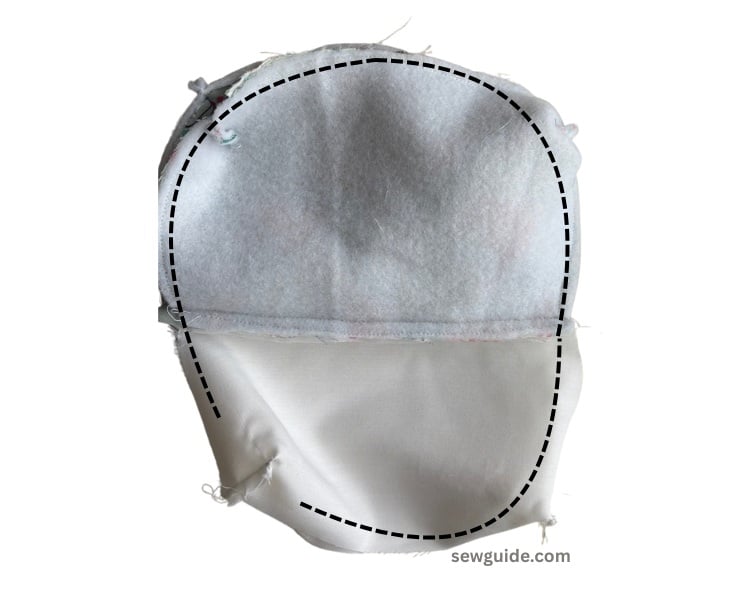
STEP 9 — Turn the pouch right-side out
Pull the pouch through the lining opening ; then through the zipper opening.
Press edges neatly.
STEP 10 — Close the lining hole
Sew the lining gap closed with:
A straight stitch, or A slip stitch by hand for a cleaner look.
Push the lining inside the pouch.
Press again.