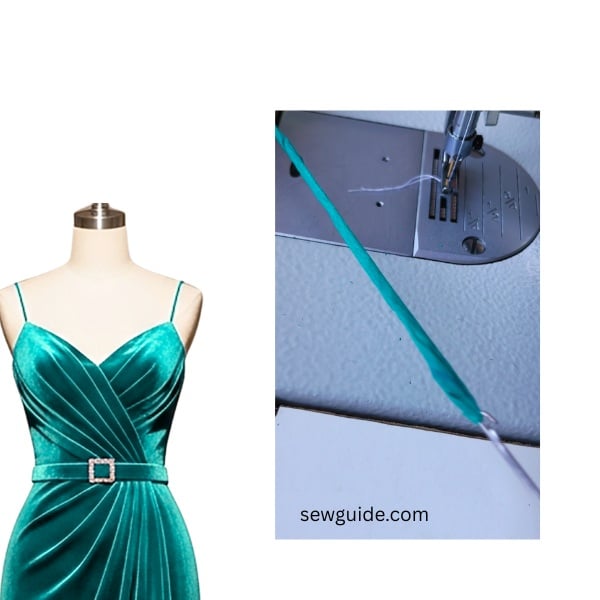
If you have a lot of trouble sewing fabric tubes and you have to do it a lot, a loop turner can be your friend. It is used to turn all kinds of fabric tubes (very thin fabric casings, bigger tubes used for drawstrings) right side out. When you have to make rounded thin fabric tubes for making spaghetti straps nothing beats this sewing tool.
Watch the video if you want a visual tutorial :
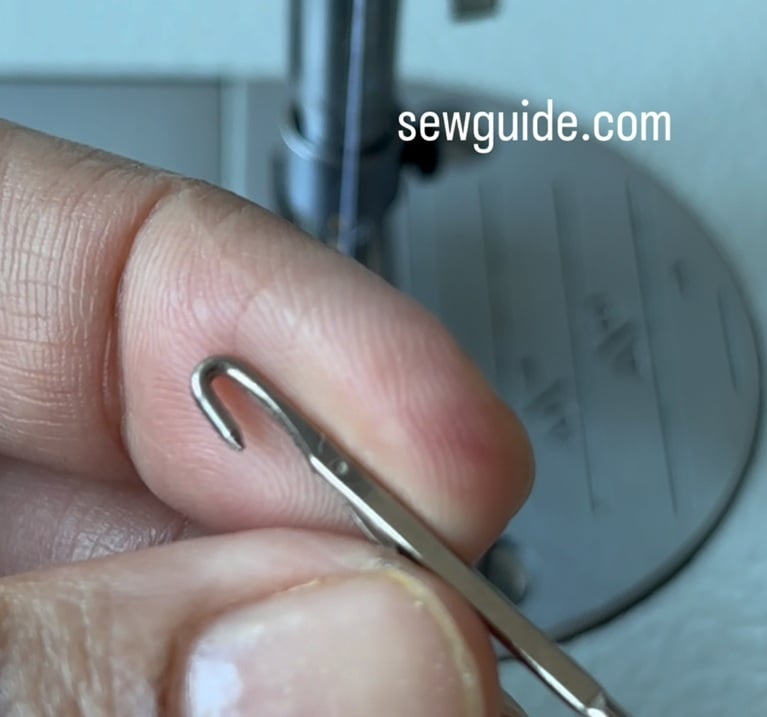
The loop turner is a thin metal rod with a circle on one end and a hook on the other. It is about 12 inches long. The hook is to be latched onto the fabric and the circle is to hold on to and to prevent the thin metal thing from riding up the fabric tube.

Here is how to use a loop turner
Cut out your fabric pieces for making the tubes. You can cut the fabric pieces as a bias strip for getting slightly stretchy tubes – this is important when making very thin and round tubes. If you do not want stretchy tubes, cut the fabric on the straight grainline – you can do this when making bigger casings.
Related posts: Grainline in fabric; How to sew thin straps; How to cut fabric on the bias.
Decide on the width of the fabric casing you want to make. Multiply this by 2. For bigger tubes, Add 1/2 inch to this as seam allowance.

Making very thin and rounded spaghetti tubes with the loop turner
- Cut a 1.5 ” bias fabric strip.
Decide on the length you want and cut it out.
2. Keep the fabric strip folded by the center, right sides to the inside.
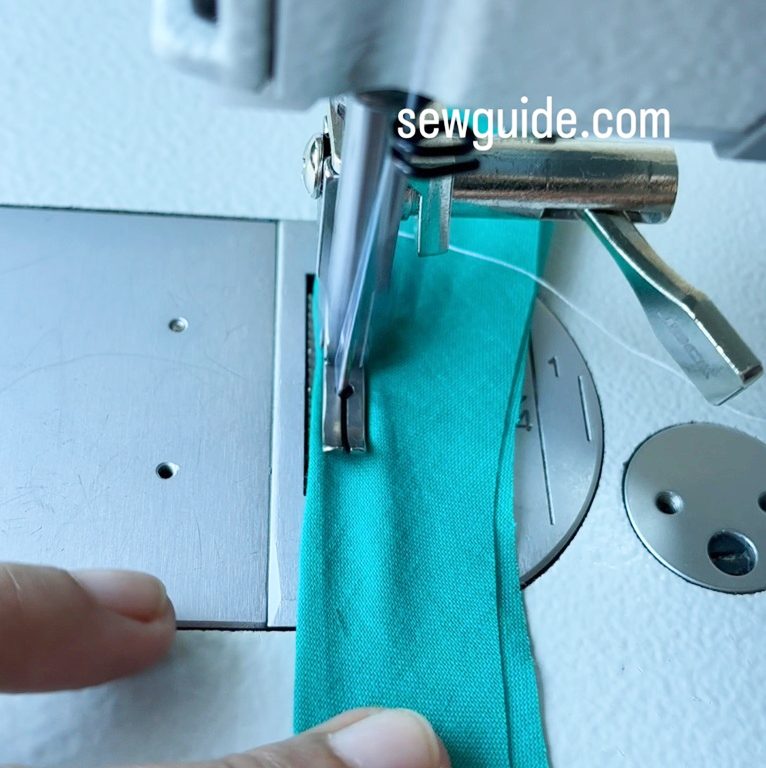
3. Sew the fabric strip 1/8 inch (or slightly more – just enough for the thin loop to pass through) from the center fold.
4. Trim the seam allowance to 1/8 inch.This will give you the necessary bulk inside the tube, which will make it rounded. And because you have cut bias, it will accomodate the bulk and remain rounded.

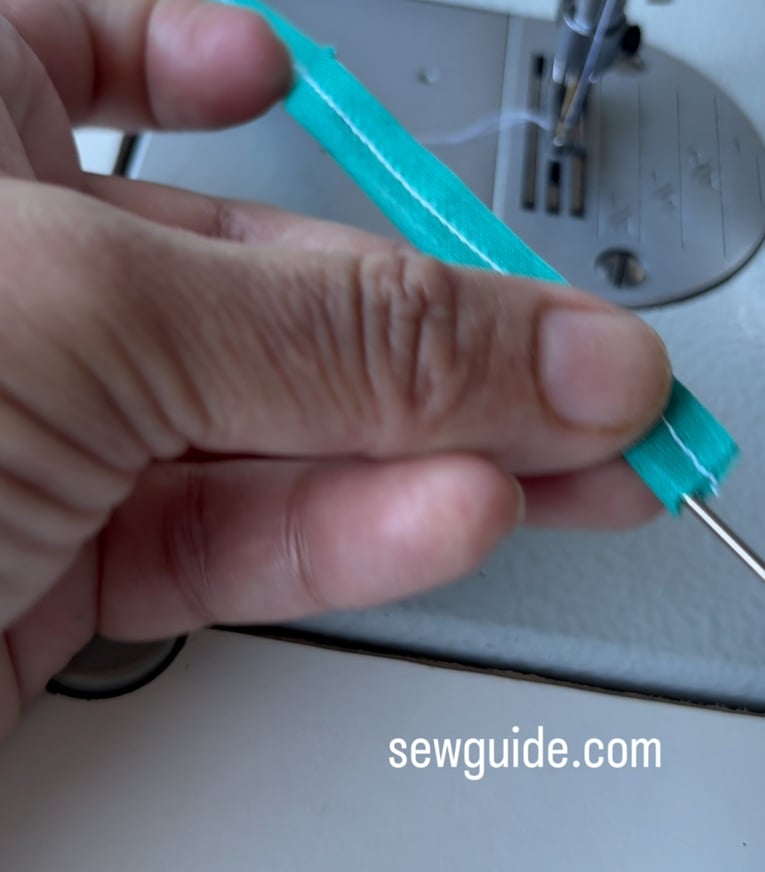
5. Insert the loop turner inside your tube
When the hook reaches the end, attach it to the end of the fabric. The hook of the loop tuner is very easy to attach to the end of the fabric ; it is a hook afterall with a sharp tip – it can even be attached to the inside of the fabric if you have a closed-end.
You have to make sure that the hook is fastened properly and closed tightly on the fabric – otherwise, it will come off when you take it out to pull the tube right side out – this is so annoying and a major sore point with this tool.
I have found that instead of fastening the hook at the top, just press the down part down and hook the top part on the fabric – this will turn the thin tube faster.
When the hook reaches the end, attach it to the end of the fabric. The hook of the loop tuner is very easy to attach to the end of the fabric ; it is a hook afterall with a sharp tip – it can even be attached to the inside of the fabric if you have a closed-end. You have to make sure that the hook is fastened properly and closed tightly on the fabric – otherwise, it will come off when you take it out to pull the tube right side out – this is so annoying and a major sore point with this tool.

Holding on to the circular ring, Pull it out gently through the casing – you may have to use your fingers to coax and move the fabric over the hook first but after this initial hiccup, the whole tube will turn inside out easily. I have seen someone hook that circular thing on to the sewing machine to turn longer tubes.

Don’t you think this tool is a solution to problems you encounter when you use pins, needle etc to turn the fabric straps – safety pin coming open in the middle of the casing, or thread breaking in the middle when you use thread and needle?.
Related posts : Simple Sewing Lessons for First-Timers; 15 Different types of cords


