Measurements Needed to stitch a vest with a princess seam:
Bust Round
Bust Span (Distance between apex points, usually 7″-8″)
Apex Height (Shoulder to bust point)
Waist Length (Shoulder to natural waist)
The Front Block OF THE VEST
Draft on a large sheet of paper. All horizontal measurements start from the Center Front (CF) line.
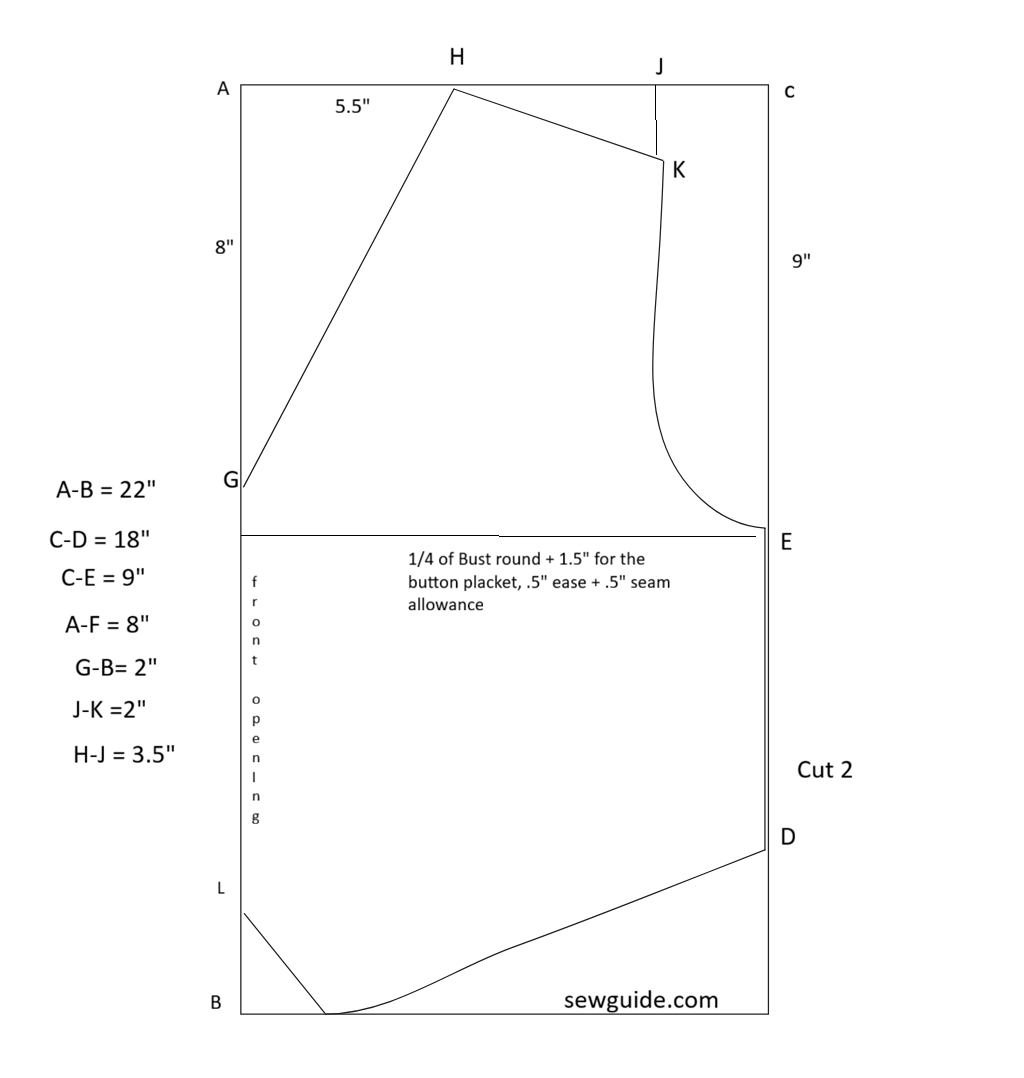
The Frame:
A-B (Length): 22″ (or preferred length). – Point G-G is the outer edge of the button placket
A-C (Width): 1/4 of Bust round + 1.5″ for the button placket + .5″ ease + .5″ seam allowance
Neckline:
A-H (Neck Width): 5.5″ (as per diagram) – This is extra to account for the button placket
A-G (Neck Depth): 8″ to 11″. Draw a slight inward curve from H to G.
Shoulder & Armhole:
H-J: 3.5″.
J-K (Shoulder Drop): 2″. Draw shoulder line H-K.
C-E (Armhole Depth): 9″. Draw the armhole curve from K to E.
The Hem Point:
B-G (Hem point): Mark 2″ up from B.
Draw the angled hem from the side seam D to the point at the bottom center.
Shaping the Princess Seam
To make the vest fit the body, we must turn that line into a shaping seam.
Locate the Apex: Measure from the shoulder down (Apex Height) and from CF inward (1/2 Bust Span). Mark this Point P.
Draw the Seam:
On the armhole curve, mark a point 1/3 of the way up from E.
Connect this point to Point P with a smooth curve.
Continue the line straight down from P to the hem.
Add the Shaping
At the waistline (usually 15″ down from shoulder), measure 0.5″ to 0.75″ on both sides of your princess line.
Draw a new diamond-shaped dart from the Apex P down to the hem.
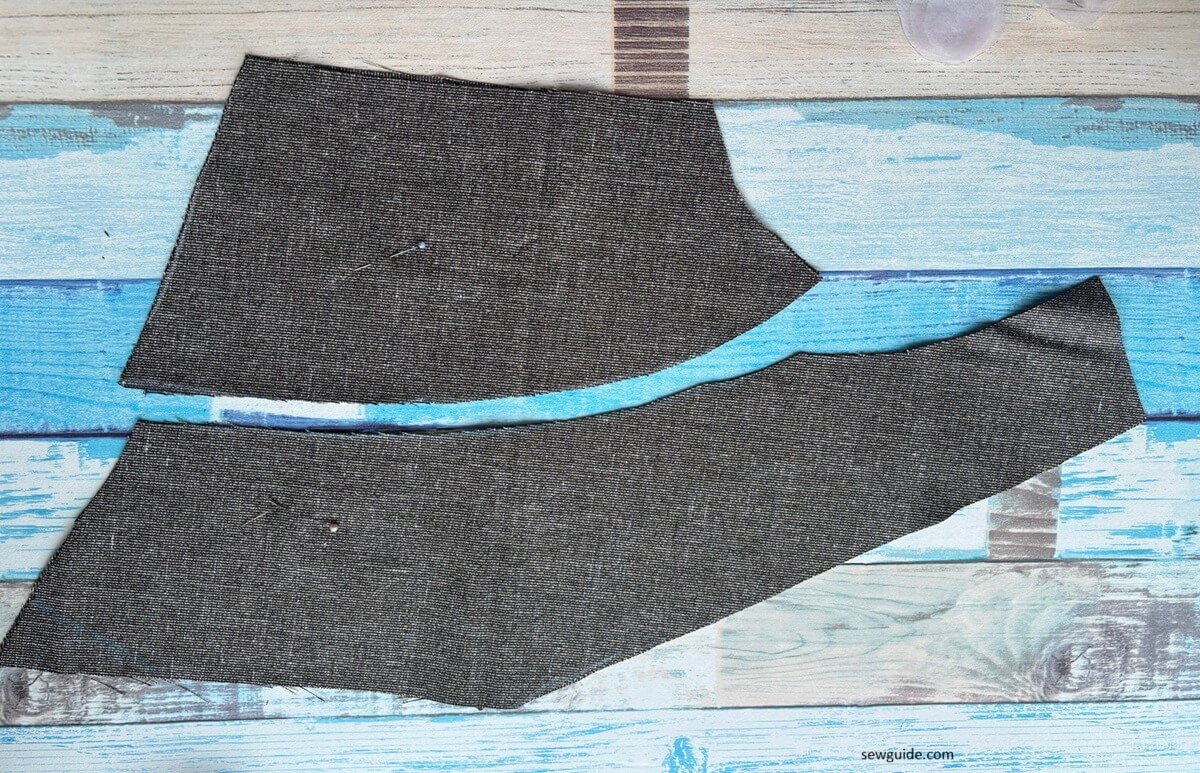
When you cut the pattern, you will cut this “wedge” out and throw it away. This creates the curve for your waist.
Checkout this tutorial to draft a princess seam:
Adding Seam Allowance: After cutting your Front pattern into two pieces (Center Front and Side Front), you must add 0.5″ of seam allowance to the edges you just cut so they can be sewn back together. You also have to extend the armhole line a little to the outside so that it will match at the cut edges.
The Back Block
The back is cut on the fold (A-B).
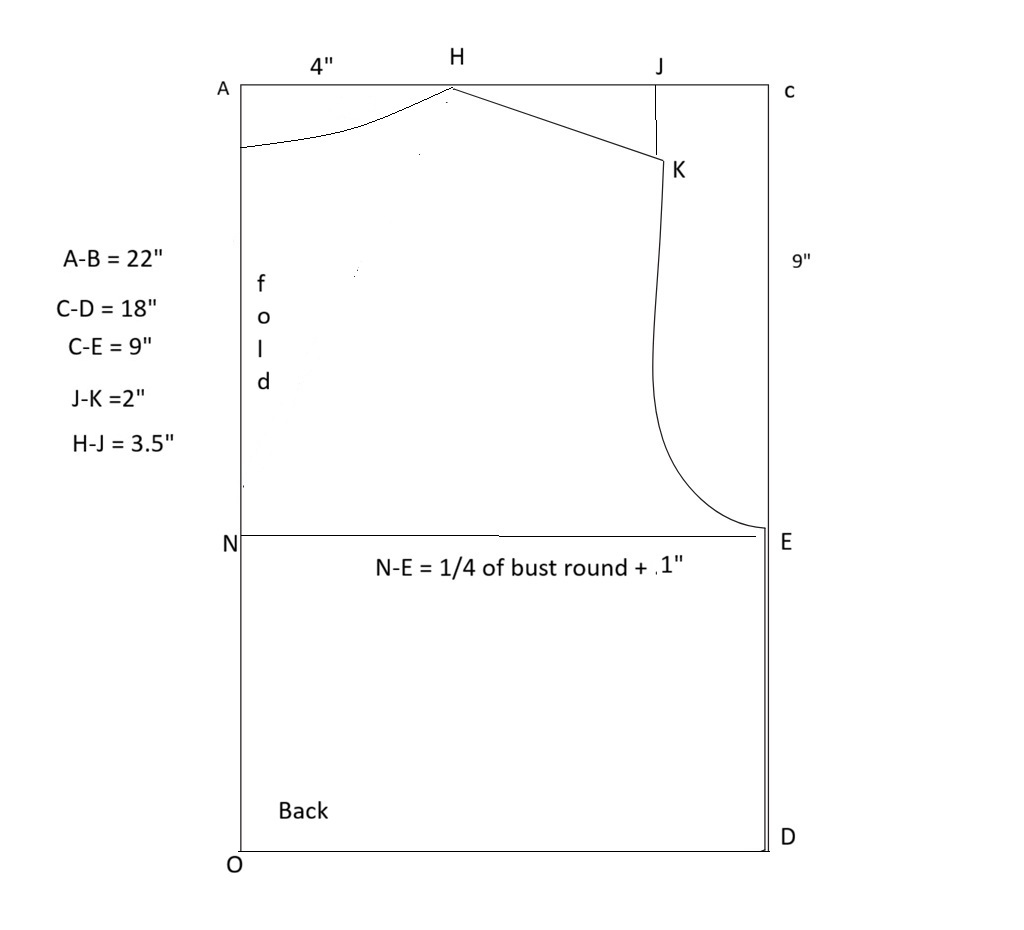
The Frame:
A-B: 22″.
N-E (Width): 1/4 Bust + 1″ (ease + Seam allowance)
Neckline:
A-H: Neckline width = 4″ Neckline Depth is 1″.
Shoulder & Armhole:
Match the front shoulder: H-J (3.5″) and J-K (2″ drop).
C-E: 9″ (Ensure this matches the front armhole depth exactly).
Waist Dart:
To prevent the back from “ballooning,” add a standard waist dart.
Place it 4″ from the fold. Width: 1″. Length: 8″ (4″ above waist, 4″ below).
Final Construction Notes
Matching Side Seams: Measure the distance from E to D on your Front pattern and E to D on your Back pattern. They must be identical. If the front is longer because of the hem point, adjust the back side-seam to match.
The Pocket placement (Optional):
The pocket should sit on the Center Front Panel only.
Place it 1.5″ below the waistline (Natural waist).
Ensure the pocket bag is sewn to the Center Front panel before you join the Side Front panel.
Fabrics to sew the vest:
You can use all kinds of fabrics to sew vests, but the best fabrics are denim, wool, cotton twill and jacquard (or brocade). And for lining you can use cotton voile, satin or Bemberg rayon, the fabric everyone raves about for lining.
Method 2 :Vest pattern without darts (for a beginner sewist)

This is a pattern to sew a lined waist length Vest with double welt pocket on either side. You can make this vest in less than 2.25 meters of cloth, lining included.
Step 1 Mark the pattern
Cut out the pattern pieces according to the pattern below. It is better to mark on a paper first and then cut on fabric. This is especially because the front panels are made based on the back pattern. So cut the paper pattern for the back bodice first, then make the front panel patterns on paper again , and then cut from the fabric
Back pattern
You need to measure the Bust round and also around the place where you want the vest to end. You can either make it shaped or straight down from the bustline.

A – B = 18 ” This is the length of the vest I have taken. You can increase this or decrease this according to the length you want for the vest.
You need to measure the Bust round and also around the place where you want the vest to end. You can either make it shaped or straight down from the bustline.
A – H = 18 ” This is the length of the vest I have taken. You can increase this or decrease this according to the length you want for the vest.
A-B =3.5″ This is the neck width.
A-C = 1.5″. This is the backneck depth.
C-D= 1″“ . This is given for the shoulder slope.
A-G = Take measurement from one shoulder to the other. A-G is 1/2 of this
Related posts :DIY Shrugs; Different types of vests ; How to make a battle vest

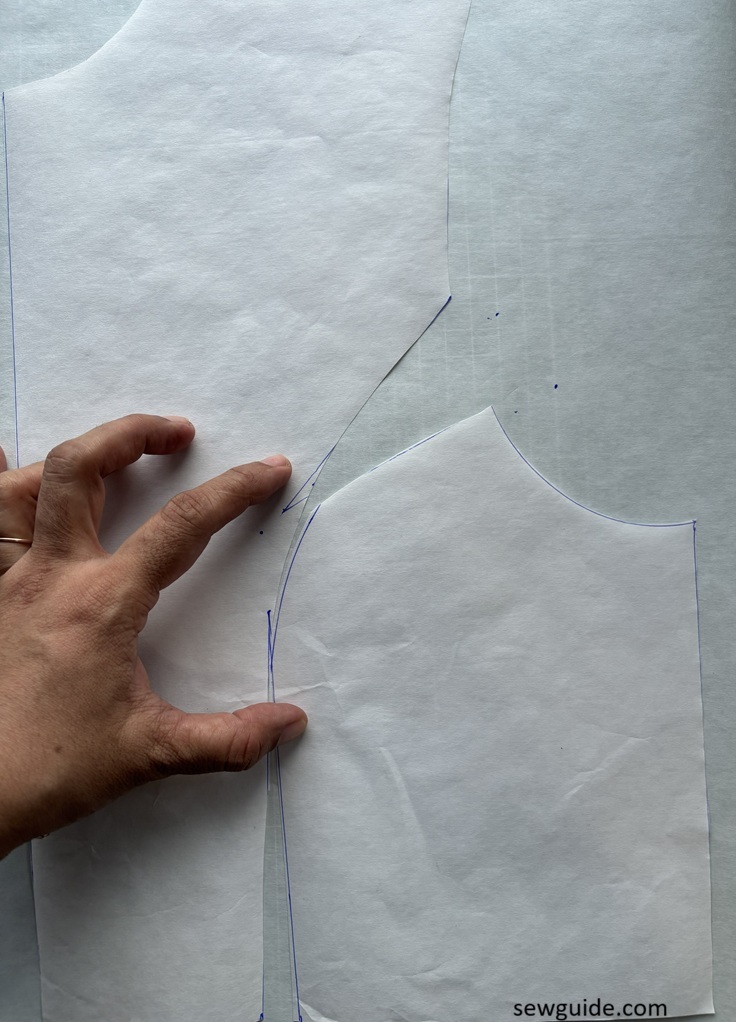
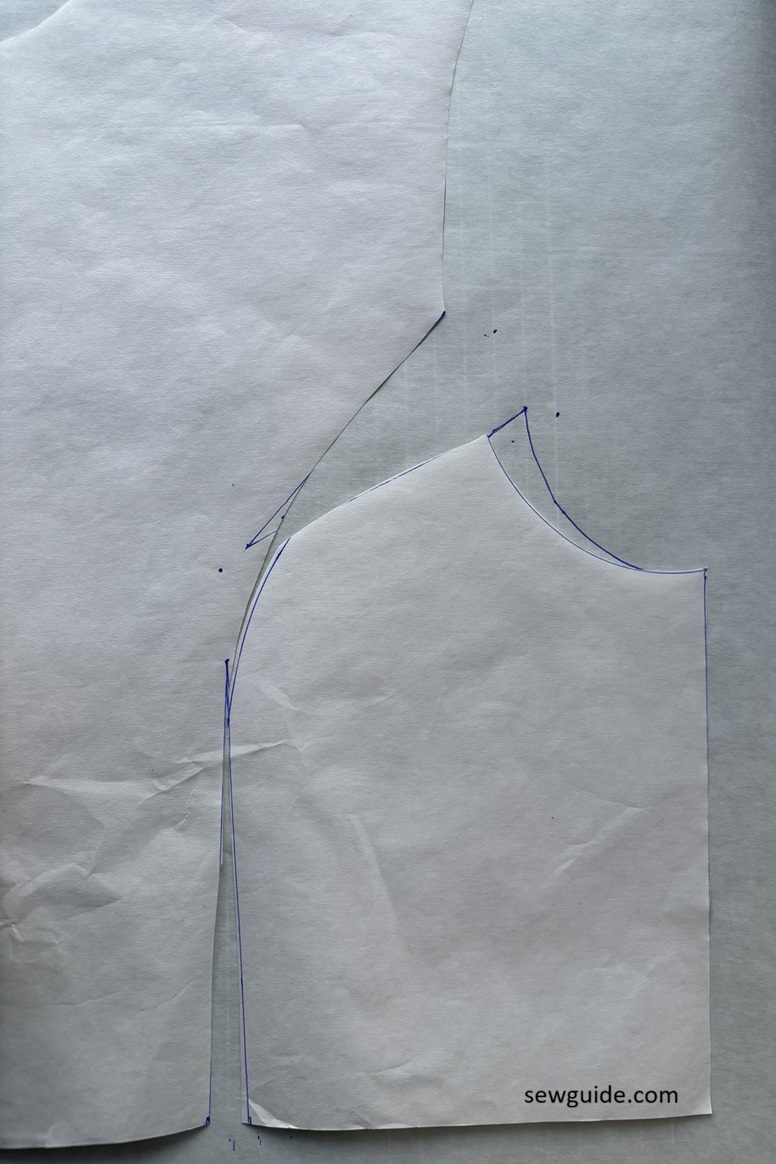
For the front bodice panels
Keep the back pattern on a larger piece of paper ( because the front pattern is about 3.5 inches longer and 1/2 inch wider. )

Mark the extra on the paper and cut out. Keep the front pattern on a folded fabric and cut the pattern; even though the front panel can be cut individually using the fold fabric, this way is better so that you get mirrored pieces.
But If you are not spatially challenged like me and never make the mistake of cutting two similar peces instead of mirrored pieces for front lapels, go ahead and cut individually
The differences between the back and front are that the center has 1/2 inch extra as well as the bottom edge is 3.5 inches longer as in the pattern below. Then the armhole is drawn to the inside as in the pattern. The blue line denotes the front pattern ( & Red the back pattern)

Ofcourse I practise all the easy ways and never follow the rules and marked directly on the fabric – in which case donot frget about the extra 1/2 inch on the center


Related posts : Many names for different vests
Step 2 Make the welt pockets
Decide on the placement of the pockets on the front panel. You can place it horizontally or diagonally. Mark the placement as a single line on the right side of the front panels of the vest.
For women’s vest the pockets are usually 6 inches width. Checkout the post on making welt pockets for more details
Take a piece of fabric of width 3 inches and 8 inches for the welt fabric. Take a medium fabric which will retain the shape when folded for making the welt pockets. Mark a pocket opening of 6 inch length and 1/2 inch width on the back side of the welt piece

Keep the welt piece wrong side up on the pocket marking of the front piece, right side up. I have decided to place this a little diagonally on the front panels some 2 inch from the center edge . Stitch along the horizontal lines you have marked ( back stitch at the start and end) – DONOT stitch the short sides of the box.

Cut open the middle line and the diagonal markings

Take the welt piece through the hole to the back

On the back fold the welt piece so that two lips are formed. Pin in place. Do finish the edges of the welt piece before stitching or it will look as horrible as mine does

Turn the pocket so that the side seam allowance is exposed

Stitch it together with the small triangular piece you have cut earlier on the garment on either side of the pocket

Make such pocket on the other front panel as well

Step 3 Stitch the lining
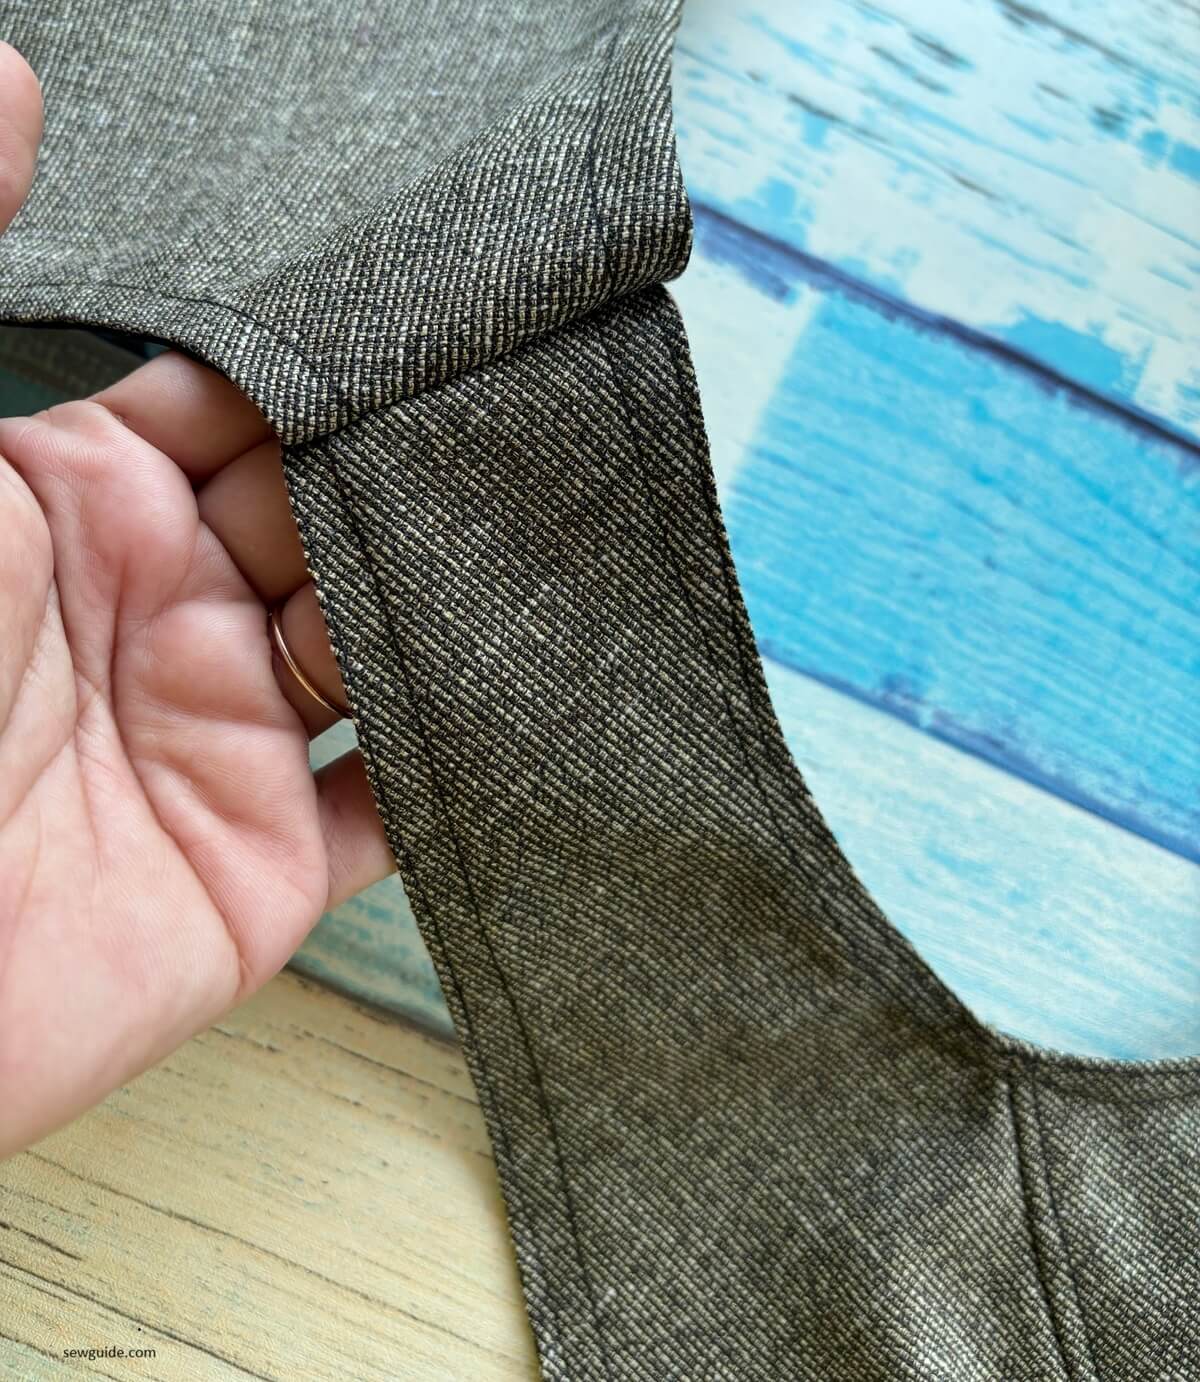
Keep the lining piece on the back piece, right sides together. Stitch along the neckline, bottom edge and armholes. Leave the shoulder and side seam unstitched.

Clip the seam allowance every 1 – 2 inches for smooth turning. Turn the back bodice right side out through one of the side seam. Top stitch the neckline, armhole and the hem, ensuring that the lining is neatly rolled to the inside and not visible outside. Try pressing first and then stitching for best results.

Do this for the front panels as well


Remember to clip the corners and seam allowance.

Stitch in the ditch along the top lip of the welt pocket , the top fabric and lining together so that pocket has a structure


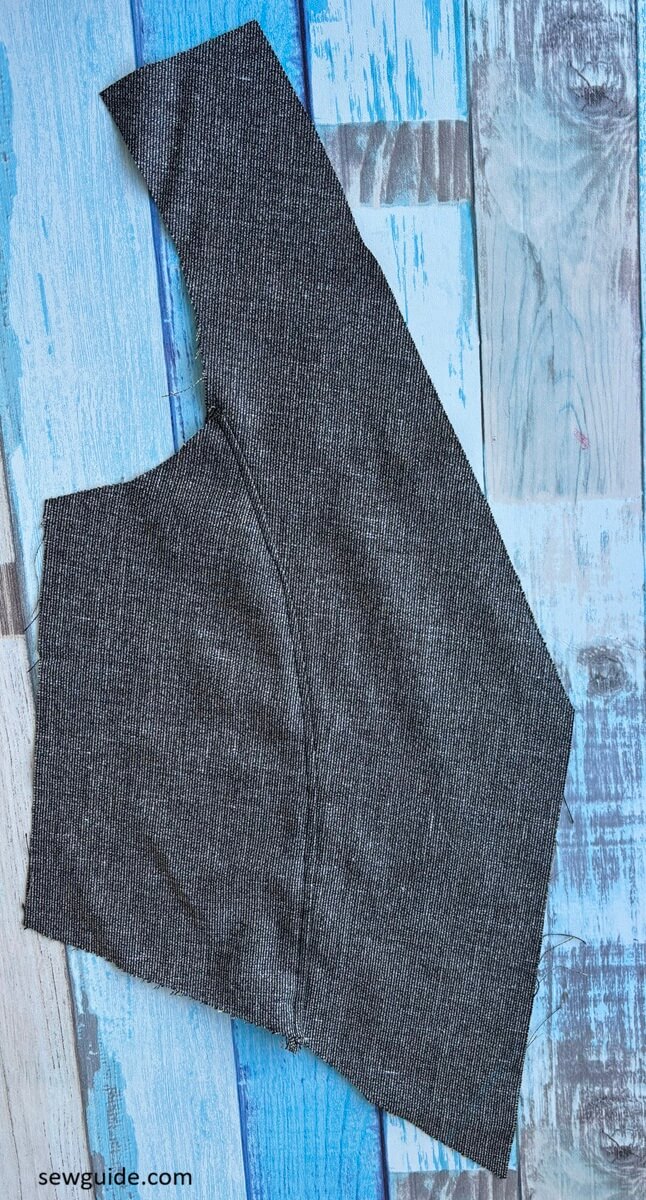
Step 5 Stitch back and front together
Keep the back bodice of the vest and the front panels right sides together. Pin at the shoulder and the side seams. Stitch in place

Step 6 Attach Buttons.
To match the chenille fabric I have added some wooden buttons. You can sew any buttons.Checkout the post on attaching buttons with hand stitches here

Make thread loops for the buttons.


I cut down the pattern to fit a 12″ doll. It looks great thank you for sharing and posting your pattern.
How do you download the pattern??? I do not need a PDF viewer I just want to download the damn Pattern!!!
Puedes imprimir la página como pdf.
Have you included ease? What would be additional east measurements?
I like sewing different things
Thank u for d illustrations. It is detailed and understandable.
Thank you for the comment