

I usually have this problem with almost all my clothes — the buttons start wobbling after a point in time. I guess either my washing machine is working overtime, or fast-fashion clothes are fitted with cheap, easily displaced buttons.
Anyway, in my house, as the house sewist, it is my duty to sew all the threadbare buttons back on. After all, I have stitched lots of buttons in my sewing projects..
Whatever button you sew, and whatever method you use, there are three constants in button sewing: use a sturdy thread, maintain enough anchor passes through the button, and interface the back of the area where the button will be placed.
Machine stitching the buttons is all about putting on the button foot on the machine and sewing the button with a zig zag stitch. You also have to lower the feed dogs, so that the button wouldnot move forward.
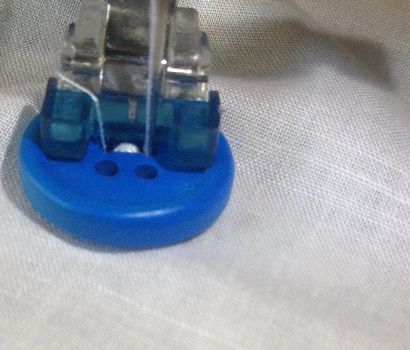
Check out this video to know how to lower the feeddogs for stitching the button. Once you have placed the button under the button foot, it is very important that you move the machine at first by moving the hand wheel slowly before going full throttle. If the stitch width is not correct, there is a high probability of the needle hitting the button and flying haywire. I had this happened to me, so speaking from experience. 8–10 stitch passes can very well attach the buttons.
How many times would you sew across – maybe 8-10 times. Fast fashion buttons fail because these anchoring stitches across the holes are not enough. You don’t want to make the same mistake.
How to hand sew the Button

Cut your thread & knot
A polyester thread is what I would suggest you get for sewing buttons. It is not about which thread is prettier, but which is sturdier. And polyester buttons can withstand the wear and tear the button has to go through every day.
I would take some 20-inch lengths of thread ( You can wing this measure by measuring from the tip of your fingers to the elbow and add a little extra – to be accurate an arms size). This is a manageable length for sewing anything.
Thread the needle with your thread.
Tie a knot catching both ends.( What I do is to roll the ends around my forefinger and then, with the help of my thumb, slip the rolled thread off the finger and then tighten it to form the knot.) . It is better if you make this thread knot twice.
Another option is to leave a long tail ( 1 -2 inches) which you can cut off later. This is the preferred way for professionals because when you finally cut off the end, there is no visibly ugly knot at the back. Just stitch 3-4 times to anchor the thread at the start.
Check out this video on tips for sewing buttons if you are a visual learner :
Placing a shank – a needle hack
Mark where you want the button placed. To know where to place the button precisely for an existing buttonhole, keep it aligned on the placket. Mark through the buttonhole with a pin or narrow chalk (or whatever marking tool you have). Separate the placket.
Bring up the needle from the back of the fabric to the front at the place where you marked it. Make two small stitches on the same place- This is done to anchor the thread there.

Place needle on top or bottom
Place the button on top of the stitches. Use a piece of scotch tape to keep the button in place if you want to.

You need a button spacer between the button and the fabric to raise the button a bit. This rise will make a small shank which you need to ease the button to the buttonhole. Shank is necessary for the buttons to be buttoned. Full stop.
I usually place a spare needle across the button and sew the button stitches over it. You can place a needle or toothpick under the button as well.
Please note that if there are many layers through which the button will have to be buttoned, the shank thickness should be more when compared to the shank of a, say, a shirt.
Stitching the button stitches
Insert the button onto the needle (from the underside of the button) through any of the four holes.
Decide if you want a cross-stitch or a parallel stitch, and insert the needle (from the topside) back down through the button in the appropriate hole.

For Parallel stitches, stitch across to the other hole atleast 5 times. Do the same for the next pair of holes for a 4 hole button.

As a final step, go to the space between the fabric and the button with the needle and thread. Wrap the thread 3 times around the thread loops between the button and fabric. Go to the back ( push your needle through the thread of the shank. Pull the needle and thread all the way through) and finish off.
For clothes made of thick fabrics like coats, it is adviceable to sew another small button (it is called a stay button) on the back of the main button to make the area strong. It will make the main button last longer.
You can sew the stitches across the buttons in many ways, as seen in the picture below.
What about replacing buttons on old clothes?
If your popped button has chosen to wander off, you have a problem. You will have to find a spare one. Most good quality clothes have an extra button on the side seams.
If you do not have a replacement button, choose the button according to the other buttons or as per the size of the buttonhole.
If you are at home and your dress does not seem to have a spare one on the side seams, you can pick a similar one from an old shirt or blouse – Unless you have a box full of buttons collected over the years in all shapes and sizes.
I have such a collection, as well as those I have scavenged from old throw-away clothes. (Handy tip – never throw away an old dress without taking off the buttons )
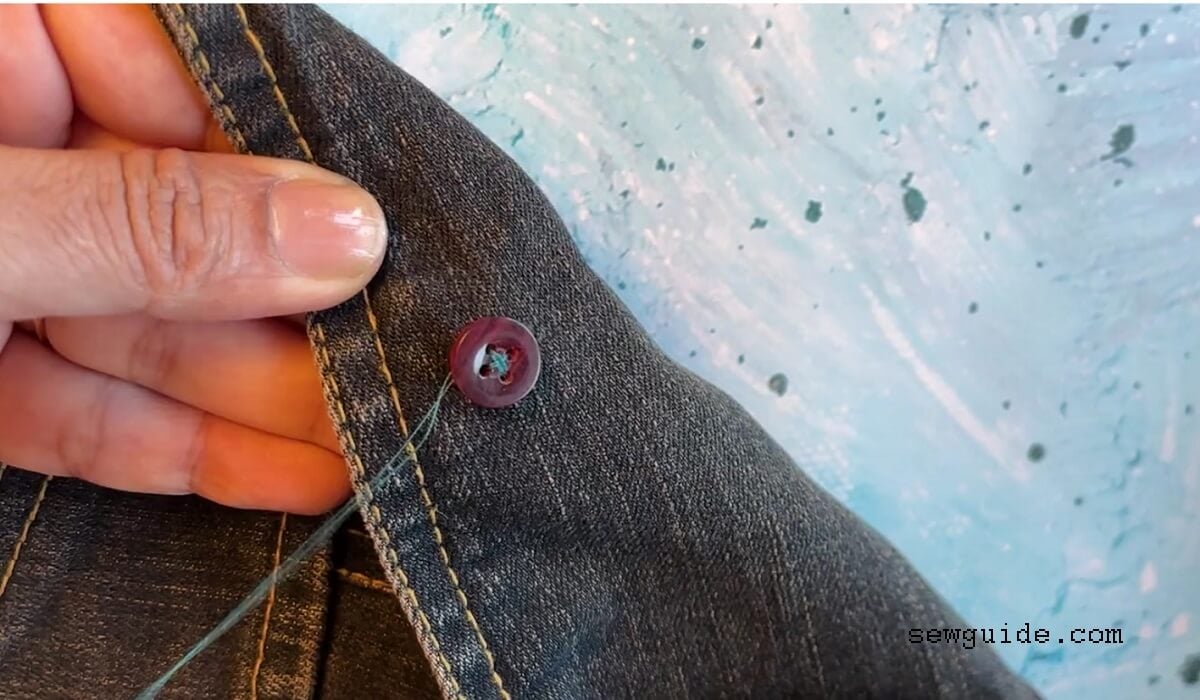
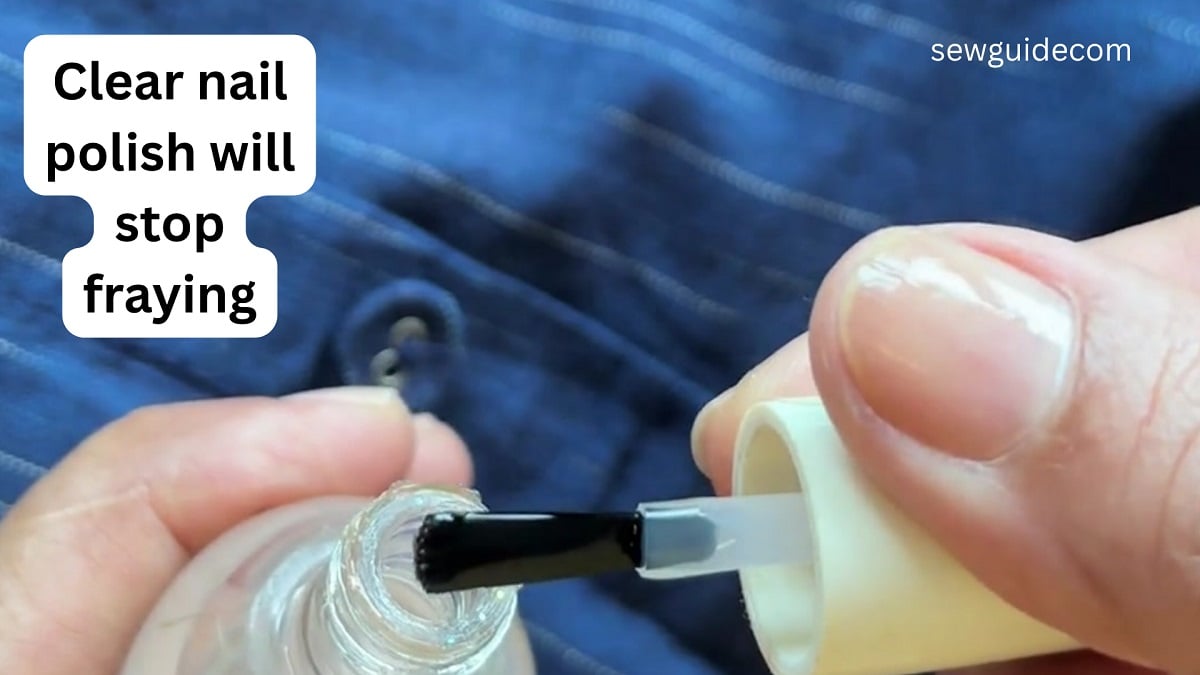
Extra tip: After sewing the button, dab a little nailpolish on the thread ends to prevent it unraveling.
Choosing the thread for sewing buttons
It is best if you can use a button thread for sewing buttons instead of the normal sewing thread as that is very strong and more durable. But it is ok if you do not have that.
Topstitching thread or carpet thread is also used as they are also sturdy especially for heavy fabric. Heavy-duty button thread is a must when sewing buttons on coating.
Regarding the color of the thread, normally, I use the same colored thread as the garment. If you are sewing clothes, choose the same colored thread you used to sew them, if you do not have a heavy thread. If you are reattaching, try to find a closer color.
When hand sewing the button, you can make the thread you have better and more malleable by coating it with the wax from a candle or beeswax.
Should you use Interfacing under the buttons?
If you are sewing the button onto a very thin fabric, it is a very good idea to add a small piece of interfacing to the area where you will stitch the button. The button will put a lot of strain on the fabric, which may tear, and the addition of the interfacing will prevent this.
Sometimes another small button is used on the other side of the fabric instead of interfacing.
Buttons on waistabands, collars and cuffs are usually interfaced. Knit fabrics are thin and stretchy – so buttons on them needs to be backed up with an equally stretchy interfacing. T-shirts made of cotton knits are interfaced with lightweight fusible interfacing.
There are many varieties of buttons for you to choose from like see-through buttons, irregularly-shaped buttons. Sew-through buttons are flat-buttons with two or more holes through which we loop thread and attach it to the fabric.
Select buttons according to the fabric of your garment. A heavy fabric needs a heavy button, and delicate fabric need small buttons. A contrasting button over your fabric will add an interesting element to the garment’s design.
Use smooth flat textured buttons on smooth textured fabrics and shiny buttons on shiny fabrics.
If you find that you are not able to match the exact color of the fabric for your button, choose a darker color rather than a lighter color. A darker-colored button will blend in, and a lighter one will stand out against the fabric color.
More like this:
- Varieties of buttons
- Different types of buttonholes
- How to sew a hand sewn buttonhole
- How to sew buttonhole with sewing machine
- Make cloth buttons and fabric-covered buttons
- Add these buttons to a button placket


There is noticeably a bundle to understand about this. I assume you have made particular nice points in features also.