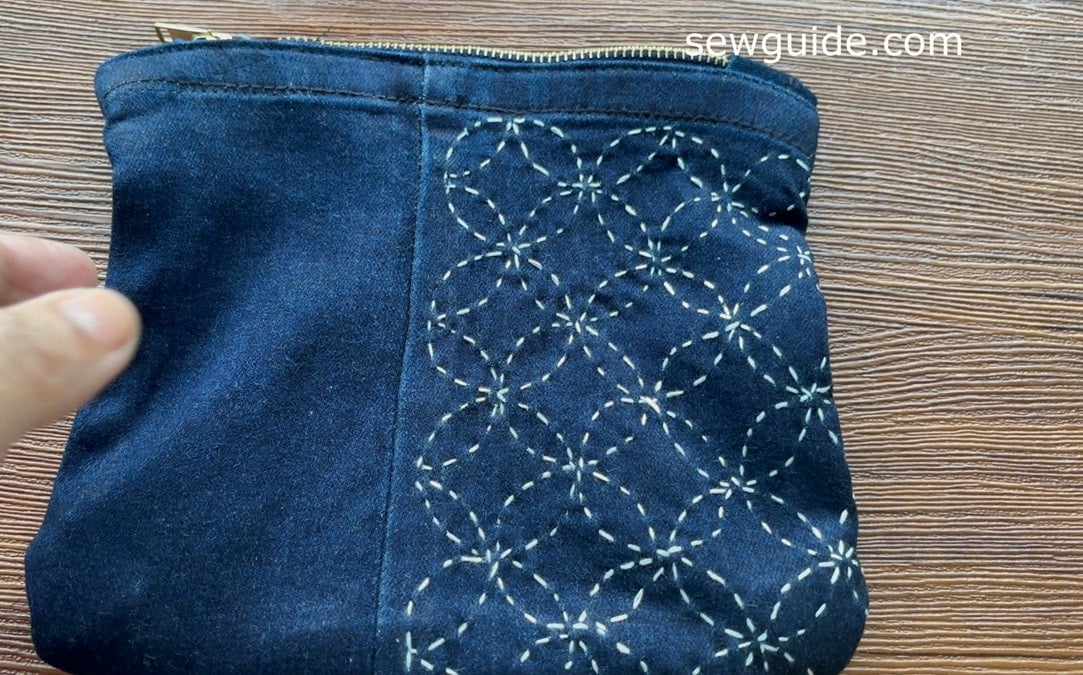
When I first saw the Shippo-tsunagi Sashiko pattern I thought: Ofcourse, trust the Japanese to turn something simple into something that looks complicated. Sashiko has at its base the easiest of all hand embroidery stitches – the running stitch. But here, this full circle lattice pattern with interlocked circles looked anything but simple.
For me, already anything Japanese always seems far beyond my intelligence. I thought the same about this sashiko pattern.
Turns out I was wrong. It is quite easy. Even an inept embroiderer like me could turn out something passable. I love it. And it is so relaxing to sew the repetitive pattern. It is like the boxed breathing in meditation. The repetitive breathing calming your senses and nervous system.
So, I forgive them, even if it is hard work, it is great for the soul. And also because, the patterns are so beautiful. Despite their age (It has been a regular sashiko pattern since the 1800s) they look wonderfully modern. Those white thread against the indigo background is a maximalistic beauty done in a minimalistic way.
And the way it is stitched proves its efficiency as you will see.
Here is how to draw the Shippo-tsunagi Sashiko design with just a circle template.
Checkout the video on how to draw the pattern here:
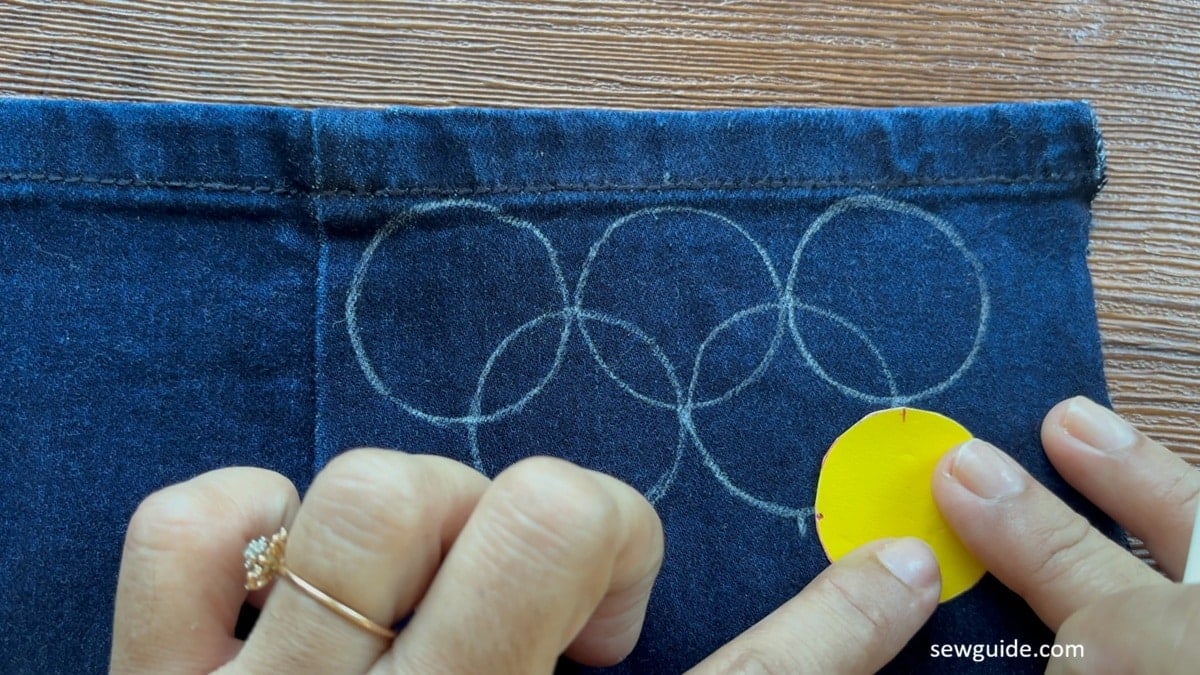
Cut out a circle with a 1.5″ diameter. Mark the 4 corners of the circle. If you have a circle template, the thin plastic kind, it will have the holes marked already. Otherwise you will have to mark manually on your paper template – and mark this on the fabric as well. This marking is used repeatedly and should be accurate.
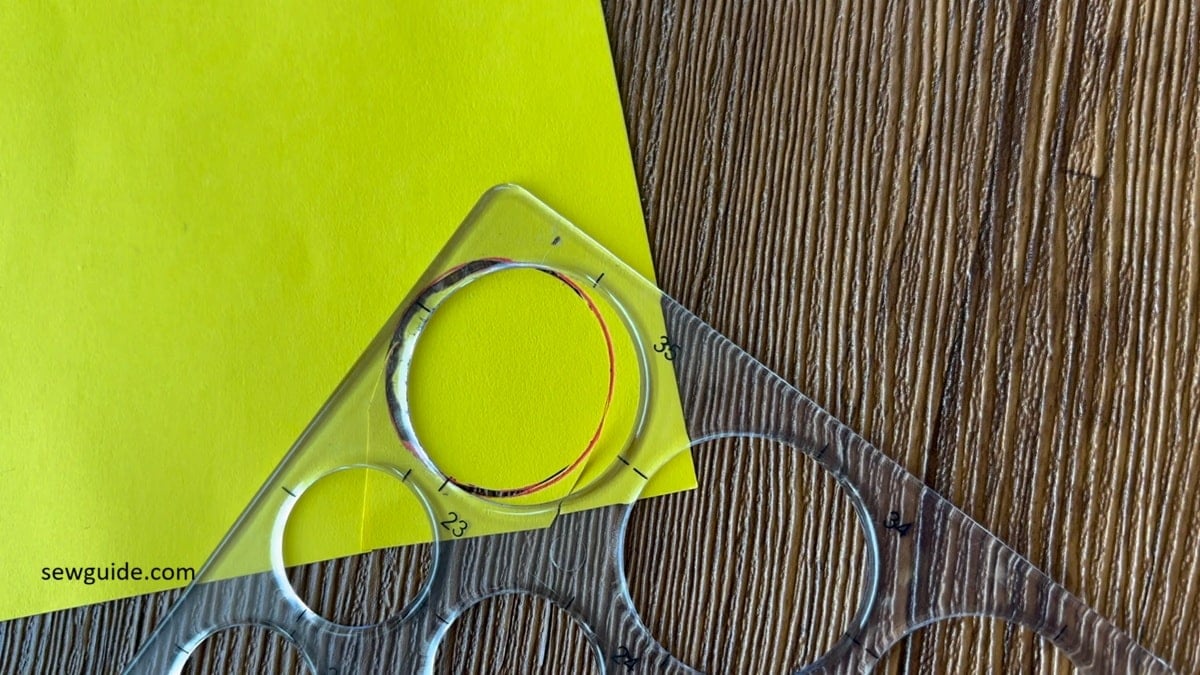
This step is very important. I used a circle template ruler to mark the circle neatly on a chartpapaer and then cut it out. You draw all the pattern based on these markings and they have to be accurate.
The size of the circle can vary. I am making a very small pouch so my flower petals are small. For large projects you can use bigger circles. Work is the same!
Now place the circle template on the face of your fabric – mark your first circle on the middle of the top edge of your embroidery area.
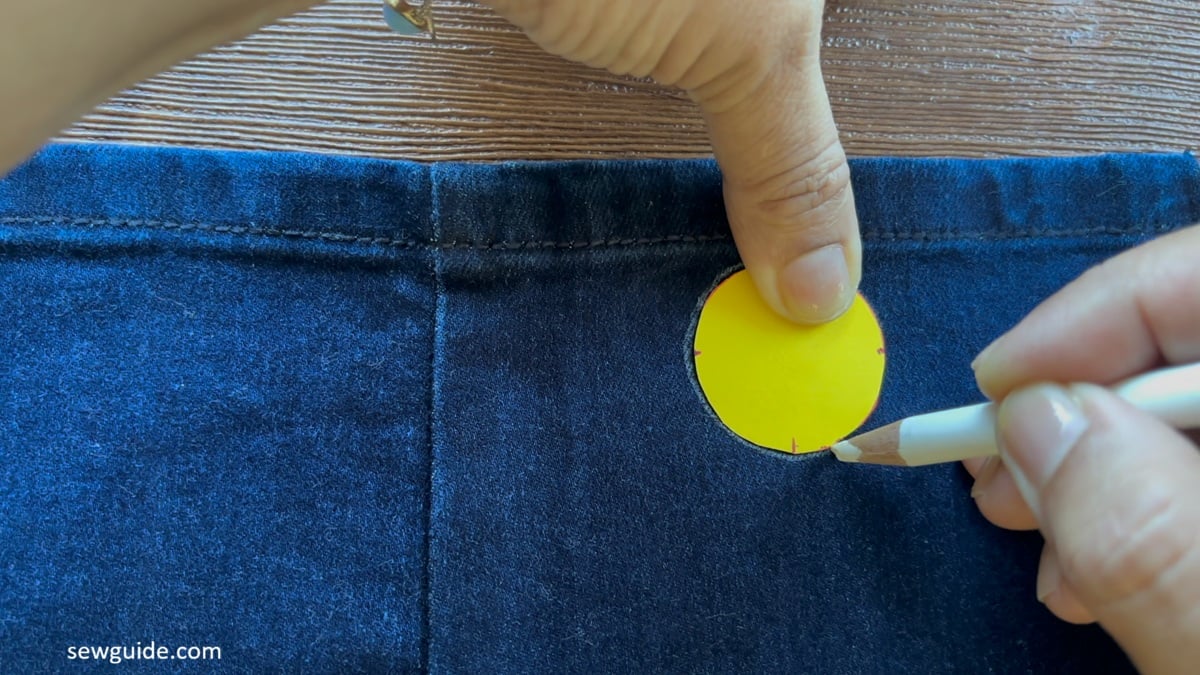
Start tracing the circle shape around the template with a marking tool of your choice. I am using a marking pencil. A water erasable marker is the best for embroidery.
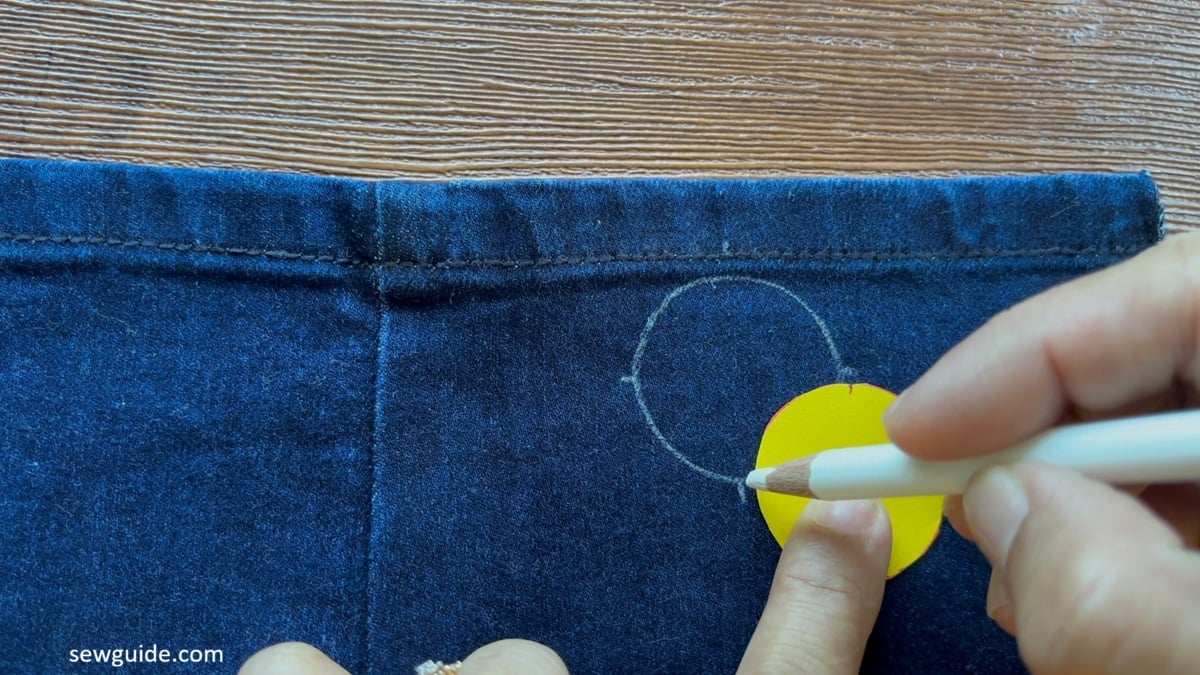
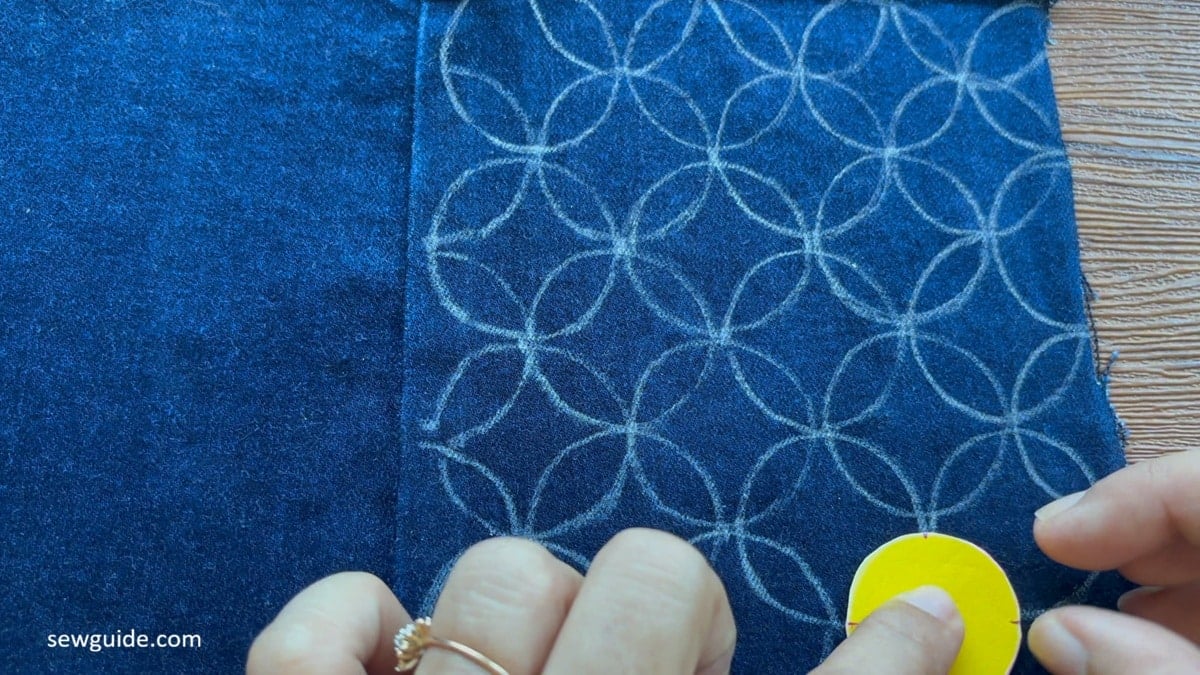
Next, move to the next intersection and mark the circle. The petals are formed automatically.
Repeat till you fill the whole design area.
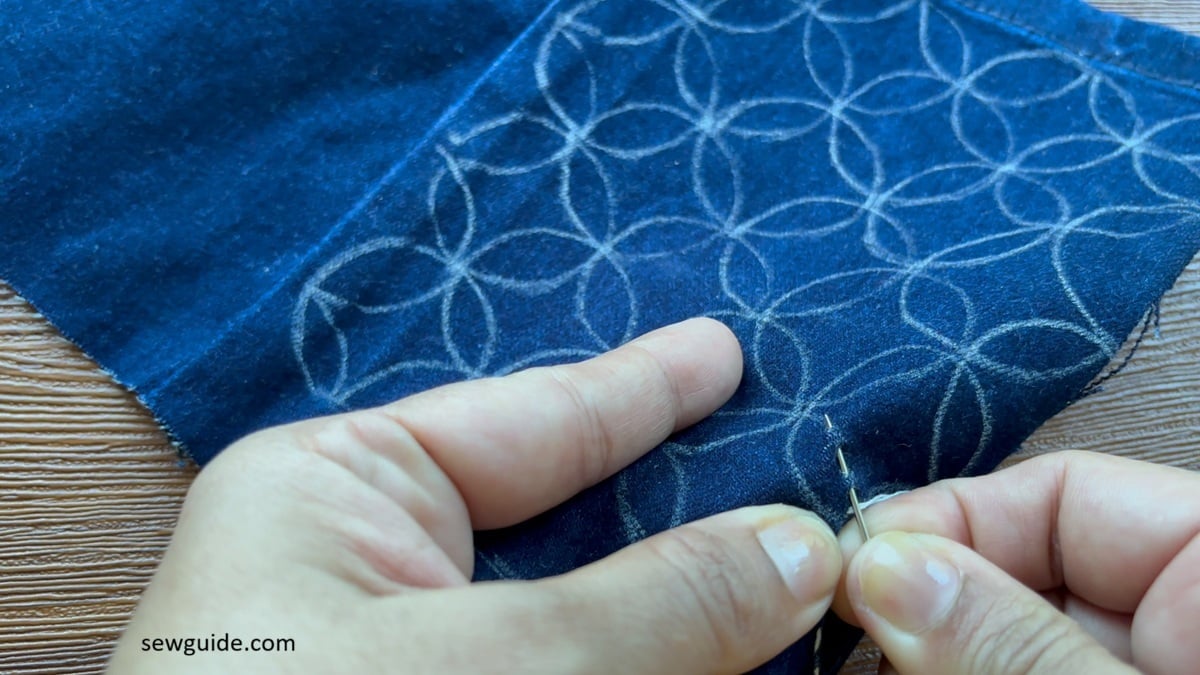
When you start the embroidery there are three things you should keep in mind :
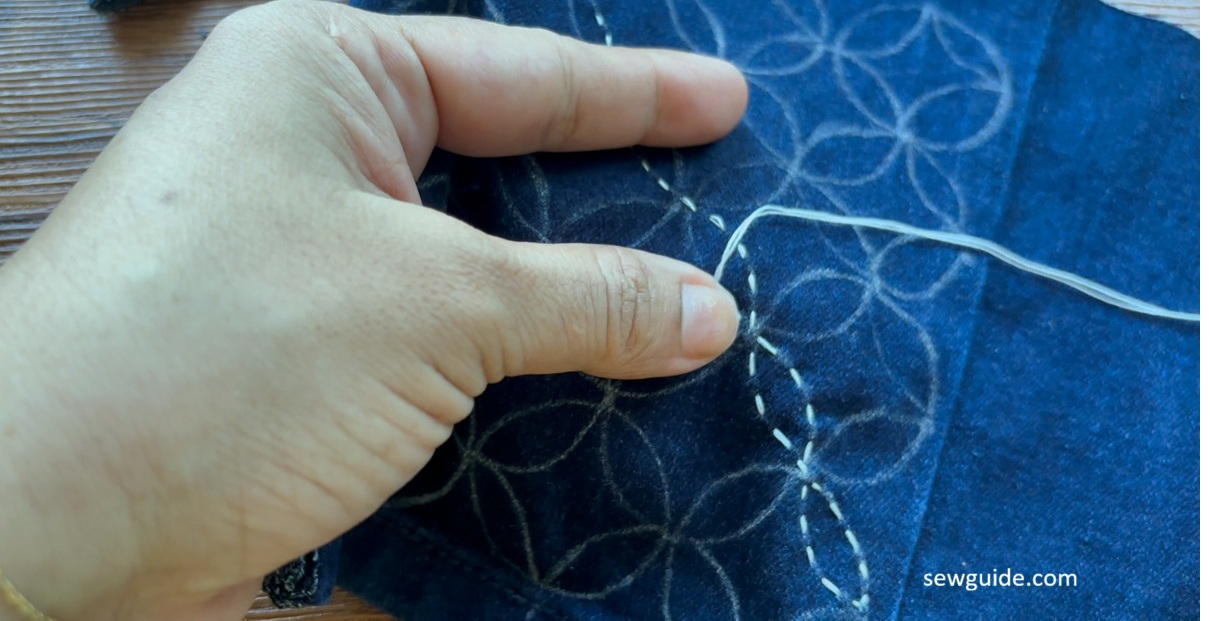
Make even stitches with even tension and remember to sew smoothly along curves. And do not overlap stitches along the center / junctions. ( a mistake very easy to make in your enthusiasm to finish the design.)
To complete the stitch efficiently two short cuts are used.
- Instead of sewing one stitch at a time, you should load load multiple running stitches onto the needle. so, you will be using long needle and working a large area at once. Saves a lot of time.
- And the Shippo pattern is usually stitched as interconnected arcs in one go, not one circle at a time. So you finish one line of the arc in one go and then move on to the next line of arc.
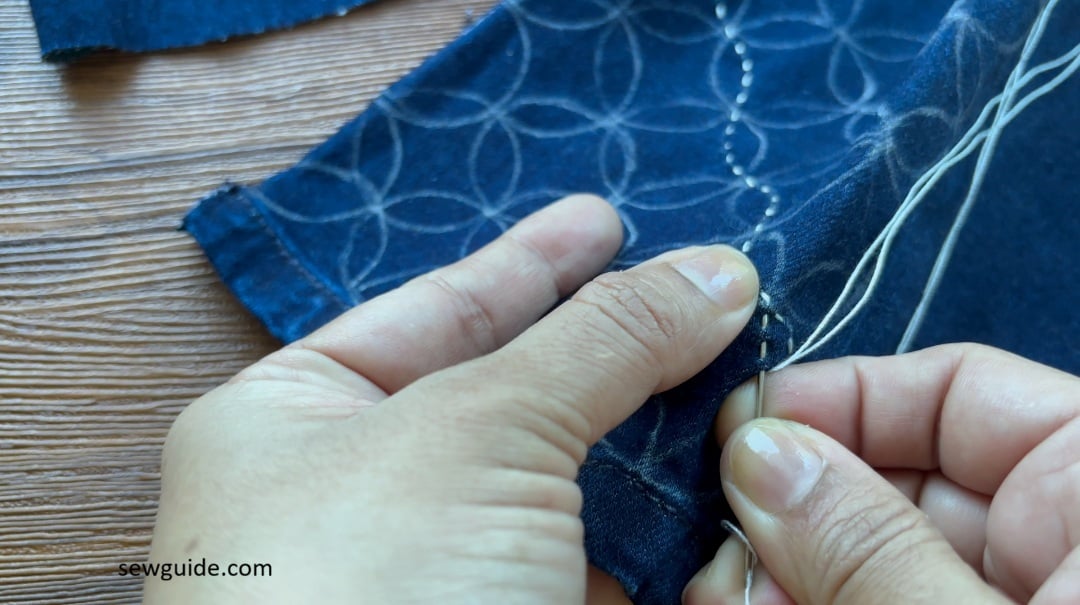
In more lucid terms, start at one edge, stitch a curved arc, continue directly into the next arc and likewise move across the row like a gentle wave.
Sashiko pattern trivia I read : “Shippo” means Seven Treasures in Japanese Buddhist symbolism. The seven treasures are the ones we all covet- gold, silver, lapis lazuli, agate, crystal, coral, pearl. Because of the endless loop pattern it also means endless prosperity. I like, I like. Beauty and money, what is not to like.
Related post: More about Sashiko embroidery