A bellows pocket is a perfect storage pocket with a gusset on the side. But how roomy can a jeans pocket be. Well, as roomy as it can be. There is a way, to turn it into an expandable bellows pocket. Yes, you make a little alteration to the jeans pocket and it turns into a roomy pocket perfect for storage.
This pocket lies flat when it is empty and expands when you fill it. The gusset you sew on the side and add to the center of the pocket allows it to expand. You can sew it back on to your workwear jeans or you can attach a strap and have an instant bag.
How to stitch the bellows pocket from a flat pocket
If you find you would rather watch a video of this post here it is:
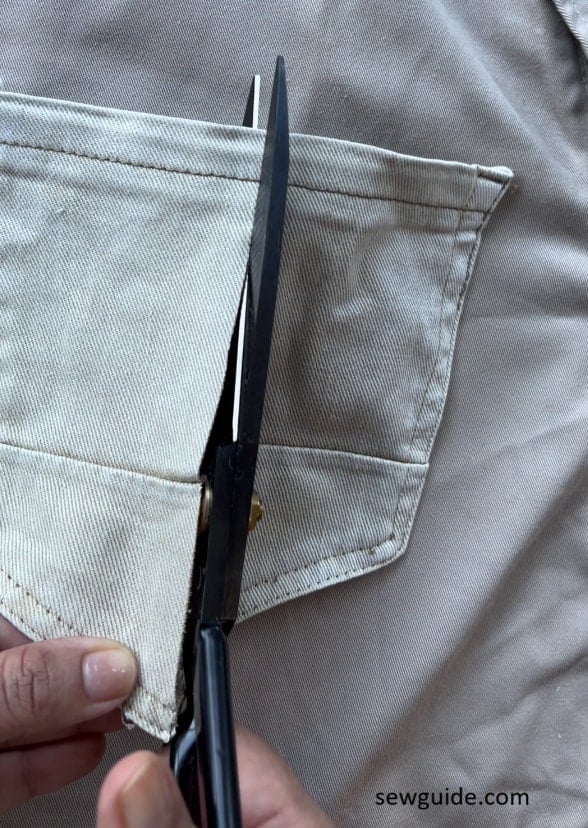
Step 1. Cut out the pocket
Cut out an jeans pocket from an old pair of jeans. When I say cut out, I actually mean rip out. The bartack stitches on the pocket top corners are brutal – you will need more than your small seam ripper for dismantling your jeans pocket. The thing about jeans stitching is that once you rip it out some, the rest automatically comes off. But the bartack stitches will need a blade to cut them off.
Cut out some extra Scrap denim or any other sturdy fabric for gussets.
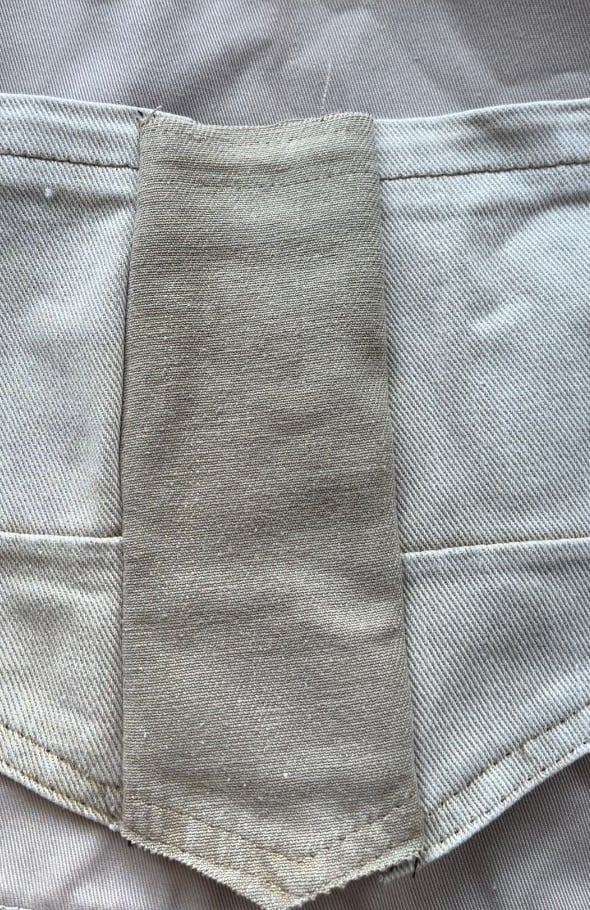
Step 2. Cut the Pocket Open
You have to add extra fabric in the middle of the jeans pocket and at the sides to add the expansion gussets.
Fold the pocket in half
Cut straight down the center of the pocket.Now you have two pocket halves.
This gap is where you will add some extra fabric to make the pocket expand.
I cut out the back of the pocket to cut this piece. Cut 3″ wide fabric for this. Length should be the same as the pocket.
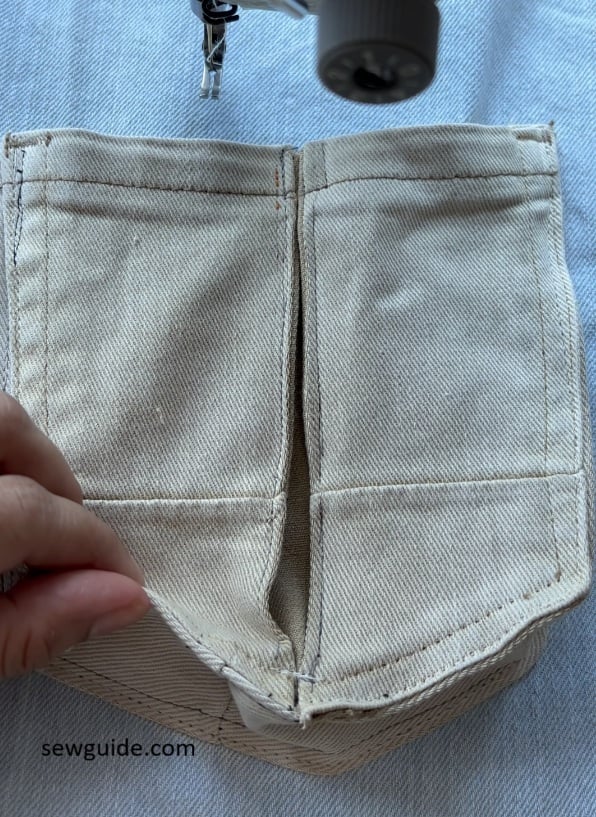
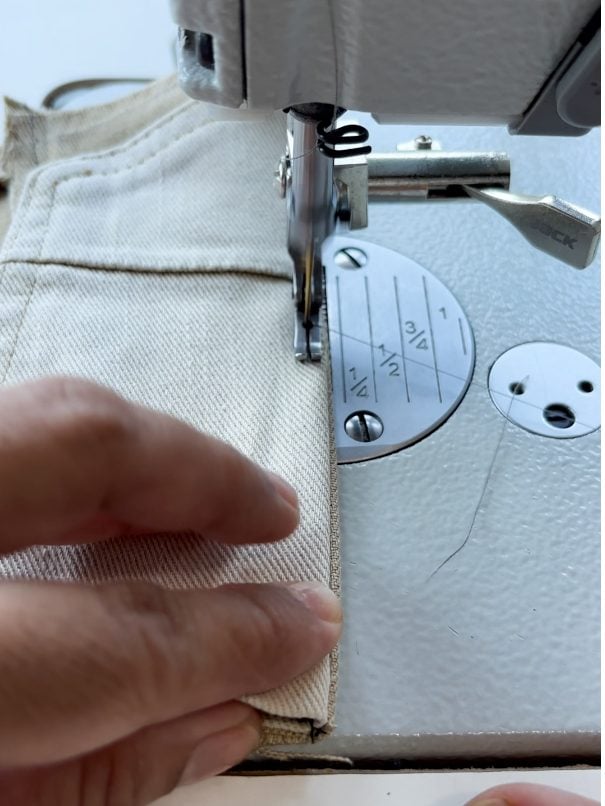
Step 3. Add the center piece
Sew this strip between the two pocket halves
Place right sides together. Stitch the strip to one pocket half. Sew the other pocket half to the opposite side.
Press the seams open.
Now the pocket has extra depth in the center.
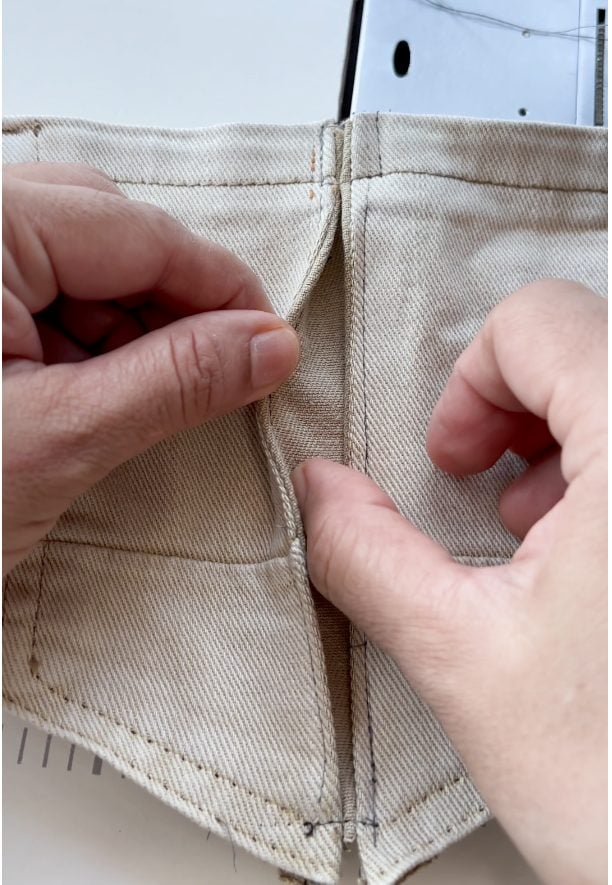
Step 4. Fold the pleat
Fold the extra fabric at the center to the back and sew along the edge. This creates the edge stitching that is characteristic of these kinds of pockets
Now, the centre part has to be folded into an inverted pleat. Press the folded edge together to get this.
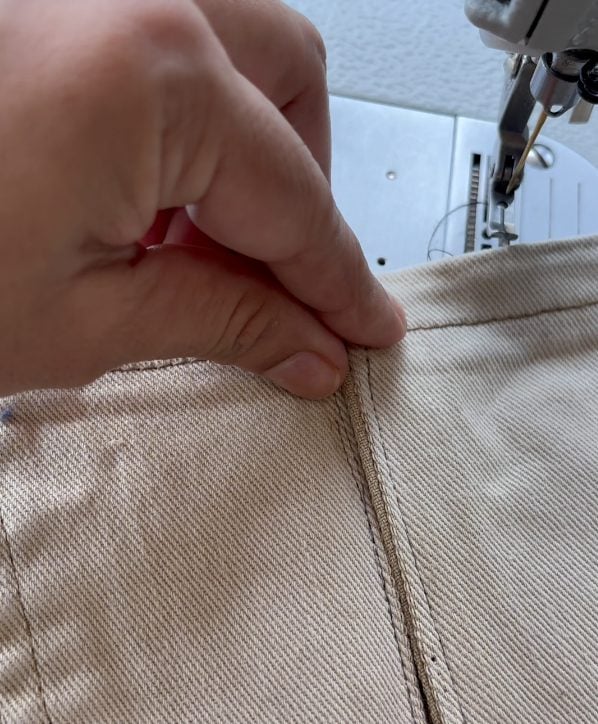
Stitch small stitches at the top and bottom of the edges to keep the pleats in place.
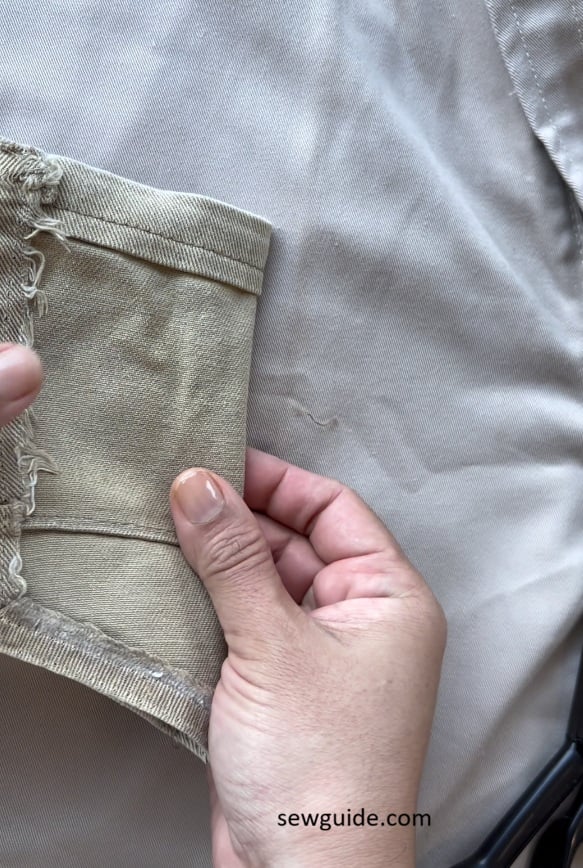
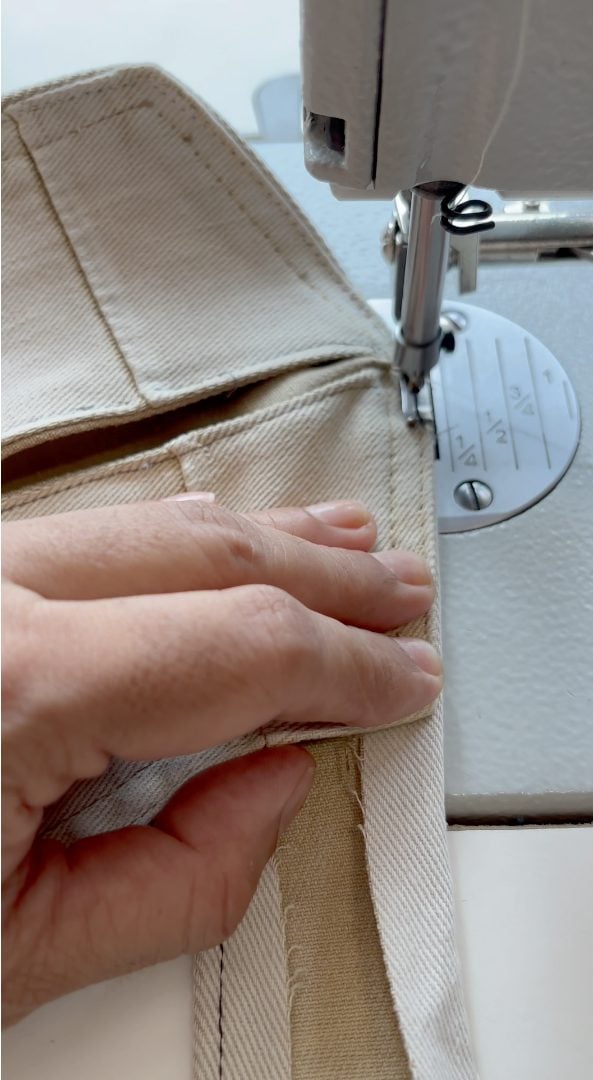
Step 5. Add the side gussets
Measure around the sides and bottom of the pocket.
Cut a long strip for the sides. I cut it 2 inches wide.
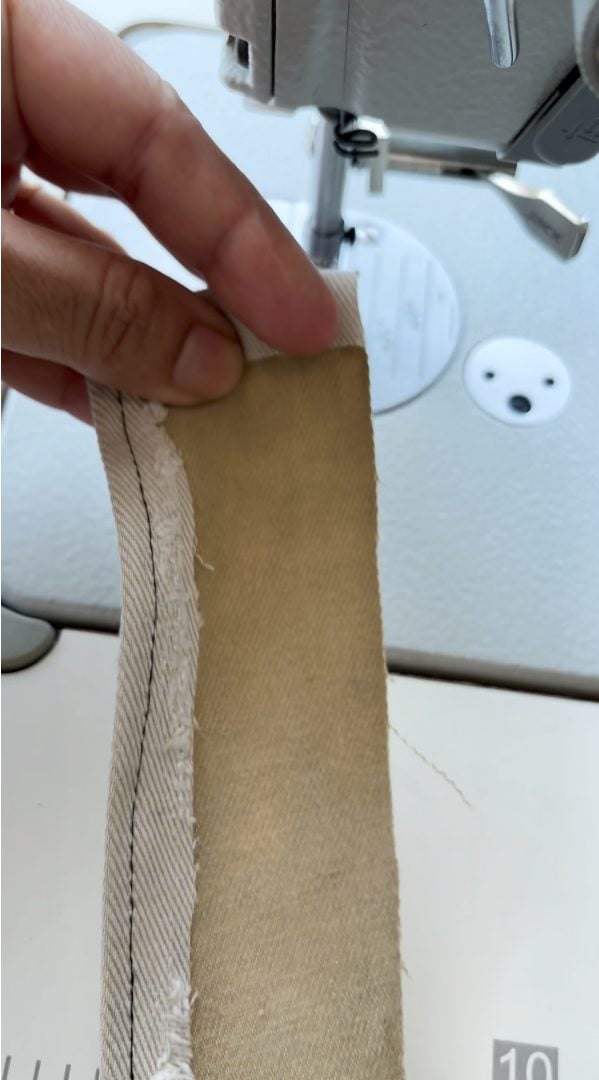
Fold one edge of the fabric strip to the back (1/4″) and sew.
Now you have to attach the gusset. Fold the other edge of the strip to the back.
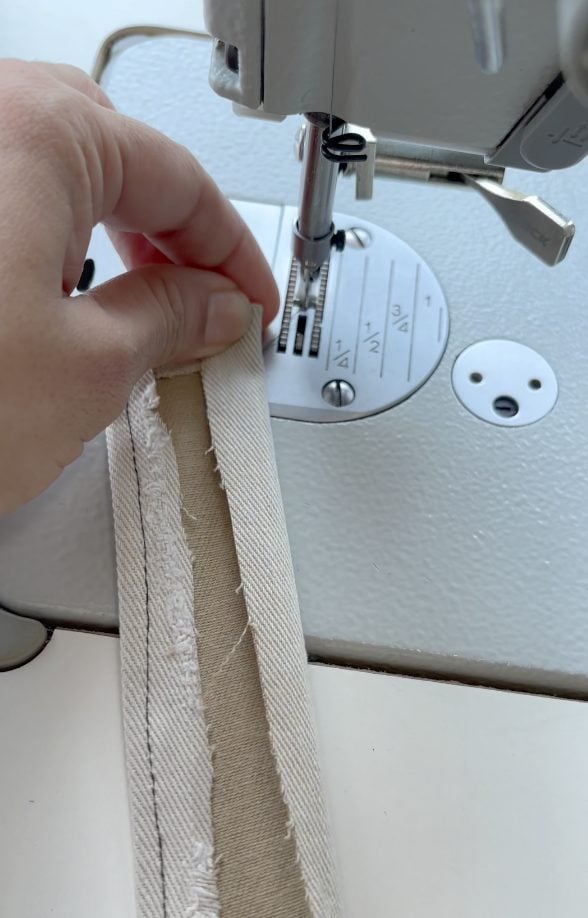
Place it on the table. Keep the pocket right side up on the fabric strip and keep it aligned on the folded edge.
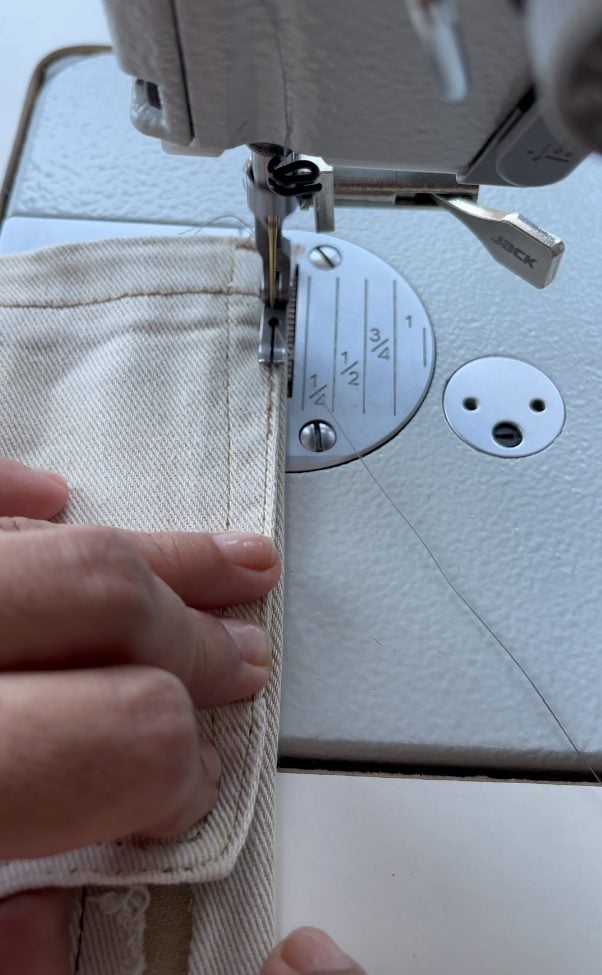
Start sewing from the top corner of the pocket. Fold the top edge before you start sewing.
Continue around the bottom. As you reach the corners of the jeans pocket remember to pivot with the needle down on the fabric

Sew up all along the pocket. When you reach the other top edge, fold the top edge.
Now this gusset will allow the pocket to expand outward.
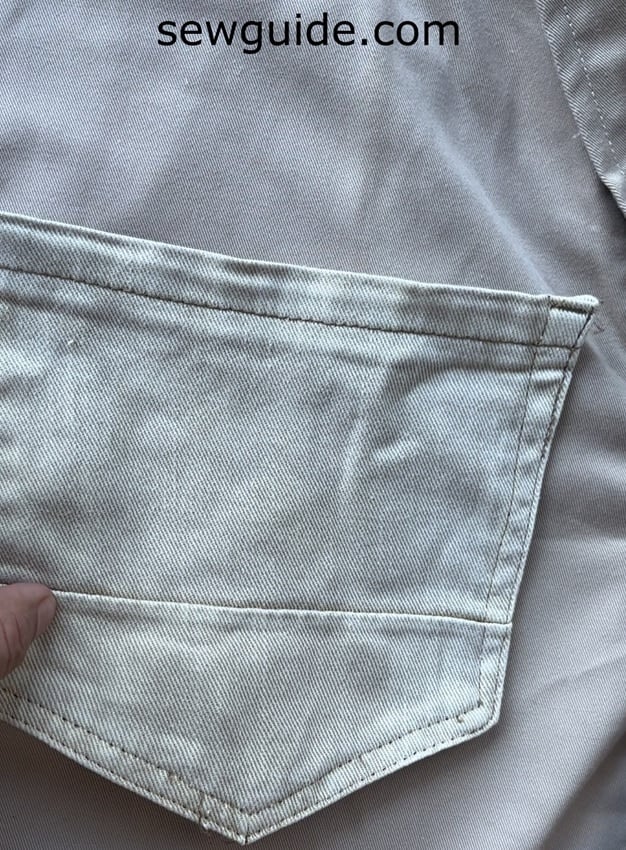
Step 6. Mark placement on your clothing
Place the pocket on your workwear jeans.
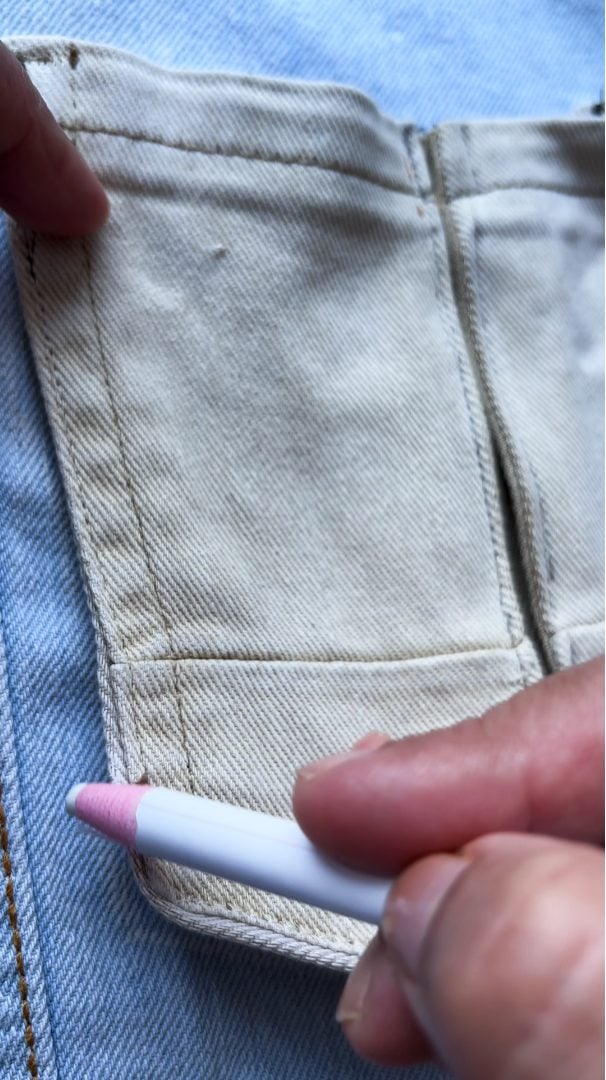
Use chalk to trace the pocket edges onto the garment. This line shows where the pocket will be stitched.
Step 7. Attach the Pocket
Pin the pocket in place.
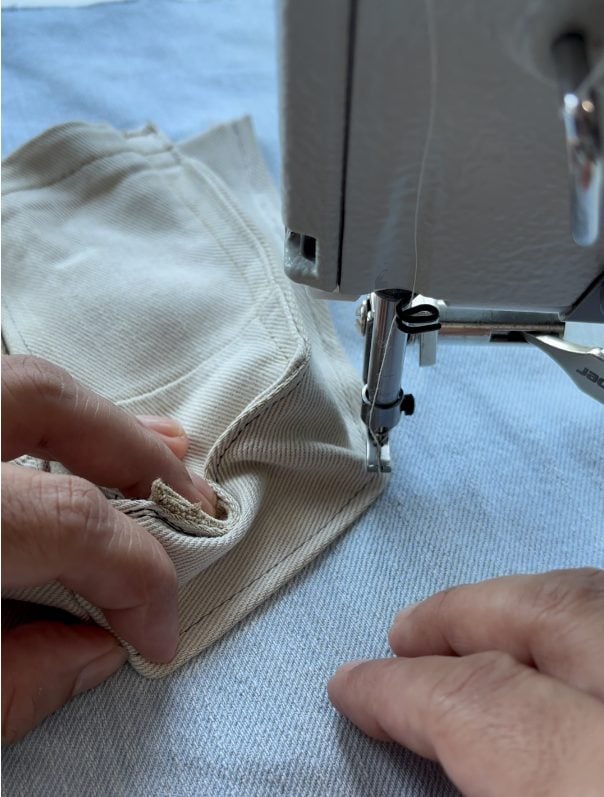
Stitch along the marked stitching line.
After the whole thing is attached to the base fabric, you can sew the top edge of the pocket together with the pleats to keep it fixed.
Backstitching like this at the top corners adds strength and structure to your pocket.
Step 8. Optional: Add a Flap
Cut a rectangle for the pocket flap.
Sew, turn, and press. Attach above the pocket.
You now have a bellows-style expandable pocket made from an old jeans pocket. It sits flat but expands when you store things inside them.
Related posts : Make these things from recycled old denim