In my house, there are five sewing machines—a Singer, a Janome, a Brother, an industrial machine, and a Janome embroidery machine. I mention this only to say that I’ve seen the way the bobbins work across these different types of machines and can write this article from real experience (for these machines). Most other sewing machines fall into these same categories, so the principles discussed here will apply to them as well.

Watch this video for a short recap of winding and using the bobbin on your machine :
Do you know that there is a theory among sewists that If your sewing machine is not stitching neatly on the top of the fabric, the problem is often the bobbin. (This is not always true, but it is true often enough to make the bobbin the first place to check.)
As soon as you notice fabric puckering, loose stitches, or uneven tension on the fabric face, check whether the bobbin is inserted correctly, whether the correct bobbin is being used, and whether the bobbin thread is evenly and firmly wound.
Here is a complete, step-by-step guide to winding and loading a bobbin correctly, so your machine stitches smoothly and evenly.
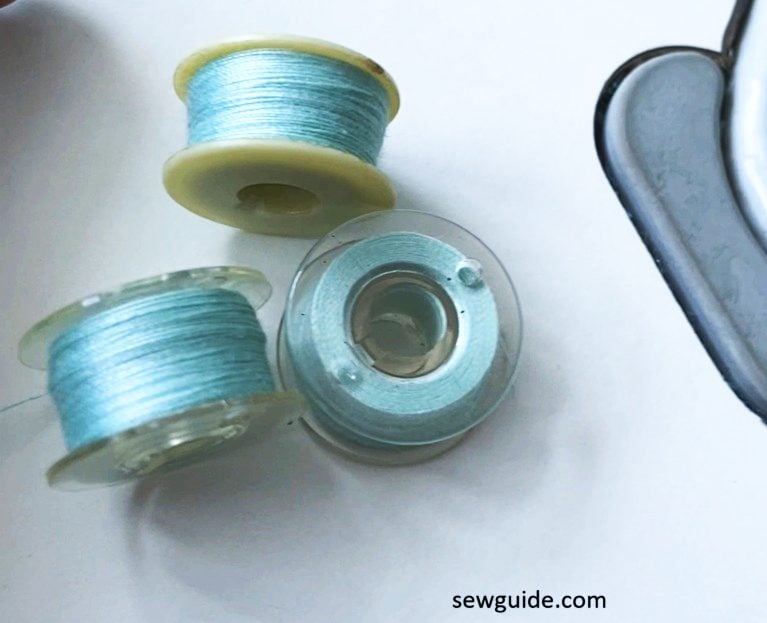
Start by using the most suitable bobbin for your sewing machine. Clear Plastic bobbins, normal plastic ones, steel and aluminium are the ones I have. Even when bobbins look similar, there may be a difference – And different machines use different types of bobbins.
Related post : You can read more about bobbin uses, thread choices, and how many bobbins to keep in Sewing Machine on this post on Bobbins
The plastic bobbins used on my embroidery machine may not be the same on my sewing machine. Even a small difference in height, shape, or material can cause problems while winding or stitching. Always use the bobbin type recommended for your machine.
Most drop in bobbin machines only take plastic bobbins – I have not seen otherwise. On industrial machines, only metal bobbins are used. That too, they should fit in correctly, not too tall on the bobbin case or not too small . It should level up inside the bobbin case.
The front loading bobbin systems on home sewing machines have seperate removable bobbin cases unlike the drop in ones, but they take plastic bobbins.
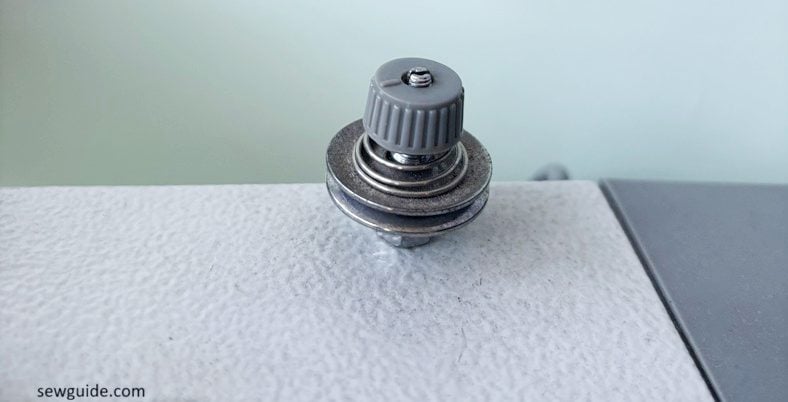
Step 1. Set up the thread for winding on the bobbin
Place the thread spool on the spool pin and secure it firmly with the spool cap so the thread feeds smoothly without jerking.
Remember to remove the thread from the needle eye of your machine when you wind the bobbin, unless you want a mess.
Step 2. Guide thread through the tension disc
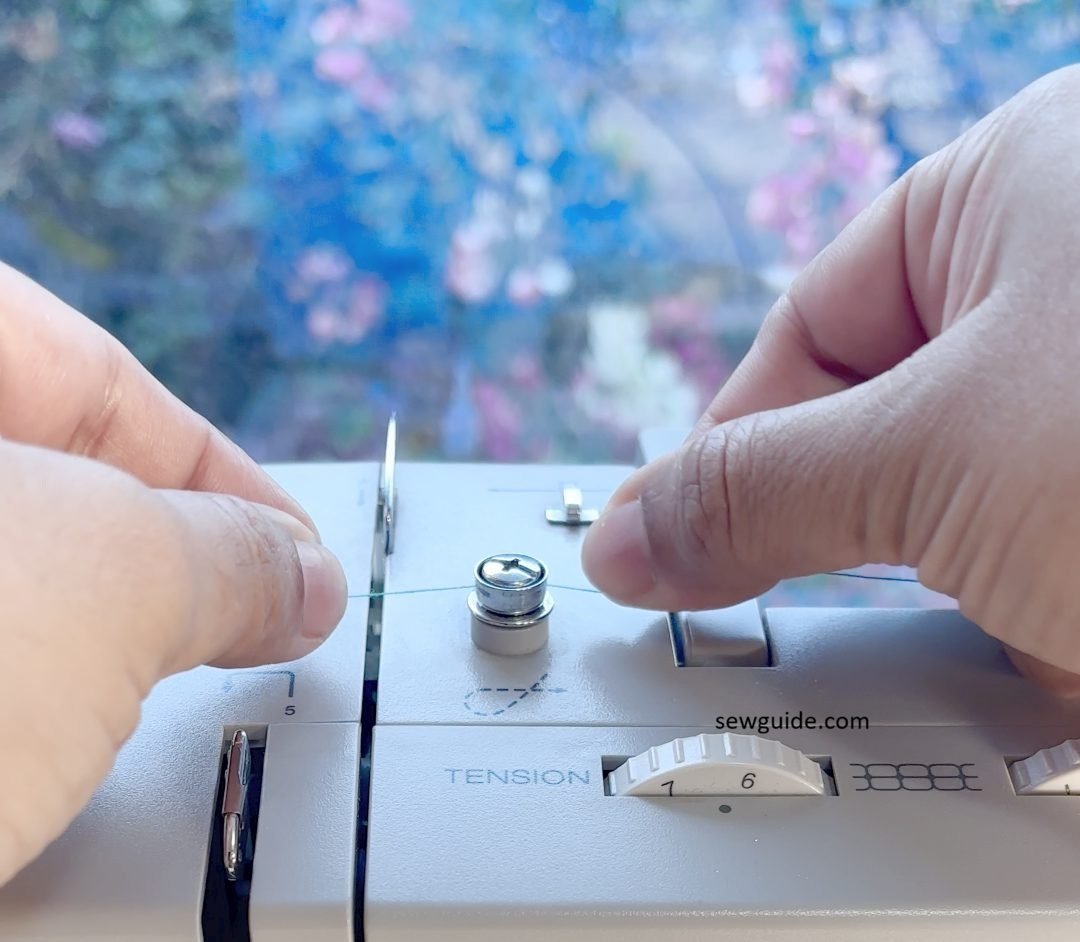
This tension disc looks different on my industrial machine.
Follow only the bobbin-winding thread path shown on your machine or consult your sewing machine manual if you are confused.
This path is different from the normal threading path used for sewing.
Make sure the thread passes through the bobbin tension guide, as this controls the tension while winding and helps the thread wind evenly on the bobbin.
Step 3. Engage the bobbin on the winder spindle
Place the bobbin onto the bobbin winder spindle and push it fully into the winding position.
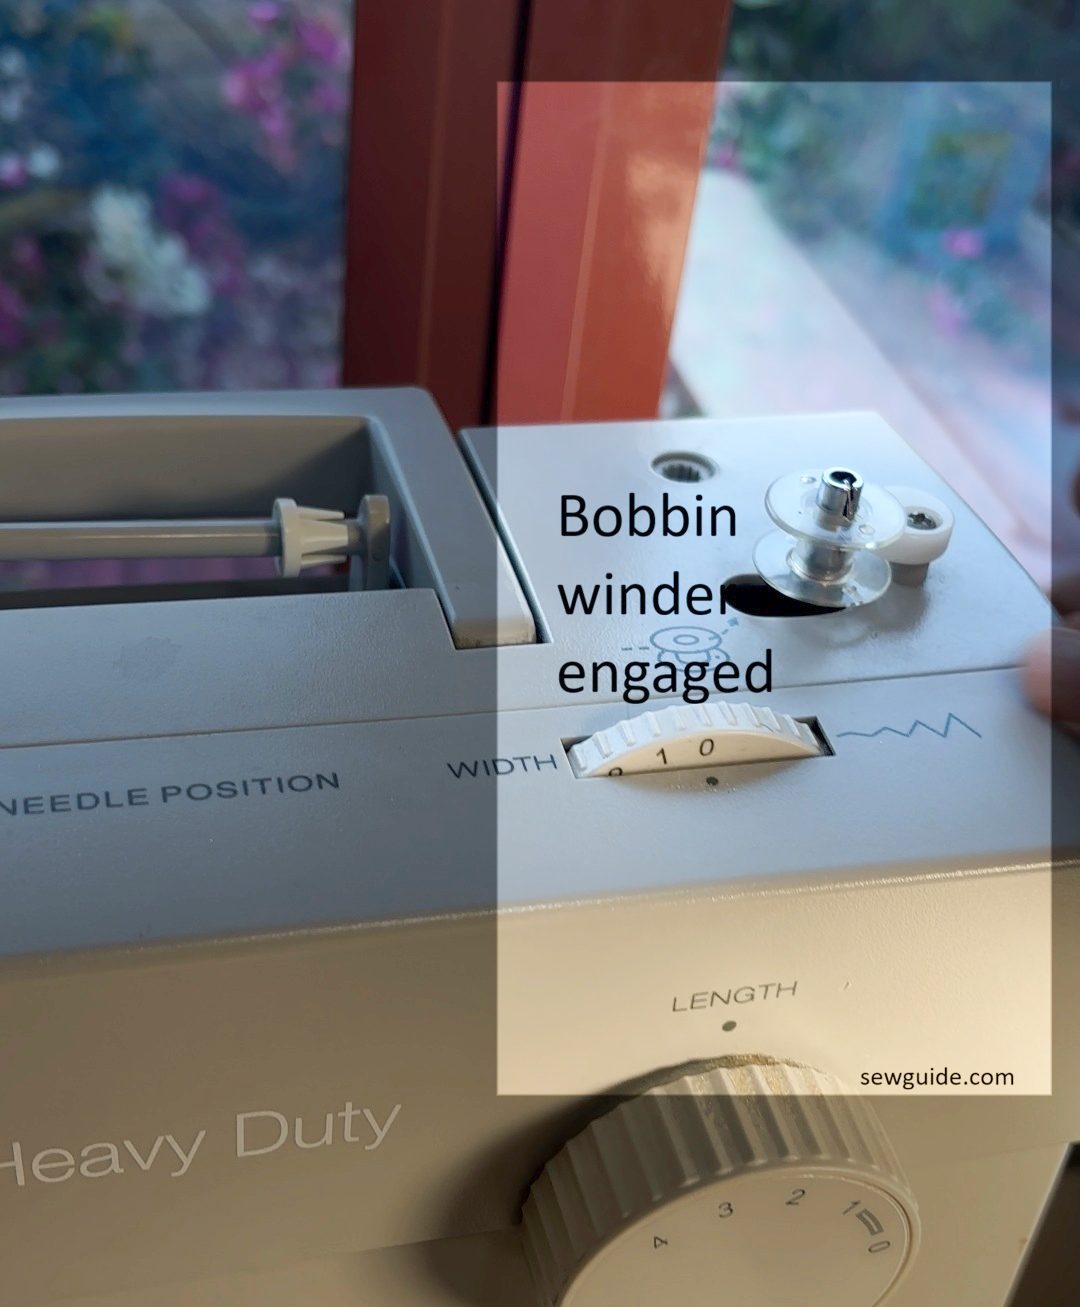
To prevent the thread from slipping at the start, insert the thread end through the small hole in the bobbin. This anchors the thread and helps the bobbin begin winding evenly right from the first few turns.
Begin winding the bobbin at a medium, steady speed. Avoid winding too fast, as high speed can cause loose, uneven winding and tension problems later. Watch the bobbin as it fills to make sure the thread is spreading evenly across it.
Do not overfill the bobbin. Stop winding when it is about 80–90% full. In case of embroidery machines, fill even lesser. An overfilled bobbin can jam inside the bobbin case, cause uneven tension, or make the machine noisy during sewing.
Step 4. Take out the bobbin and Disengage the bobbin winder
Once the bobbin is wound, disengage the bobbin winder, cut the thread neatly, and remove the bobbin from the spindle.
In drop-in (top-loading) bobbin systems, the bobbin usually unwinds counter-clockwise.
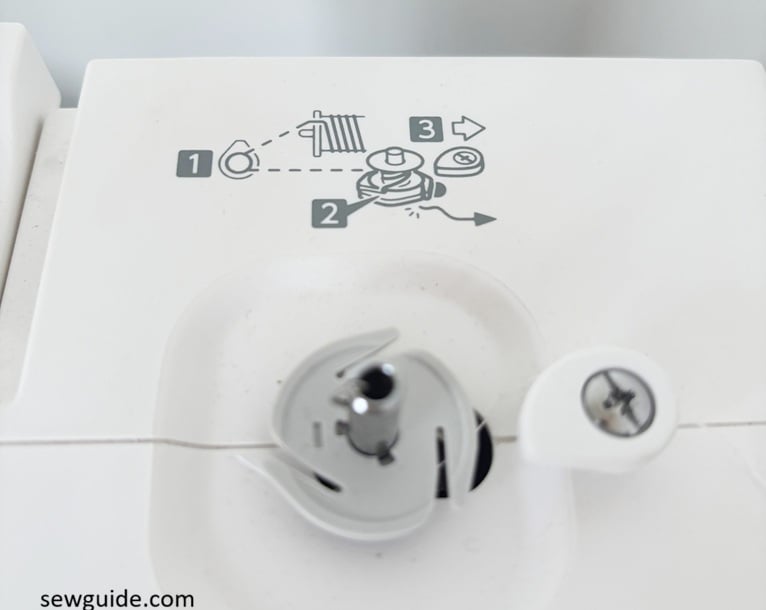
Step 5. Insert the bobbin in the machine
Drop-in vs front/side loading – Metal bobbins and bobbin case
For front loading and side loading bobbin machines, there is a seperate metal bobbin case – which is ever so slightly more complicated than the drop in one. But then you get more granular control – there is a tension spring inside the bobbin case which you can adjust as you does the top tension. Very useful for making decorative couching stitches, bobbin embroidery work etc.
When inserting the bobbin inside the metal case, drop it so the thread pulls in the correct direction – clockwise.
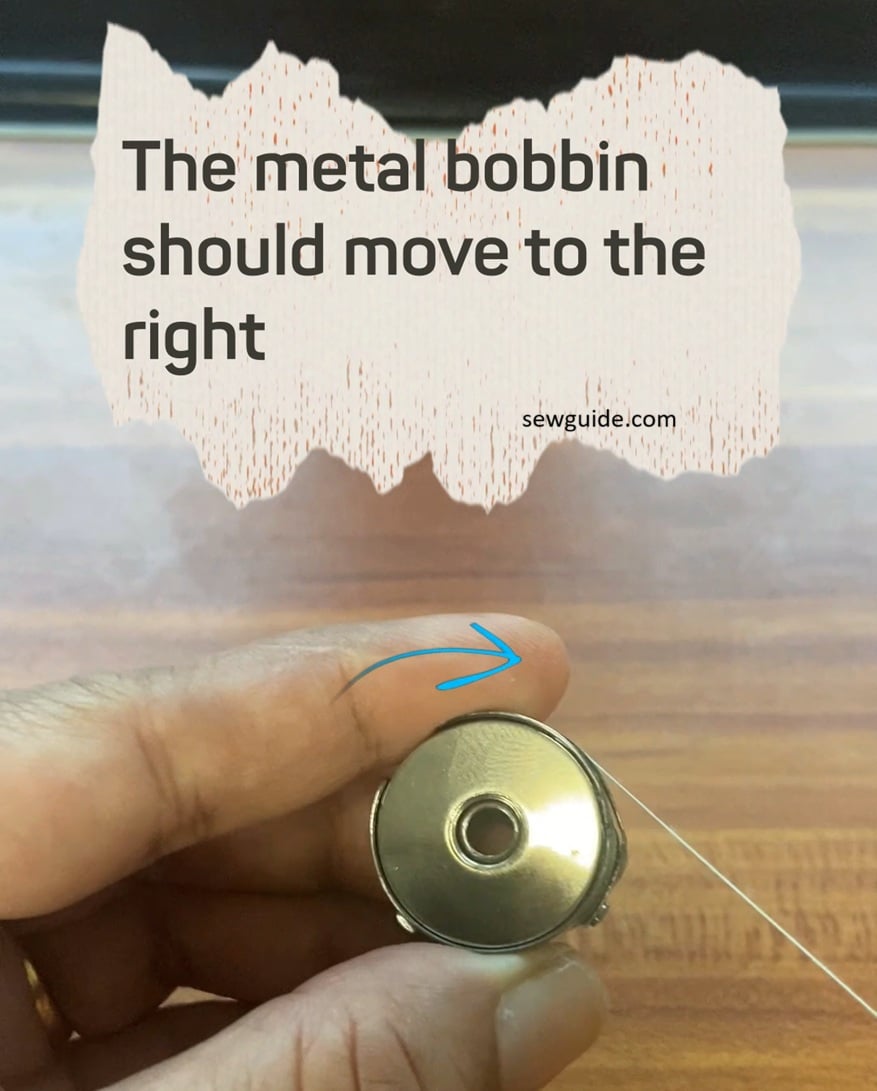
You can check this as you put in the bobbin inside the bobbin case. Pull the thread and check the movement. If it is moving clockwise, that is good. Otherwise insert it back.
Ensure that thread is passing through the tension spring. Pull the thread through the thread delivery slot. Slide it firmly under the tension spring. Pull out 8–10 cm of bobbin thread.
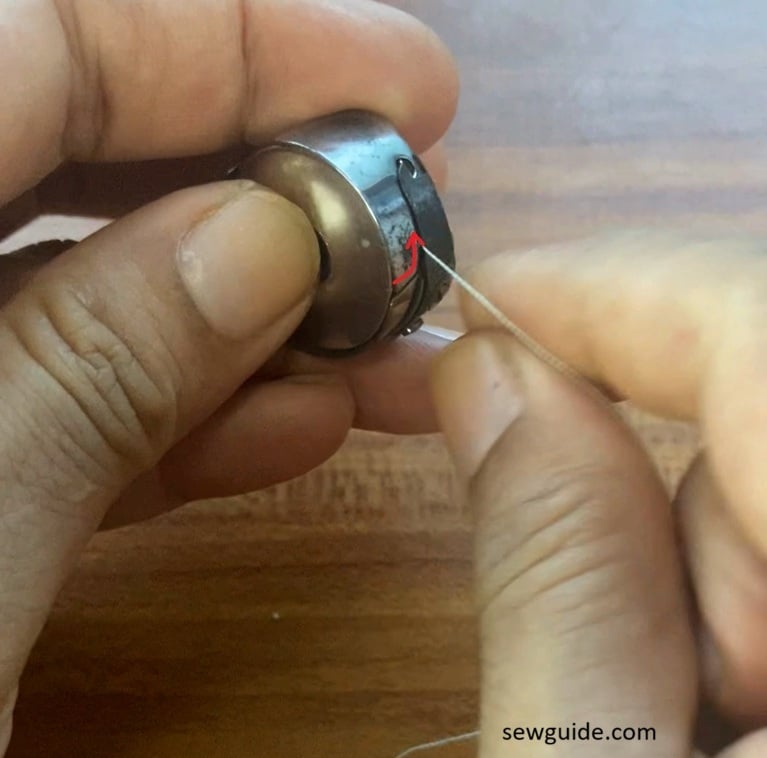
Bring it out through the thread exit notch.
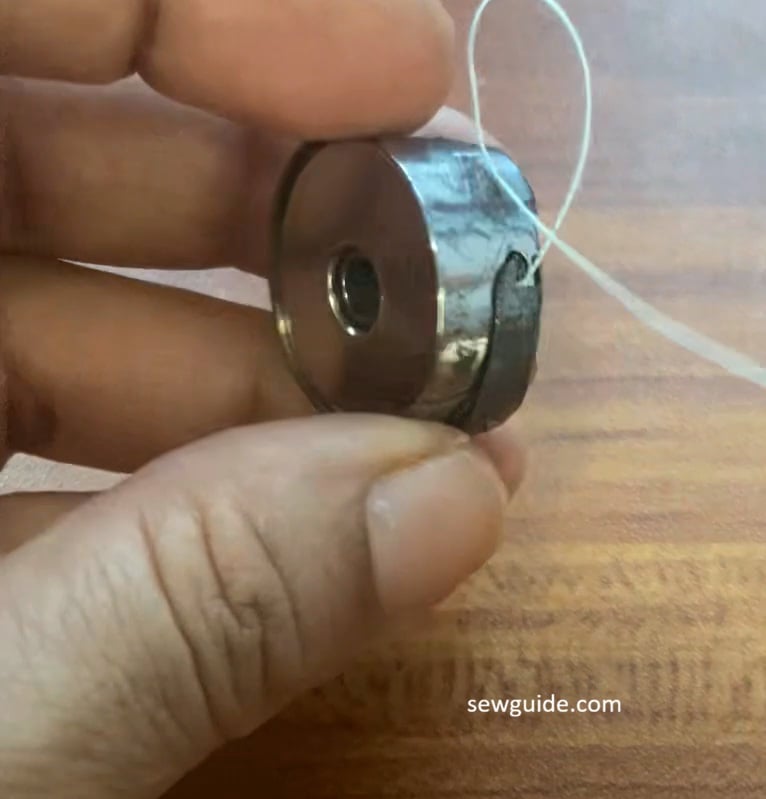
Do the Drop-bobbin test to check that the tension of your bobbin case is correct or not. Just drop the bobbin by the thread and you will know by how it drops whether the tension is correct right off the bat or not.

It should hang and drop slightly when you give a small jerk. If it drops freely you can assume that the tension is too loose. If it doesn’t move maybe it is too tight. But even if you find something wrong, think twice before you do anything with the bobbin case, unless you have a spare one.
Insert the bobbin case into the machine
When inserting the metal bobbin case into the machine, hold the case by the latch. Align the stop finger with the groove in the hook race. Push it inside. You should hear or feel a soft click as it snaps into place, indicating it is properly seated.
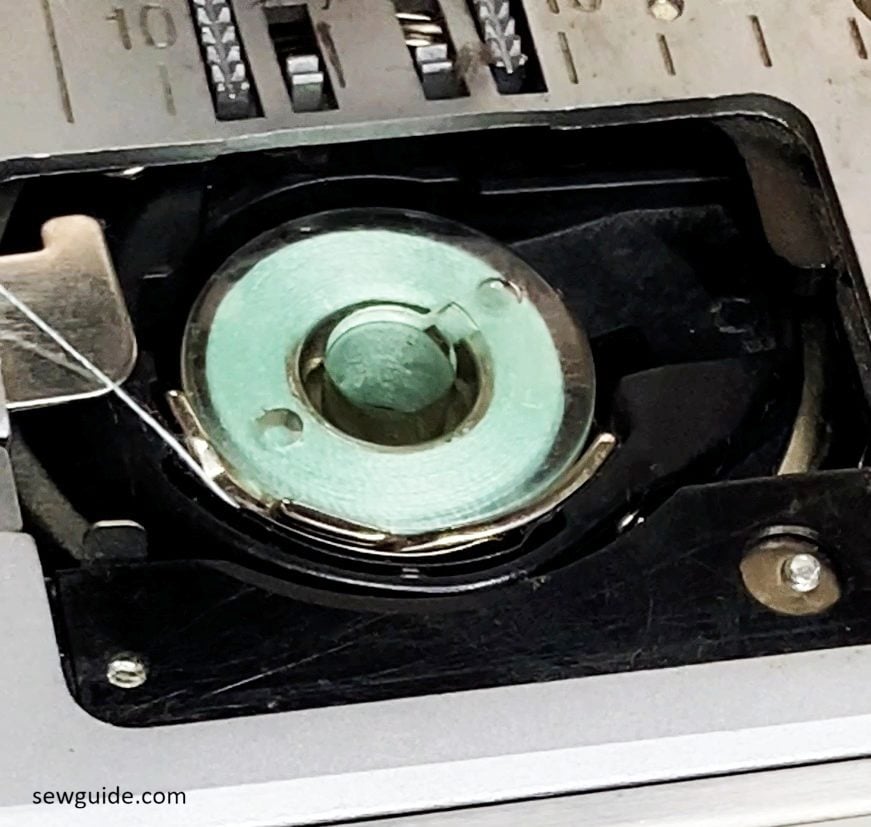
Drop in bobbin machines – Plastic bobbins
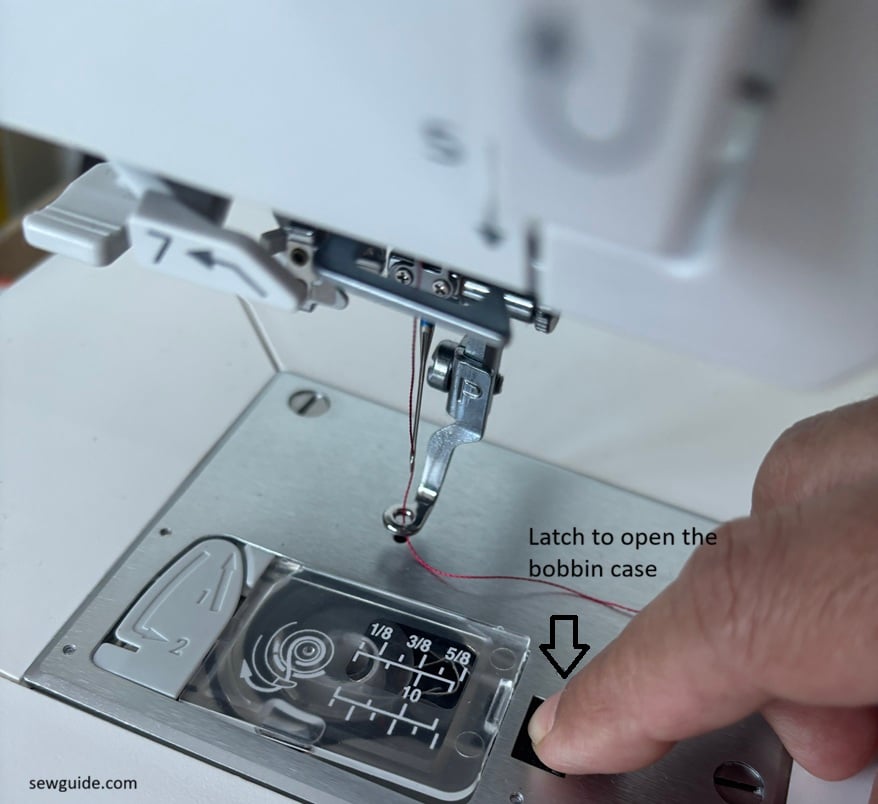
On drop in bobbin machines, there is a latch outside the bobbin case to open it. It is a simple straightforward thing to just drop in the bobbin once the cover is open.
Place the bobbin into the case following the threading diagram printed on the needle plate or inside the bobbin cover to ensure the thread is correctly engaged.
In most horizontal drop-in bobbin cases, you have to bring the thread to the left, through a slit in the drop-in case. The bobbin thread will be moving anti-clockwise when the thread is pulled in this case. ( I think this is not universal for all machines, you will have to check your sewing manual and the instructions printed to check if this is true for your machine)
After inserting the bobbin, pull up the bobbin thread by holding the top thread and turning the hand wheel toward you once. This brings the bobbin thread up through the needle plate.
Before you start sewing, gently pull both thread tails toward the back of the machine to prevent tangling at the beginning of your stitching.
A poorly wound or incorrectly inserted bobbin can affect stitch quality even when everything else seems right.
Winding and loading the bobbin correctly is like an insurance policy. It protects you from one of the most common sewing frustrations—spending hours trying to fix bad stitching.
Related posts : Naming the parts of sewing machine and their functions