
A Bar tack is a high-density stitch made to reinforce areas of stress. It is extensively used in sewing on areas where there is constant usage, push and pull and consequent strain resulting in ripped stitches, like securing belt loops, pockets, buttons, zippers, and other functional elements of garments. It is more efficient than double lines of stitching for added strength.

They are a constant feature in jeans. There are many strategically placed bartacks on jeans. The bar tacks, similar to rivets, provide the jeans a reputation of being a very durable garment. The jeans undergo many washes after it is produced to give it the distressed look that fashion commands. The bar tacks protect the vulnerable areas from damage during these processes, as well as during usage by the wearer.
Where are the Bar tacks used

- On the opening of pockets. This gives strength to the opening and when you put your hand inside constantly, the stitches do not come open because of the strength of the bar tack
- At the end of the zip externally or internally. Usually, a horizontal bartack is placed on pants zip area though vertical bar tacks are also seen. This prevents damage to the zipper
- As a safety stitch on the fly placed above the slider head when the zip is fully open.
- On belt loops, to prevent the loops from coming apart because of the strain of pulling of belts.

- To reinforce the opening, on top of side slits
- On buttonholes, they protect the stitches from ripping open when you use them continuously. The bar tacks prevent it gaping open under stress
- All areas where you feel there is a need for stability and strong stitches

How to make a hand-sewn bar tack
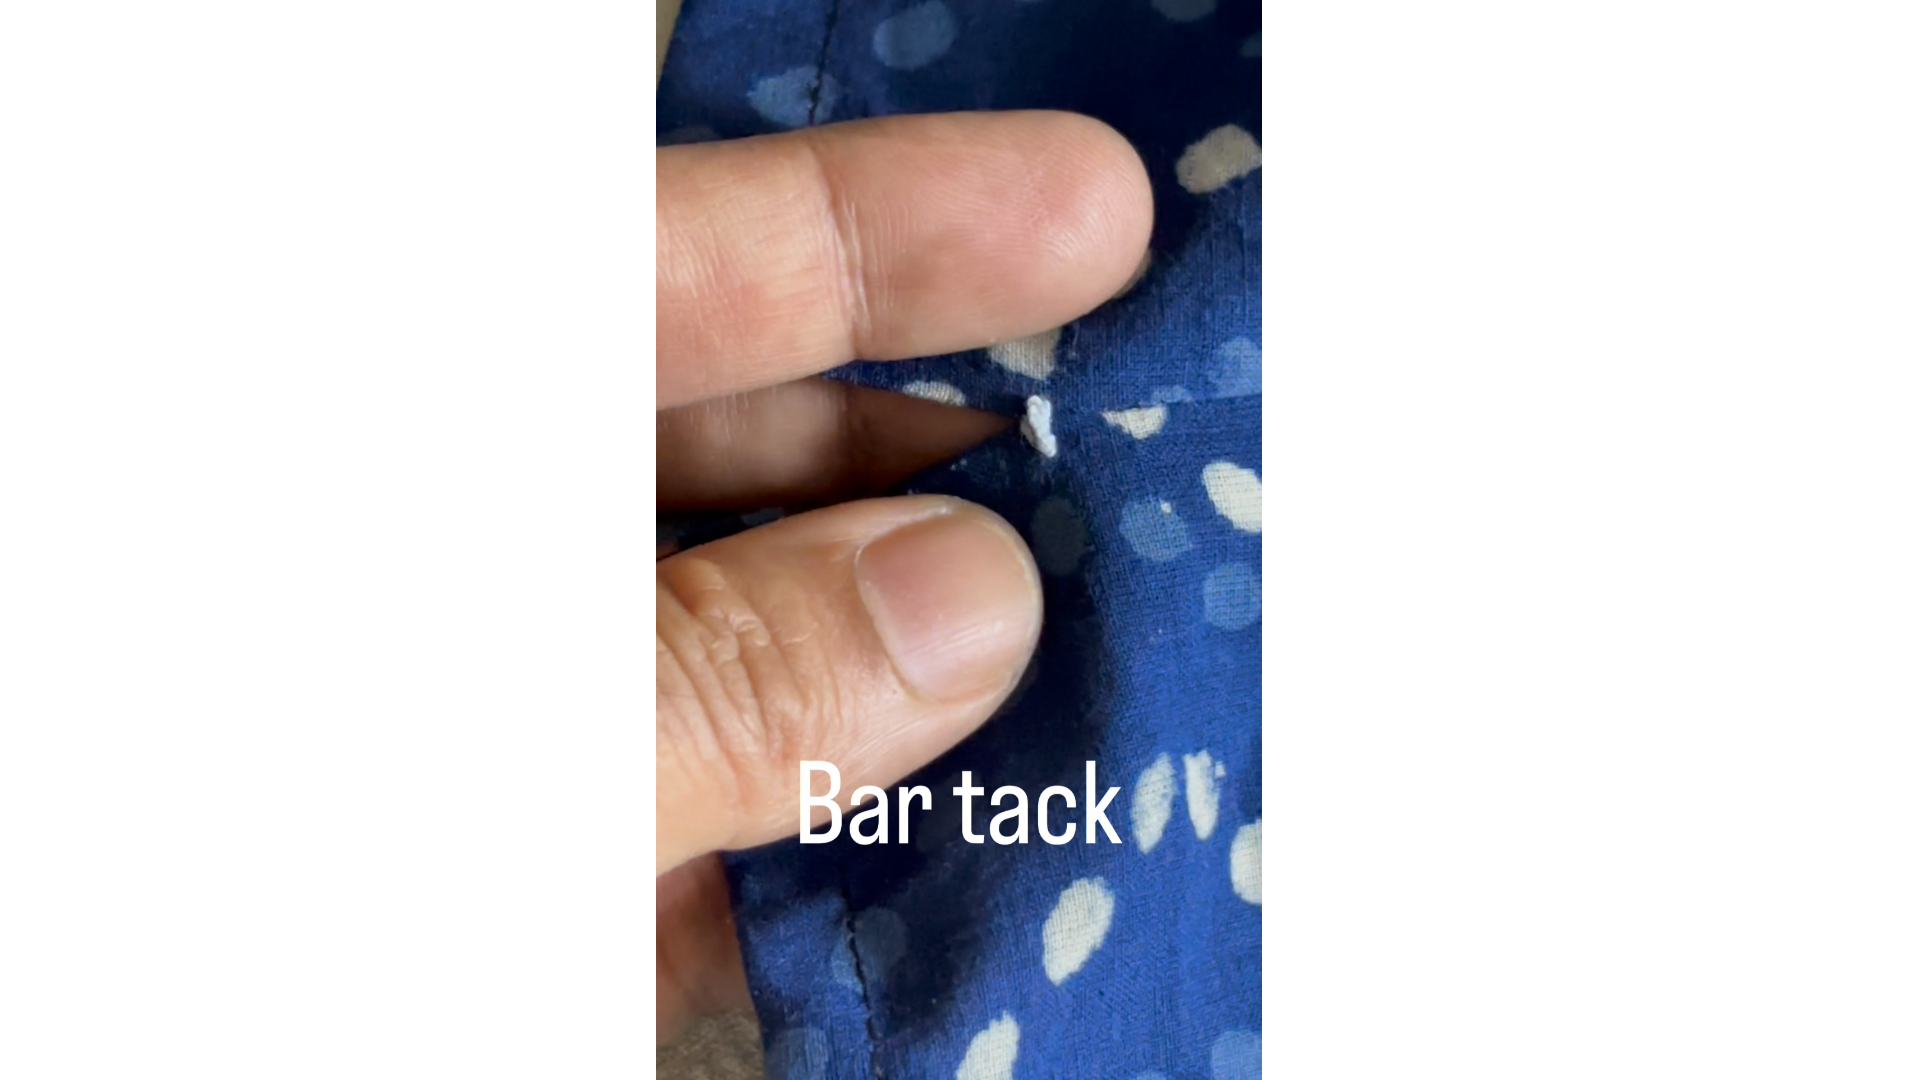
Checkout this video tutorial for sewing a hand sewn bar tack stitch:
To sew this bar tack stitch that holds two seams together (I am sewing it to repair and secure the loose stitches on a slit – it is a 5 min solution to a slit that is almost going to come apart.) Make a straight stitch across and
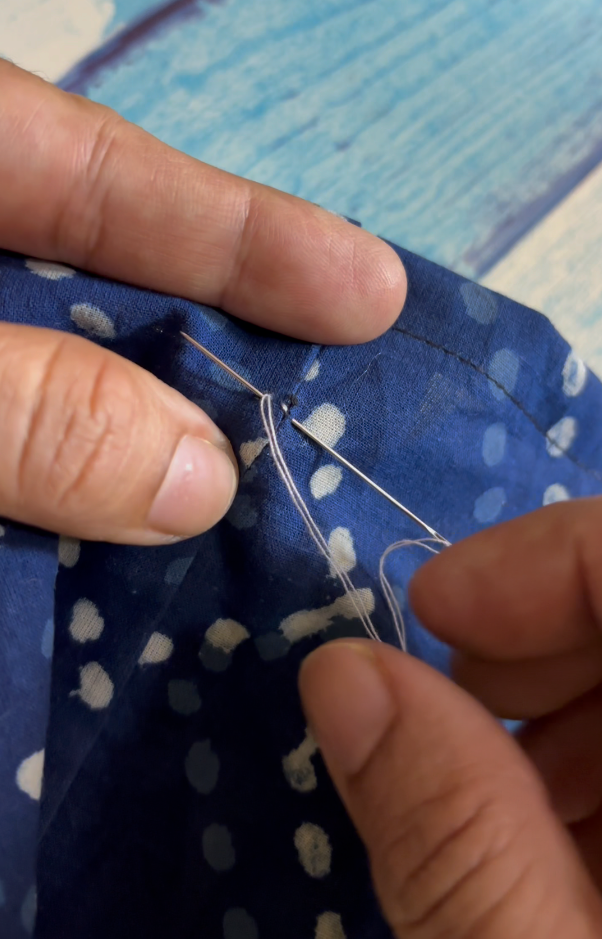
then twist the thread over the needle some 5-6 times (enough to fill the space)
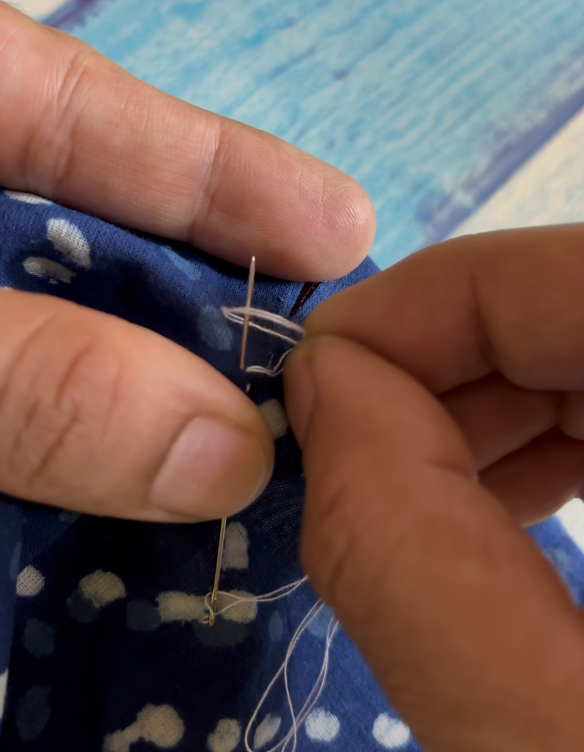
You will be doing this some 5 or more times.
You are essentially making a bullion like stitch.
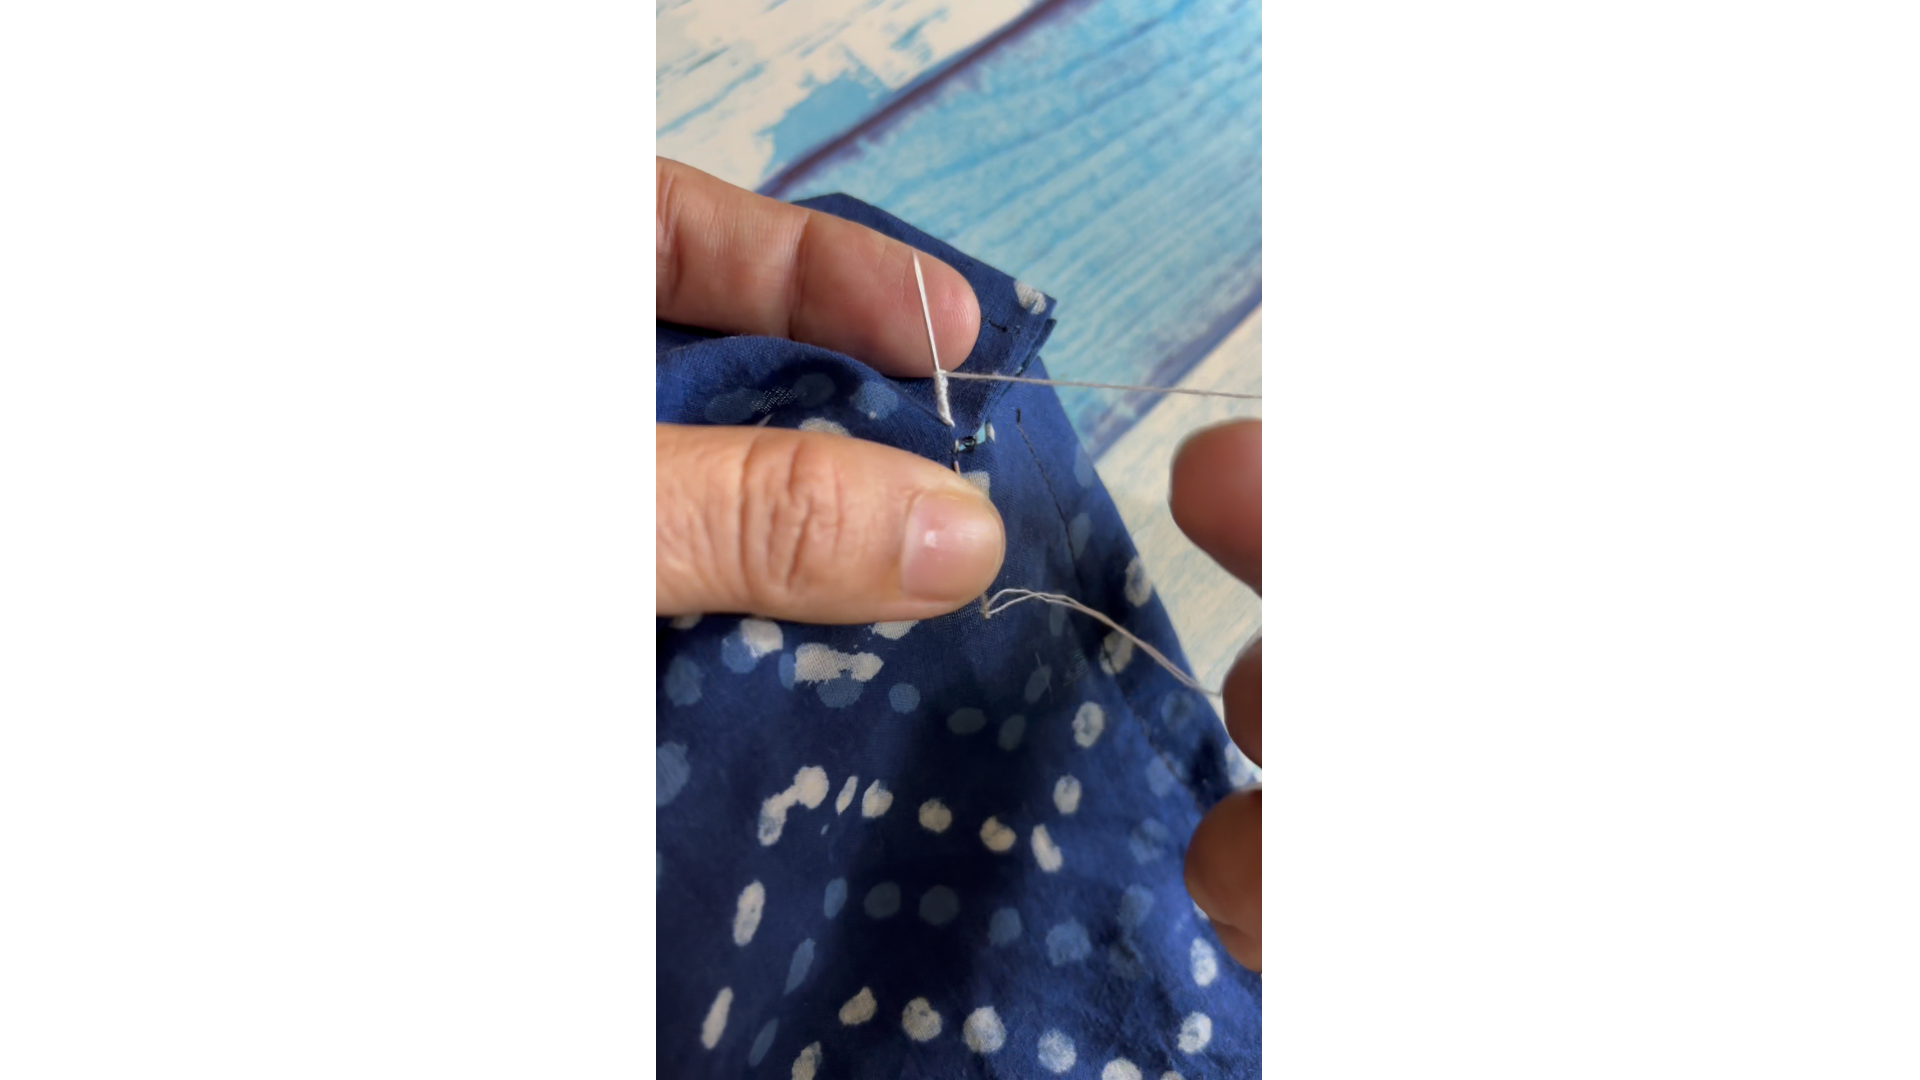
Now take it to the other side and bring the needle to the other side.
Secure it there.
You can make the bartack on the back of the slit, if you do not want to see it so obviously.
It is pretty straightforward to hand sew a bar tack stitch that looks like the machine sewn one. You can use a thick thread or embroidery floss for the bartack. Decide on where you want the bar tack. You make three straight stitches in the same place, then make overcasting stitches over these straight stitches; you have to take up some thread from the fabric as well so that the stitch is firmly placed. Make the stitches very close to each other, neat and even. The stitches made are no wider than 1 or 2 cms.
How to make bartack with the sewing machine

Do you know that there are special sewing machines which exclusively makes bar tacks – They are used in factories and garment making concerns.
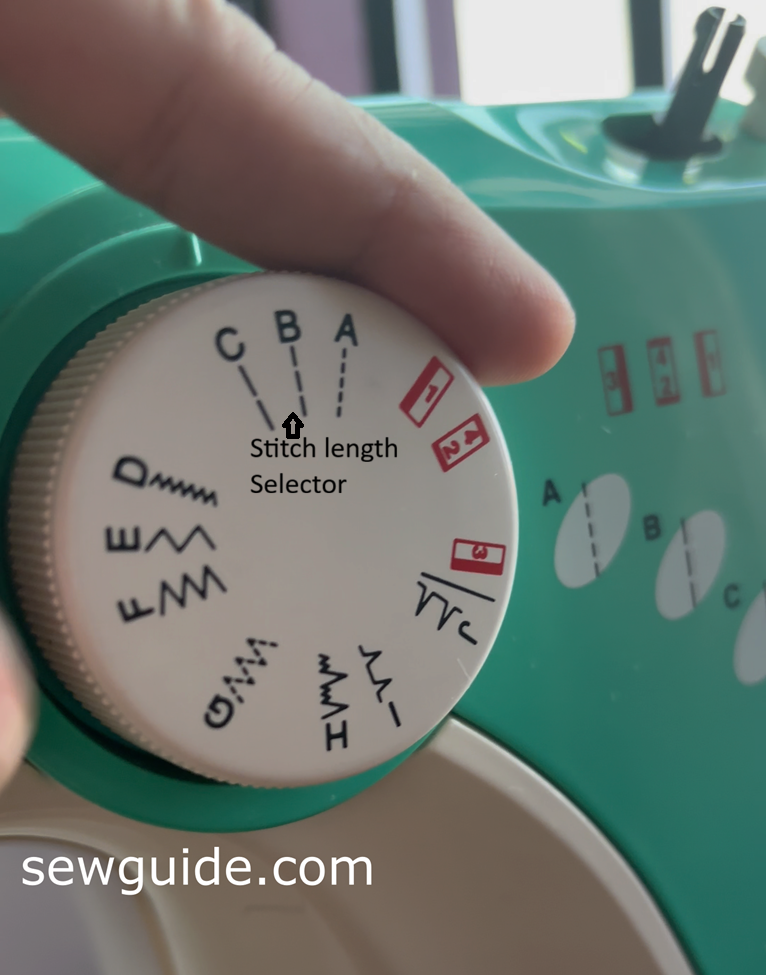
You can make a bar tack with your simple sewing machine by making tightly packed zigzag stitches with a very narrow stitch width.
Related posts: Make an Overcast stitch ; Pin stitch ; Pick stitch ; Zig zag stitch; All essential hand stitching stitches


Hi thank you for this info, now i know why my motorcycle gear fails. Cheers
Cheers to you too : )
Excellent and timely info. I am making a handbag and wanted to be sure the handles were secure. This should do it. Thank you.