A corded seam is a regular in sewing- it incorporates a cord inside the seam for added strength and aesthetics. A corded hem is equally pretty with its raised rounded edge defining the hem and making it very decorative.

When you add a cord in the seam it supports and makes the seam more strong and durable. Basically reinsforcing the seam against all future wear and tear. As well as accentuate the seam line. For eg. when you add cord in the seam of princess line bodice, it accentuates the pretty curves a little more than if you have a plain seam there. It gives the needed structure to the seamline.
Are you convinced?
Here is how I sew the corded welts needed for this textured stitching.
There are two things which are indispensible when sewing these seams : a zipper foot and a cord. You need a presser foot that will sew very close to the raised edge.

You can use any type of cord inside your corded welt -depending on the raised edge you want.
And optionally, bias strips for covering the cords – bias cut material adds flexibility to the corded seams. It makes it easy to shape it to the seam you have – curved seam, corners etc. Cut your fabric in the true bias to strips that are 1 1/4 inches plus 3 times the width of the cord . Sew strips together if you have a long project.
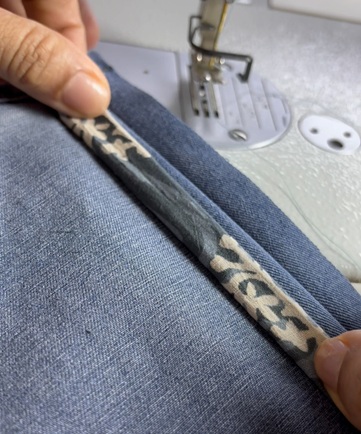
Wrap cord in fabric.

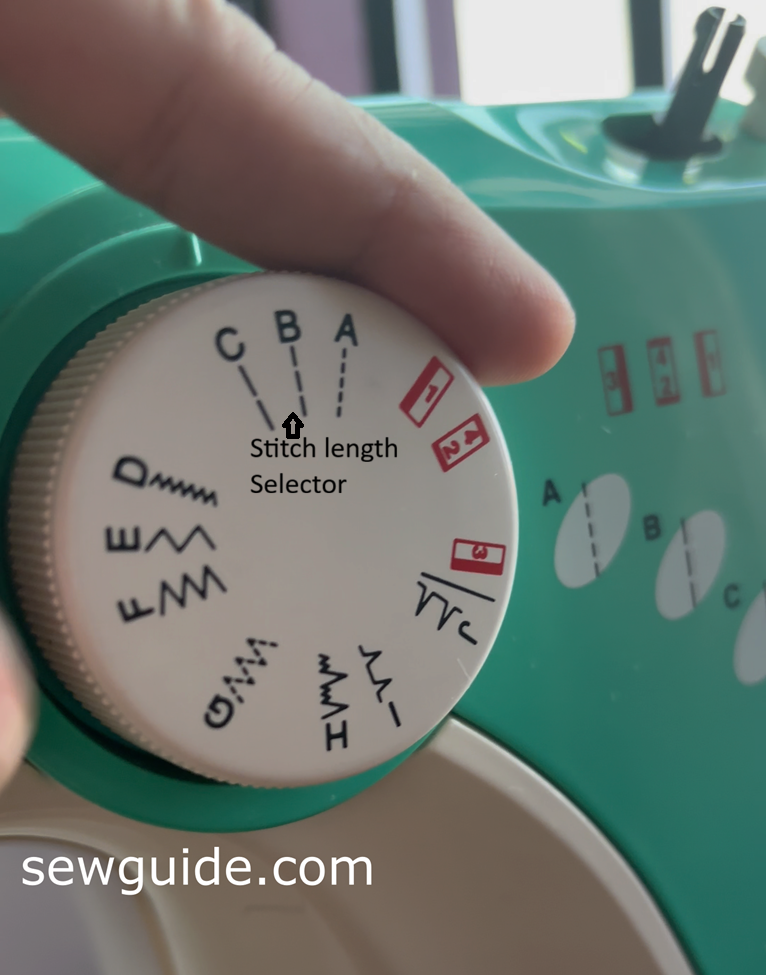
Position the Zipper Foot to the left-side of the needle. Stitch close to the cord. Use a longer stitch length. (The same procedure as in making piping)
When sewing this corded material into your seam, the Zipper Foot is usually adjusted to the right of the needle. Keep the foot as close as possible to the cord, as you sew.

2 ways to add corded hem
Method 1. Self corded hem

Checkout the video tutorial
To make this, Keep the cords (4 or 5 of them) inside the folded fabric. Keep stitching close to the cord. I added a piping for added texture and shine.

After making this, the garment edge is kept on top of the welt and sewn in place.

Method 2. Contrast corded hem
This hem is made using contrasting colored fabric strips

Cut out fabric strips in contrasting colors.

Checkout the video tutorial:
Keep the cord inside and sew the welts one by one one on top of the other.

Keep adding welts one on top of the other.

Add enough to create a standout texture is created.

Keep the garment edge on top of the welt edge and top stitch in place.


Thank you for this post