Any one who has a home sewing machine will have a zig zag stitch and any one with a zig zag machine can make satin stitch applique – And, Satin Stitch Applique is considered as the holy grail of applique technique. But, it is not a matter of just “keep your fabric on top of your clothing and stitching it there” easy. There are some steps which will ensure that you will get a good result the first time you do it.

Related post : All the ways to do applique with sewing machine
The process of Satin stitch applique is as follows: You cut out the design shape and place it on your base fabric and stitch the edges with dense zigzag stitch aka satin stitch on your sewing machine. The closely packed stitches completely cover the raw edges of the design. The slightly raised decorative stitching is the highlight of this applique technique.
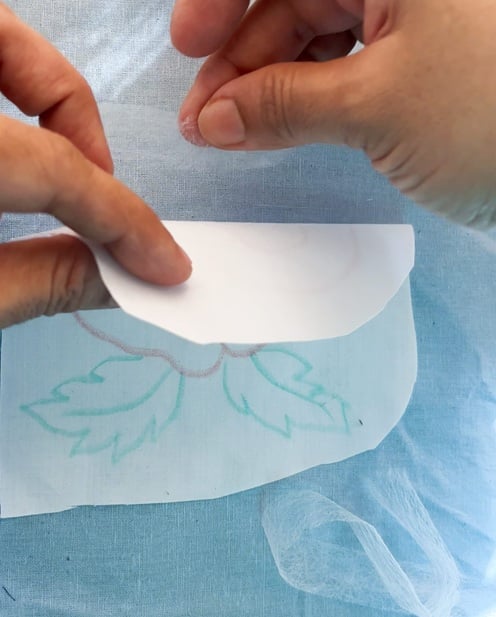
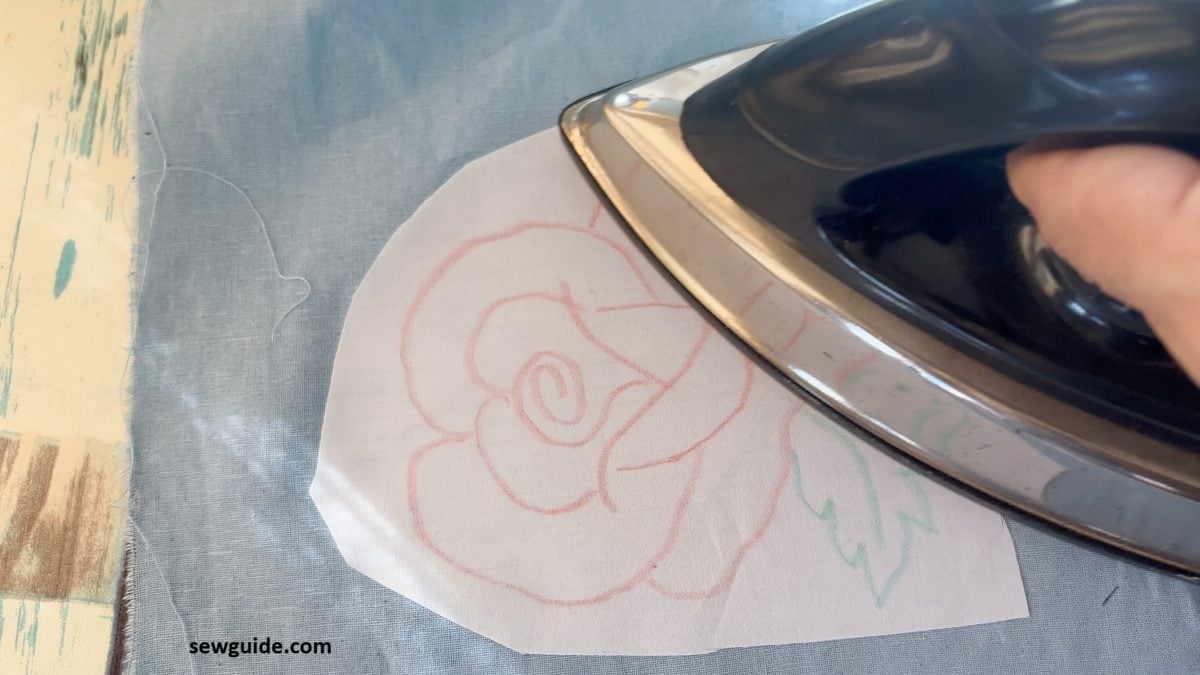
Transfer the applique design on the fabric
You can draw the design free hand or transfer from somewhere with transfer sheets. Cut it out with 1 inch around atleast.

Change the settings of the machine
I always set my sewing machine to a Stitch width above 2.5 mm and a stitch length under 1 (usually .5); And reduce the tension a little bit.
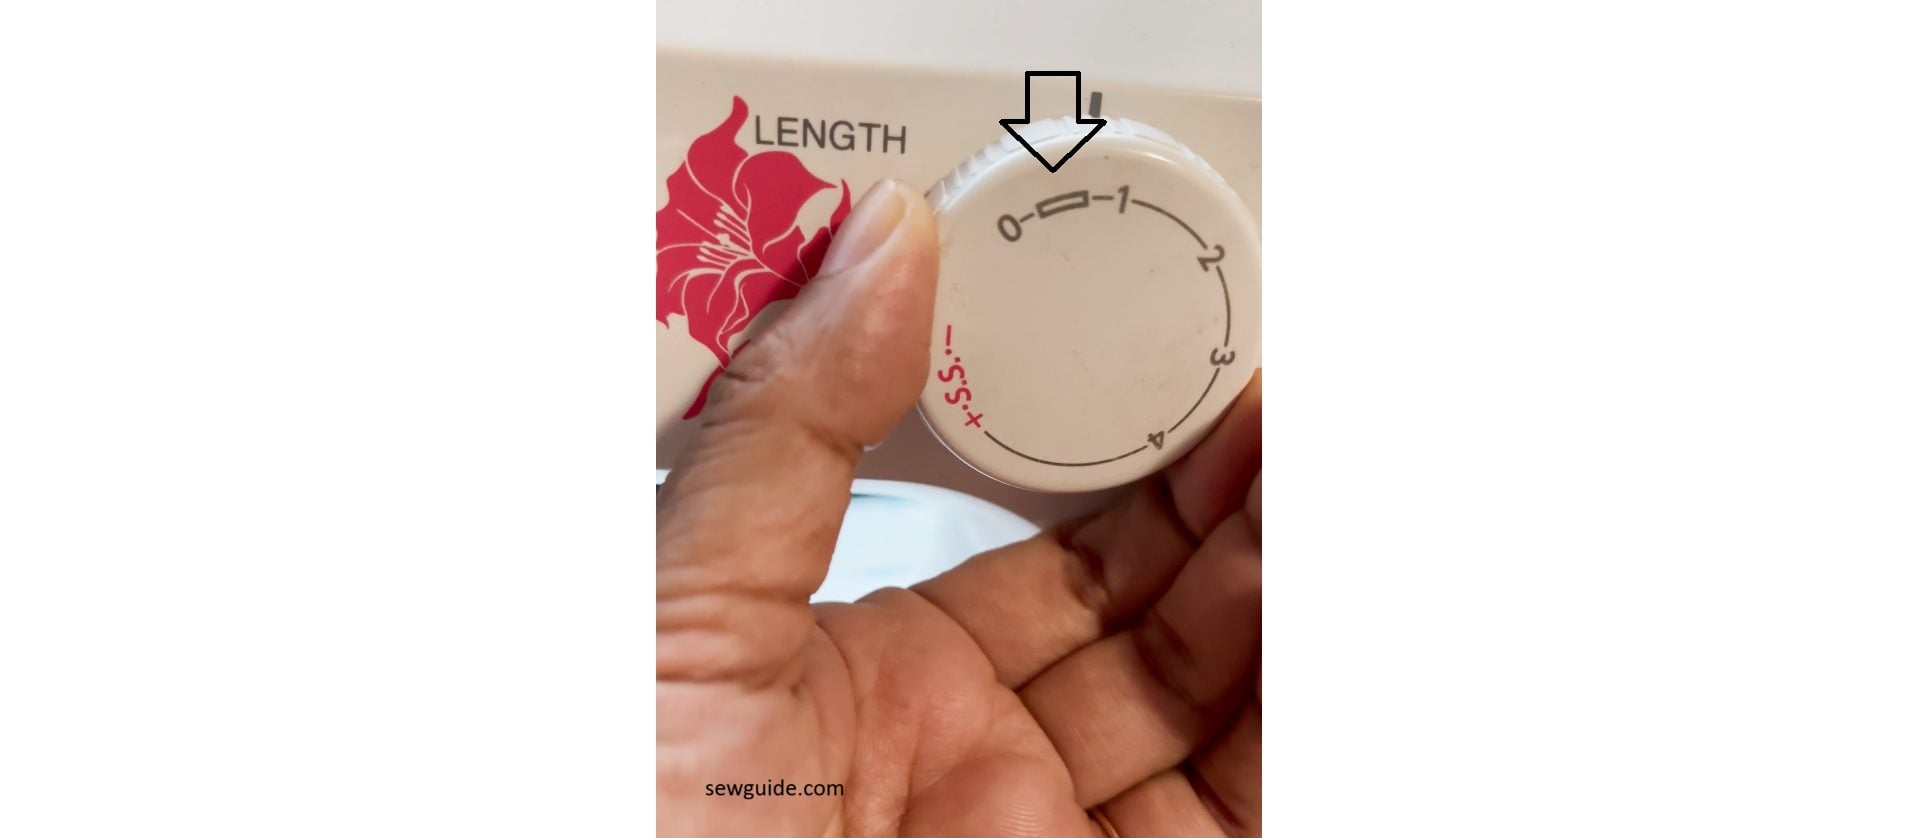
Use these settings, to be precise
| Setting | Recommended Range |
|---|---|
| Stitch Width | 2.5 mm – 5 mm |
| Stitch Length | 0.2 mm – 0.5 mm |
| Upper Tension | 2.5 – 4 |
| Presser Foot Pressure | Reduced Slightly |
| Speed | Medium to Slow |
| Needle Position | Center |
| Fabric Weight | Needle Type | Thread Type | Tension Setting | Interfacing |
|---|---|---|---|---|
| Lightweight | Microtex 70/10 | 60 wt Rayon | 2.5–3 | Lightweight Fusible Tricot |
| Midweight | Embroidery 75/11 | 40 wt Polyester | 3–4 | Woven Fusible Interfacing |
| Heavyweight | Embroidery 90/14 | 40 wt Polyester | 4–5 | Medium-Weight Fusible Woven |
Here is the video tutorial if you would rather watch the steps, starting from drawing the rose shape:
By light weight I mean fabrics that are soft, thin, and delicate, which includes materials like silk, chiffon, and rayon. You have to be very careful with these. By medium weight, I mean fabrics such as quilting cotton, linen, and poplin. Heavyweight fabrics include thick fabrics like canvas, denim, and wool coating. The best in my opinion are medium weight fabrics.
What I have found is that there is no need to match the base and the design fabric – you can applique anything on anything – just ensure that the design fabric is not so heavy that it will weigh down the base.
Apply interfacing
I interface the design fabric , not the base fabric. But interfacing can also be added to the background fabric depending on the fabric type and stitch density. Interfacing prevents the dreaded fabric puckers and tunneling and the edges of the curves distorting.
Baste the design
I usually use fabric glue for this. But this time I used hem tape.
Just put some scrap pieces of the hem tape and iron in place.
No more shifting of the piece as you sew – and no interfering and needle-busting pins along the stitching area.
Sew in place.
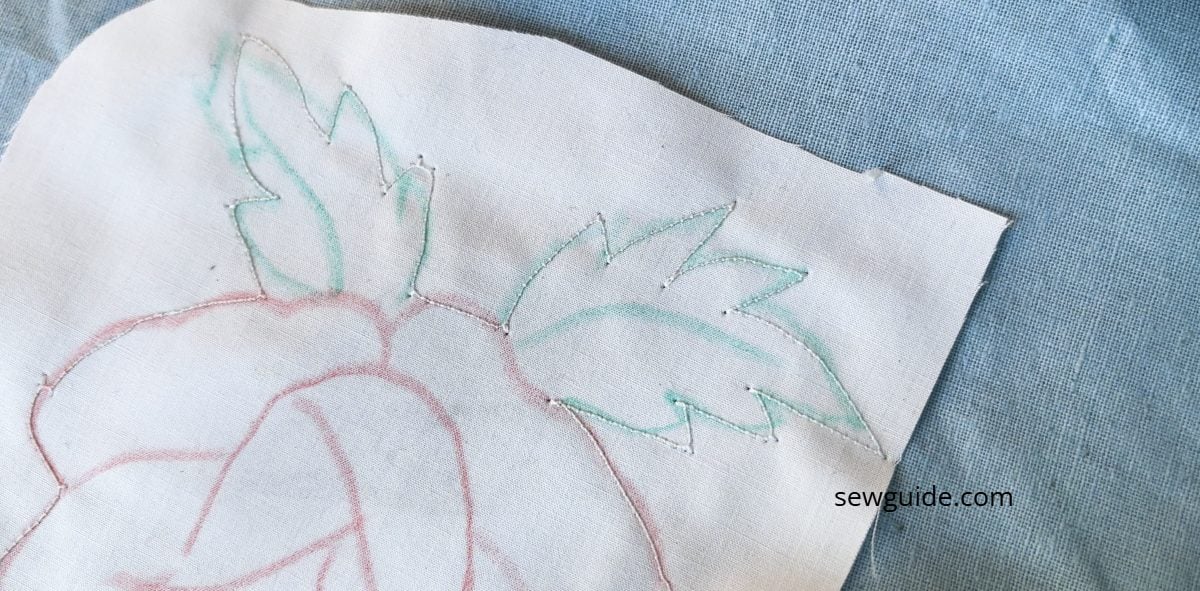
Using a long stitch length, sew the design along the mark of the design. Be careful as you sew to pivot with the needle in the fabric.
Cut out the design
Now that you have finished stitching along the periphery of your design, start to cut it out.
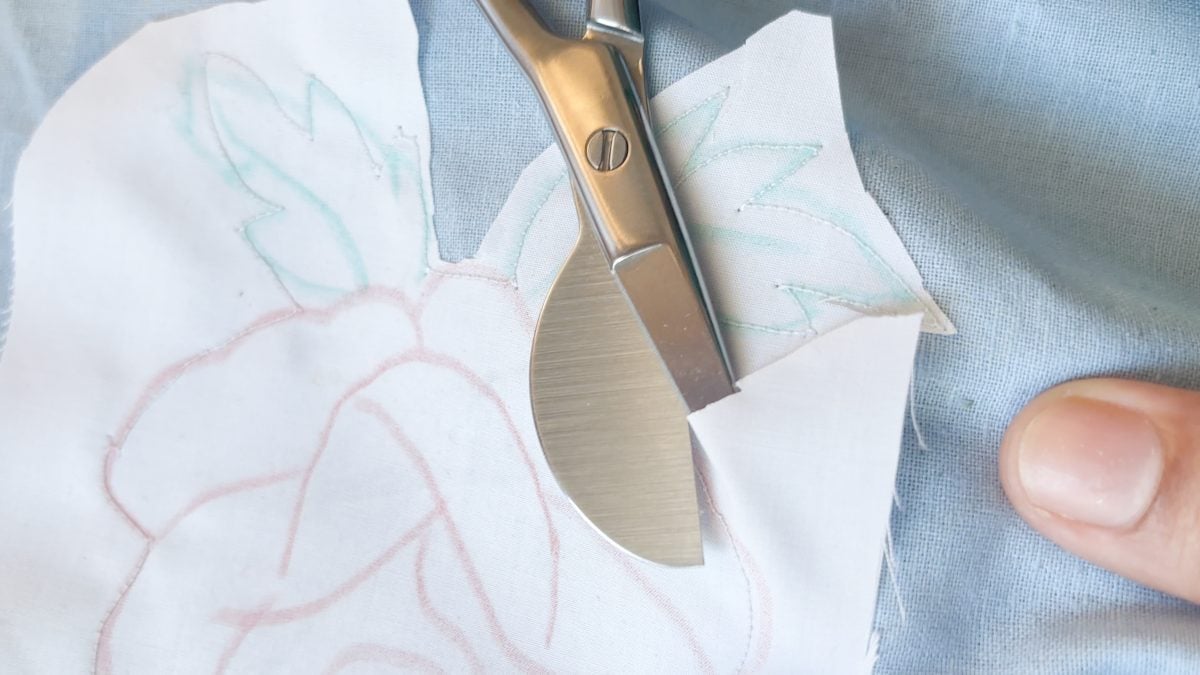
Use duckbill scissors for the best result. This scissors can be used flat against the base fabric, so you can cut out the design fabric as close as possible to the stitching line.
Satin stitch
Change the machine settings according to your fabric and the result you want. Refer the table I have given above. Stitch over the stitching line, covering the fabric edge fully with tightly packed zig zag stitches.
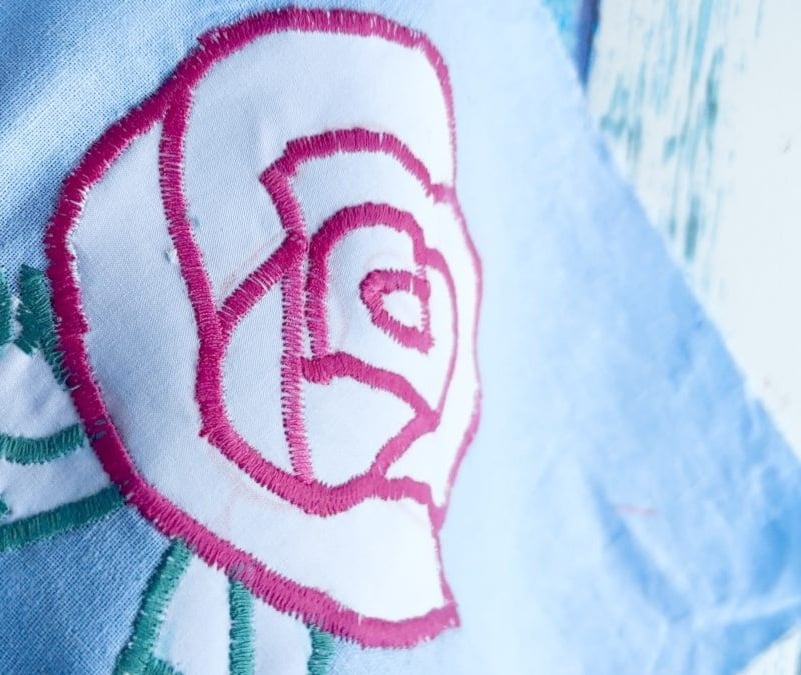
Depending on the quality of your sewing machine stitches, you will have to go over the stitching again. Mine was not the greatest and the tension was so bad, the bobbin thread was coming up. After adjustments and going over the stitching once again, I got a passable applique design, which could have been better. I would try this on a garment next.
My learnings : Never ever pull the fabric as you sew. I got some distorted stitches because I pulled. And also becaue I forgot to pivot with the needle down.
Related posts : Best stitches to hand sew applique ; Zigzag stitch setting