There are many types of plackets used to reinforce slits in clothing. In this tutorial, I’ll show you how to sew a slit placket that creates a strong base for buttons and buttonholes. It can be added to an existing garment by cutting an opening and stitching the placket in place. It reinforces the opening, prevents fraying, and helps tight garments become wearable again—perfect for altering existing clothes. When a garment is a little tight around the neck, this is my go-to solution.
If you want a visual tutorial – watch the video – press stay to continue watching :
Step 1: Mark and Cut the placket pieces
Cut out One large placket fabric ; the length of this piece should be the Slit length + 1 inch extra.
Width of the fabric should be the width of the slit you are cutting ( which depends on your button size)* 4 ; this plus 2 inch extra.
You need to mark the center front of your clothing.
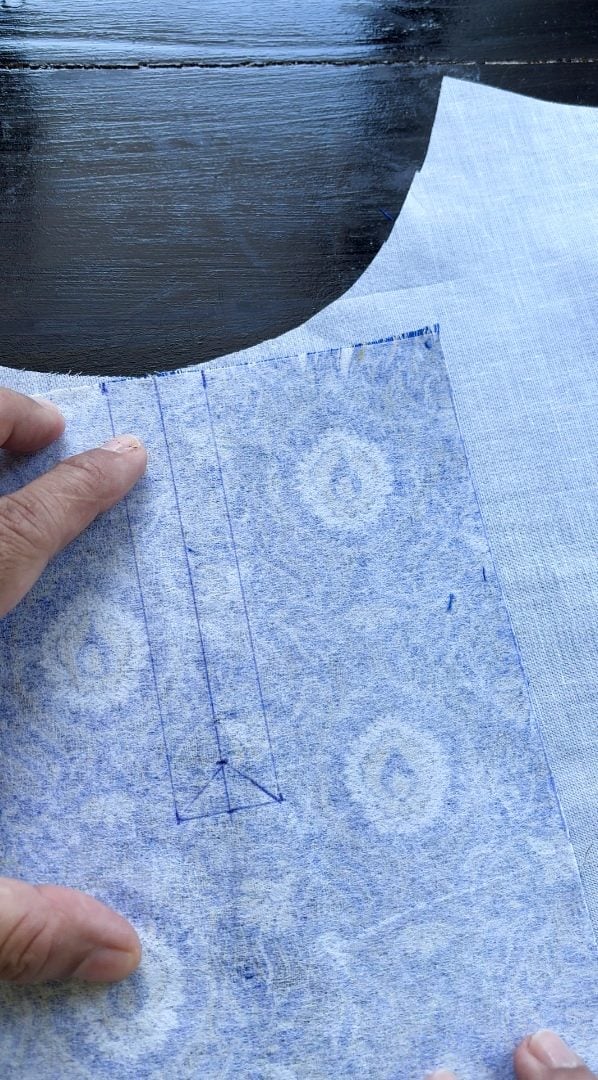
This placket, as I said and as is usual, starts off as a slit. You have to mark the slit opening on the backside of the placket fabric – Mark 1/2 inch on either side of the slit as in the picture. At the end of the slit mark a traingular shape to cut the slit for turning.
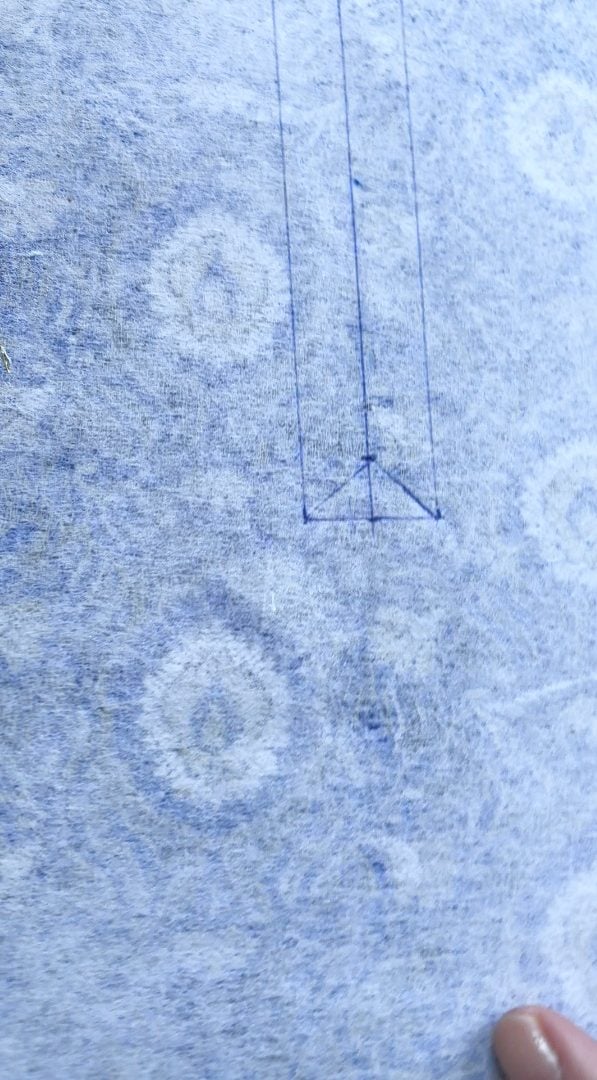
Draw the slit length clearly using a marking pencil.
Mark the center line where the placket will sit on your clothing. Keep the placket right side down on the top of this slit. Pin in place.
Place the placet piece wrong side up on the garment right side up. Keep it aligned on the center mark you made earlier on the garment.
Pin in place.
Step 2. Stitch the placket to the garment
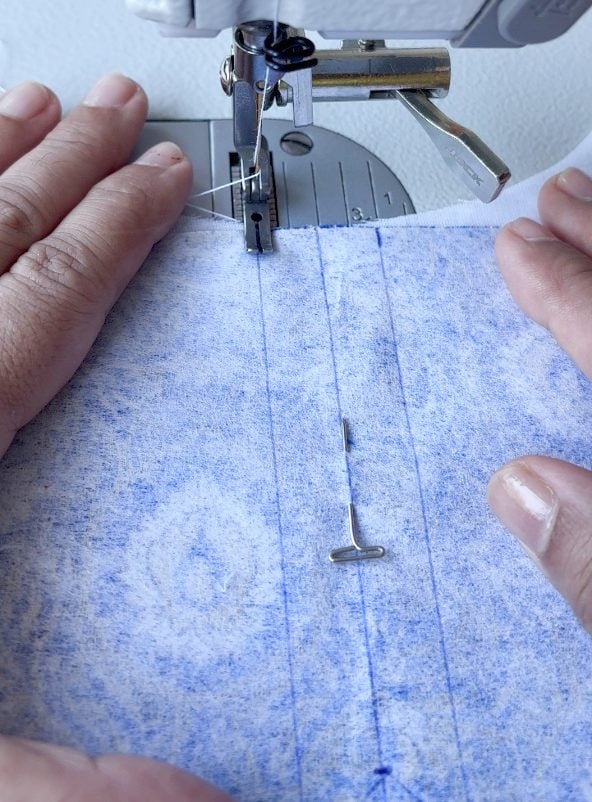
Sew on the marks you made on either side of the center line of the slit. Do not stitch on any other lines – just those parallel lines.

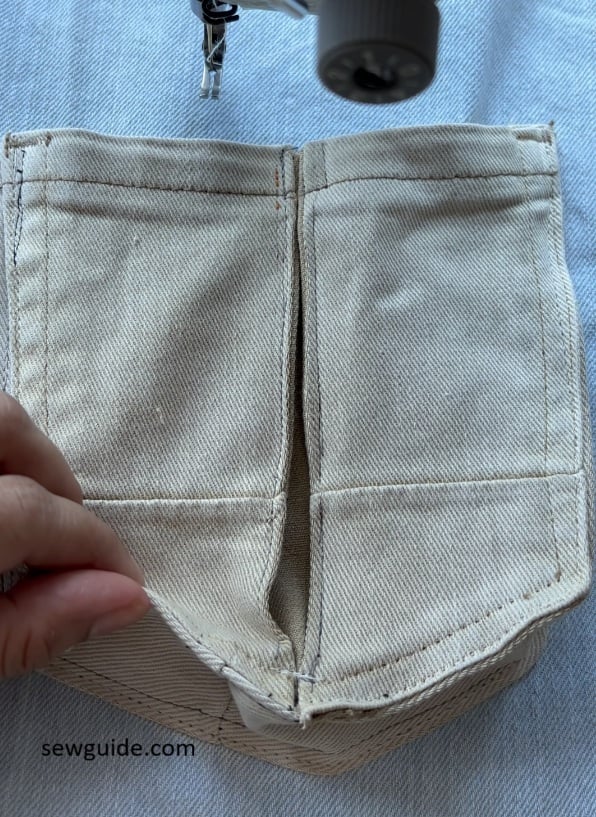
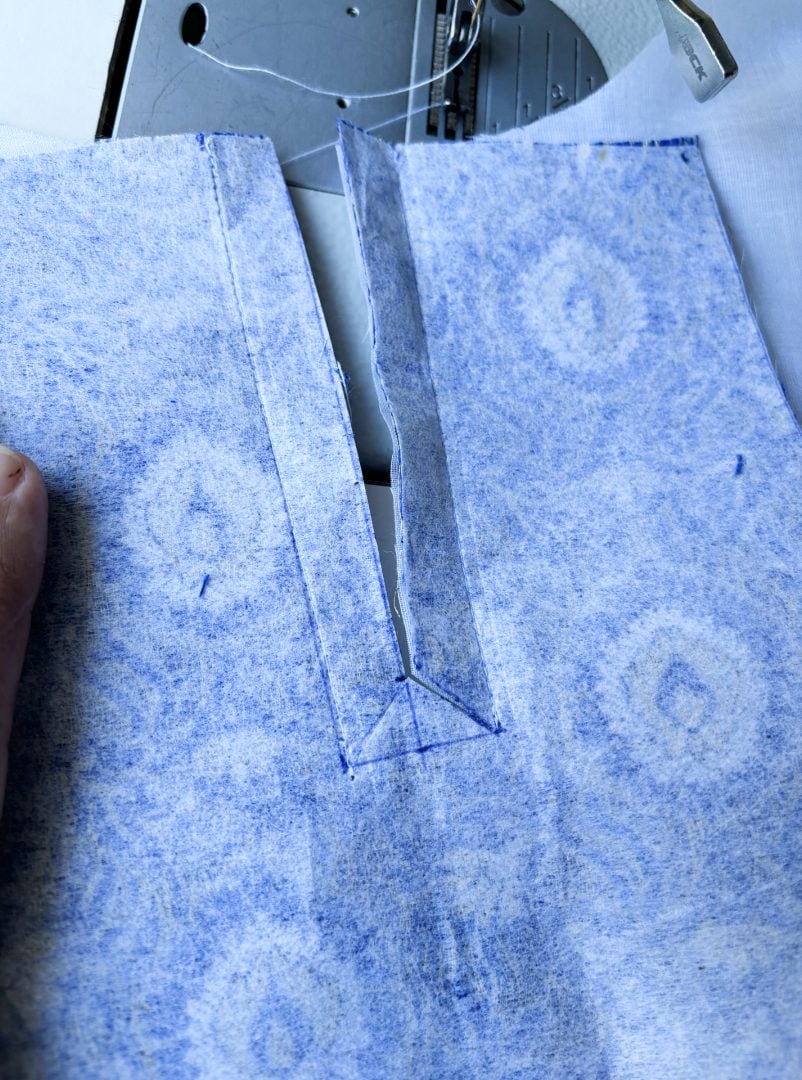
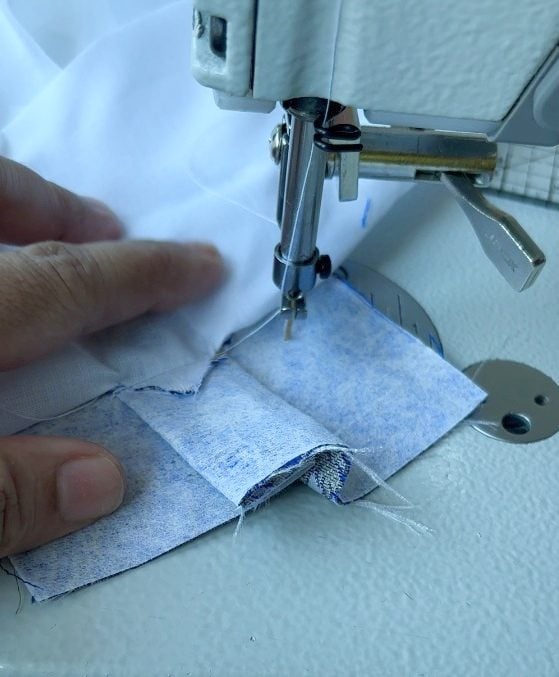
Step 3. Cut straight along the line of the slit.
Cut along the middle slit marking. And also the sides of the triangle marking. Stop exactly at the marking on top of triangle—do not overcut. Cut the sides of the triangle shape.
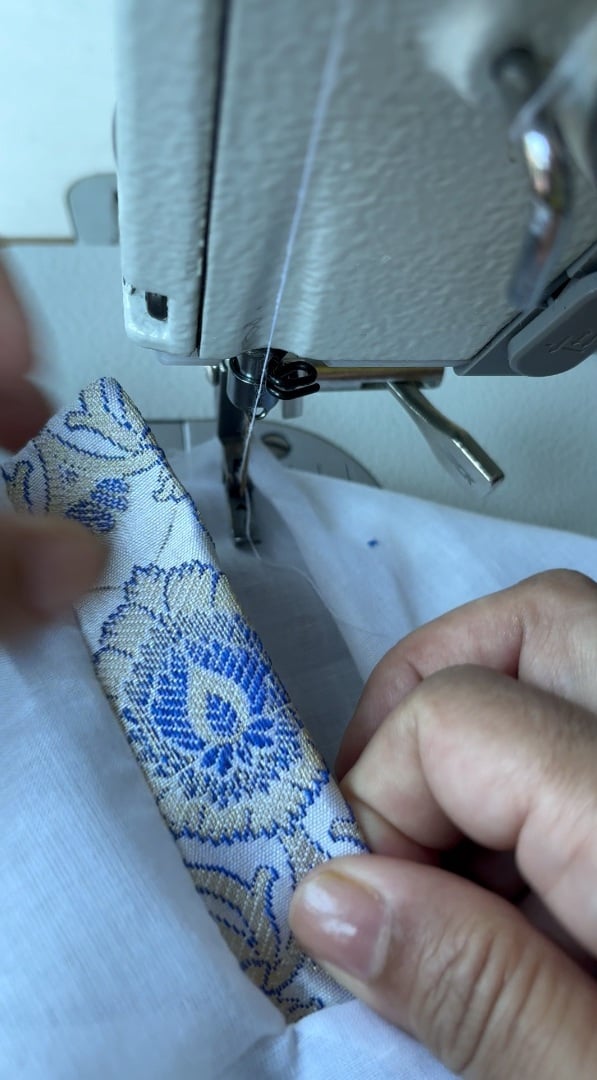
Step 3: Fold and stitch top edge
On the back fold one side of the placket piece so that the folded edge meets the stitching line on the other side of the slit.
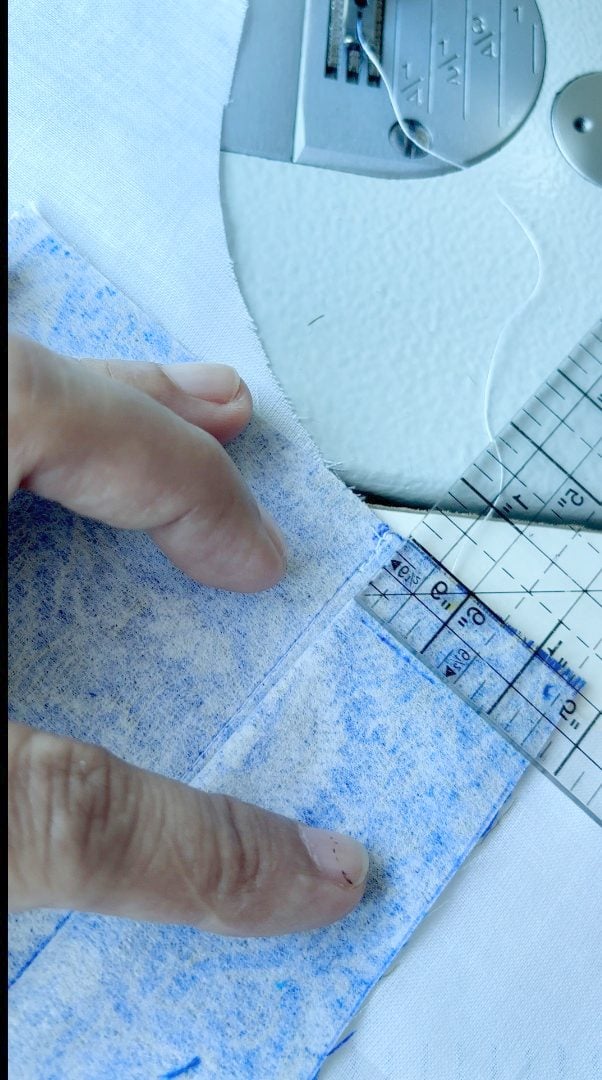
Mark 1/2 inch at the top edge. Stitch through this line – this is done so that the top edge of the placket is neatly finished.

Do the same for the other side of the placket – check out the video if you are confused about the step. After stitching the top edges of either sides of the placet, cut off the extra and turn the placket right side to the outside.
Step 4: Turn the Placket to the front
Push the placket fabric through the slit to the front side of the garment. Gently push everything cleanly without puckers.
I used a pencil to square off the slit corners neatly. I think I should have used a knitting needle or something- anything blunt but pointy would do.
Press – you want the slit to lie flat and the edge to be sharp.
This creates a clean, strong top edge and finishes the placket professionally.
Form the Placket Folds
On one side of the slit, fold the placket fabric inward along the stitched line.
Then fold it again to cover the raw edge completely.
Repeat on the other side, making sure:
One side overlaps the other
The overlap is wide enough for buttons and buttonholes
Press thoroughly to set the folds.
Step 5: Secure stitch the Placket
At the bottom of the slit, stitch across the triangular section together with the placket piece – this will hold the opening at the bottom edge – as you do it ensure that the placket is formed neatly and overlapping precisely .
Topstitch close to the folded edges to hold the placket in place.
Stitch evenly from top to bottom for a clean finish. Make sure that the fabric edges are inside the placket as you top stitch
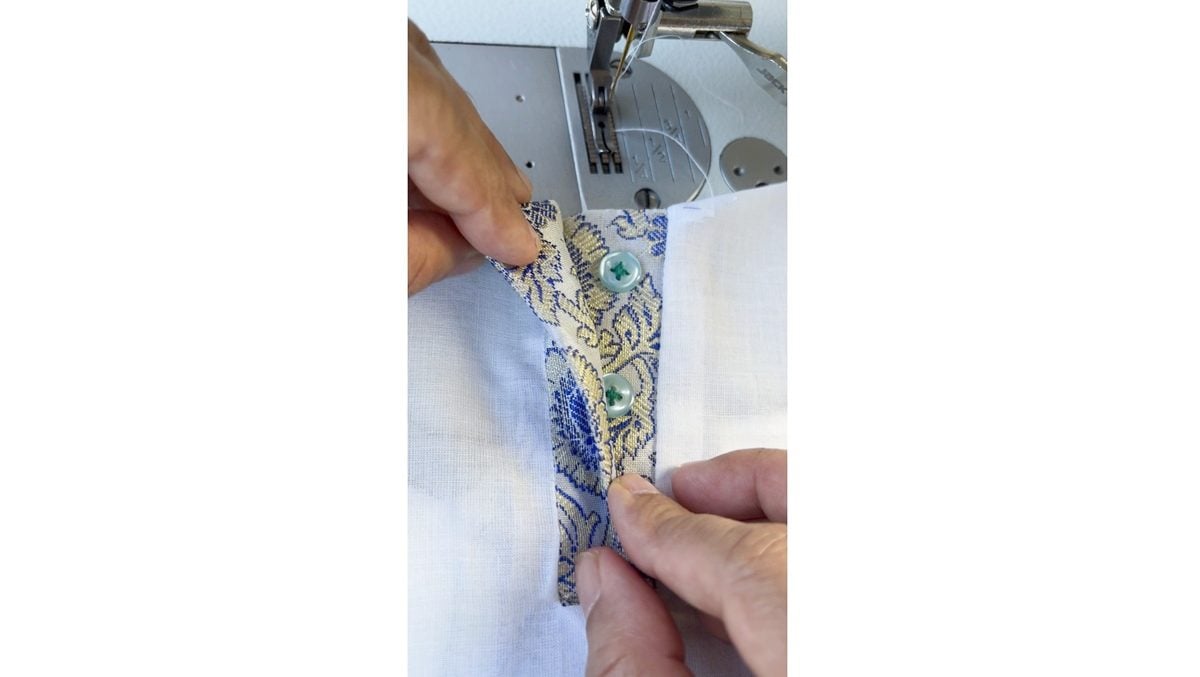
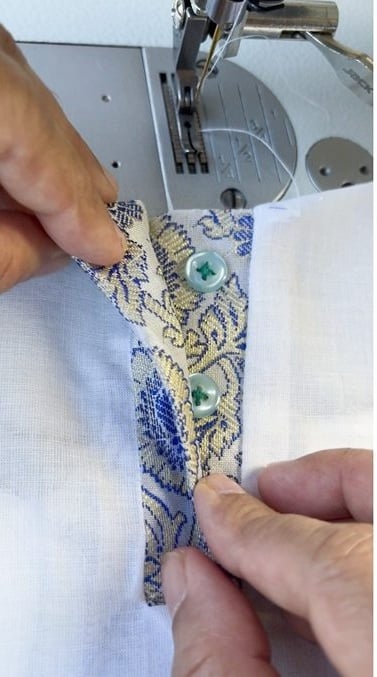
Step 6: Mark and Sew Buttonholes and Buttons
Mark buttonhole placement on the overlap side of the placket. Keep spacing even and aligned with the center line.
Sew buttonholes, then attach buttons to the underlap.
Related posts : How to sew sleeve plackets