The yankee puzzle patchwork block is a quilt classic- a staple of American quilting (which you must have guessed from the name). And it is one of the basic and most easiest of patch work blocks. You can easily make it with small 4 inch (or even smaller) fabric scraps and use it to decorate your clothes, scarfs, bags etc.
The term “Yankee” is used for designs that were popular in New England (USA). This simple block made of square fabric pieces gives you a perfect example of how simple blocks makes the prettiest and as a bonus, you can use up all your scraps.
Related posts: Names of other patchwork blocks
The dimensions of your final yankee puzzle block will depend on the square fabric pieces you cut first.
To make this quilt block in different sizes ( to fit all the different sewing projects you will be making for this) get the final block size and the square fabric scraps you should first cut
| Cut 4 small squares of this size | To get Final block size |
|---|---|
| 3.5″ by 3.5″ | 4 1/4″ × 4 1/4″ |
| 4″ by 4″ | 5 1/4″ × 5 1/4″ |
| 4.5″ by 4.5″ | 6 1/4″ × 6 1/4″ |
| 5″ by 5″ | 7 1/4″ × 7 1/4″ |
Color choices for the block
Cut 4 square fabric pieces : 2 from a light color and 2 from a dark color OR 2 from printed fabric and 2 from plain fabric. This is the usual way. But there is no end to the possibilties of mixing and matching patterns to create your own version of this classic block.
Using a Rotary cutter and mat and Quilting ruler cut out the small fabric squares (4 nos).
From Fabric A – plain fabric : Cut out 2 squares, in any of the above dimensions. I chose to make them 4″ × 4″. Cut 2 squares in the same dimensions that you cut A from patterned fabric. The Yankee puzzle block’s charm comes from the contrast of the fabrics, so choose accordingly.
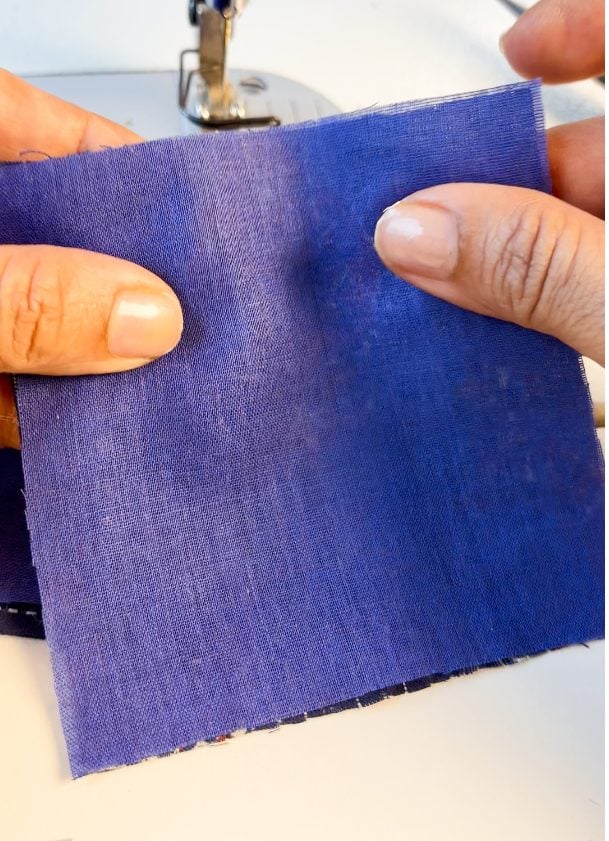
Keep one plain fabric and one patterned fabric one on top of the other.
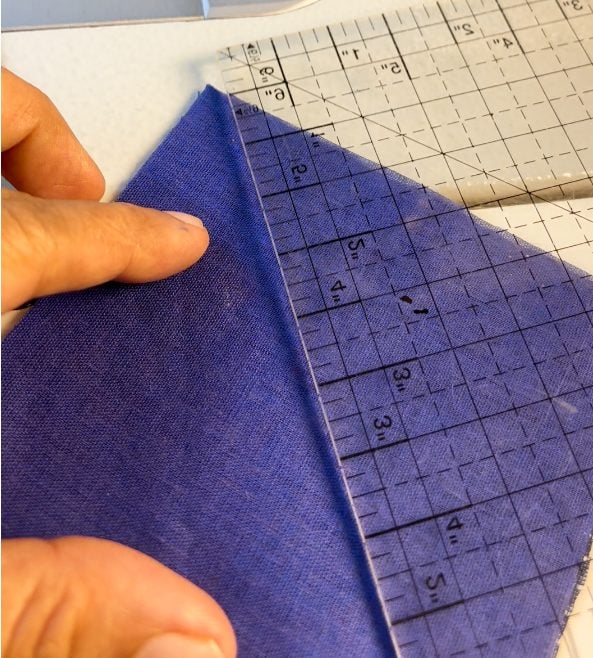
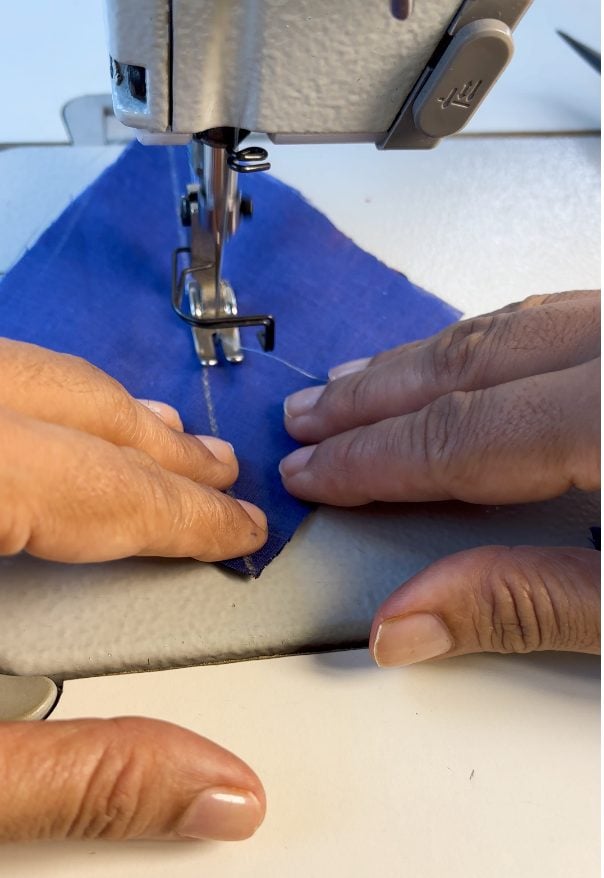
Mark a diagonal line across the top square.
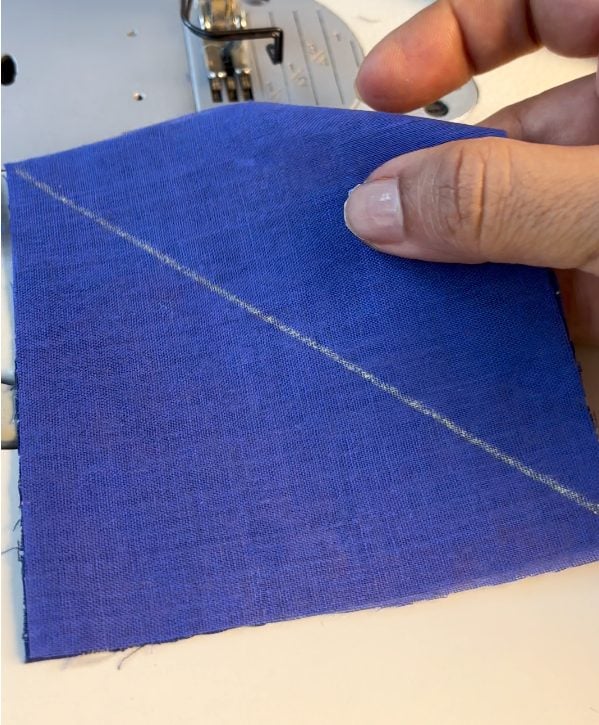
Using a ¼” seam allowance, sew the two fabric pieces together along this marked line. You will be sewing on either side of the marked line.
Cut along the marked line.
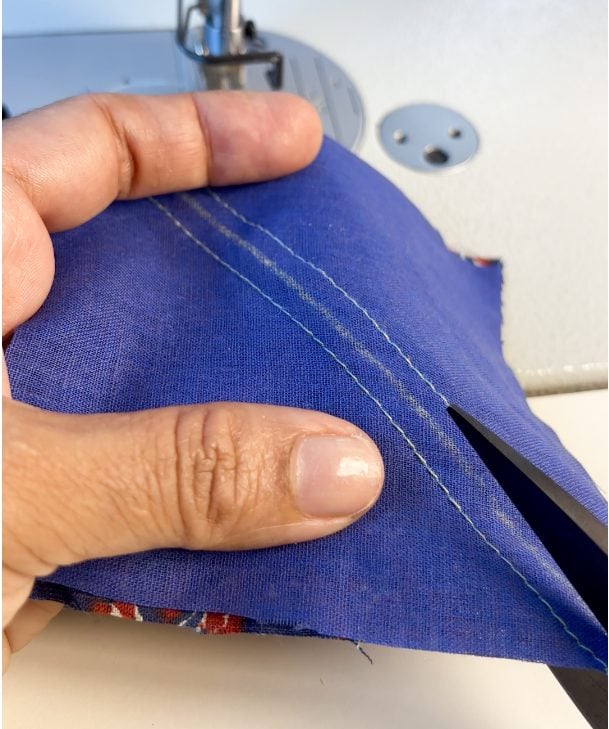
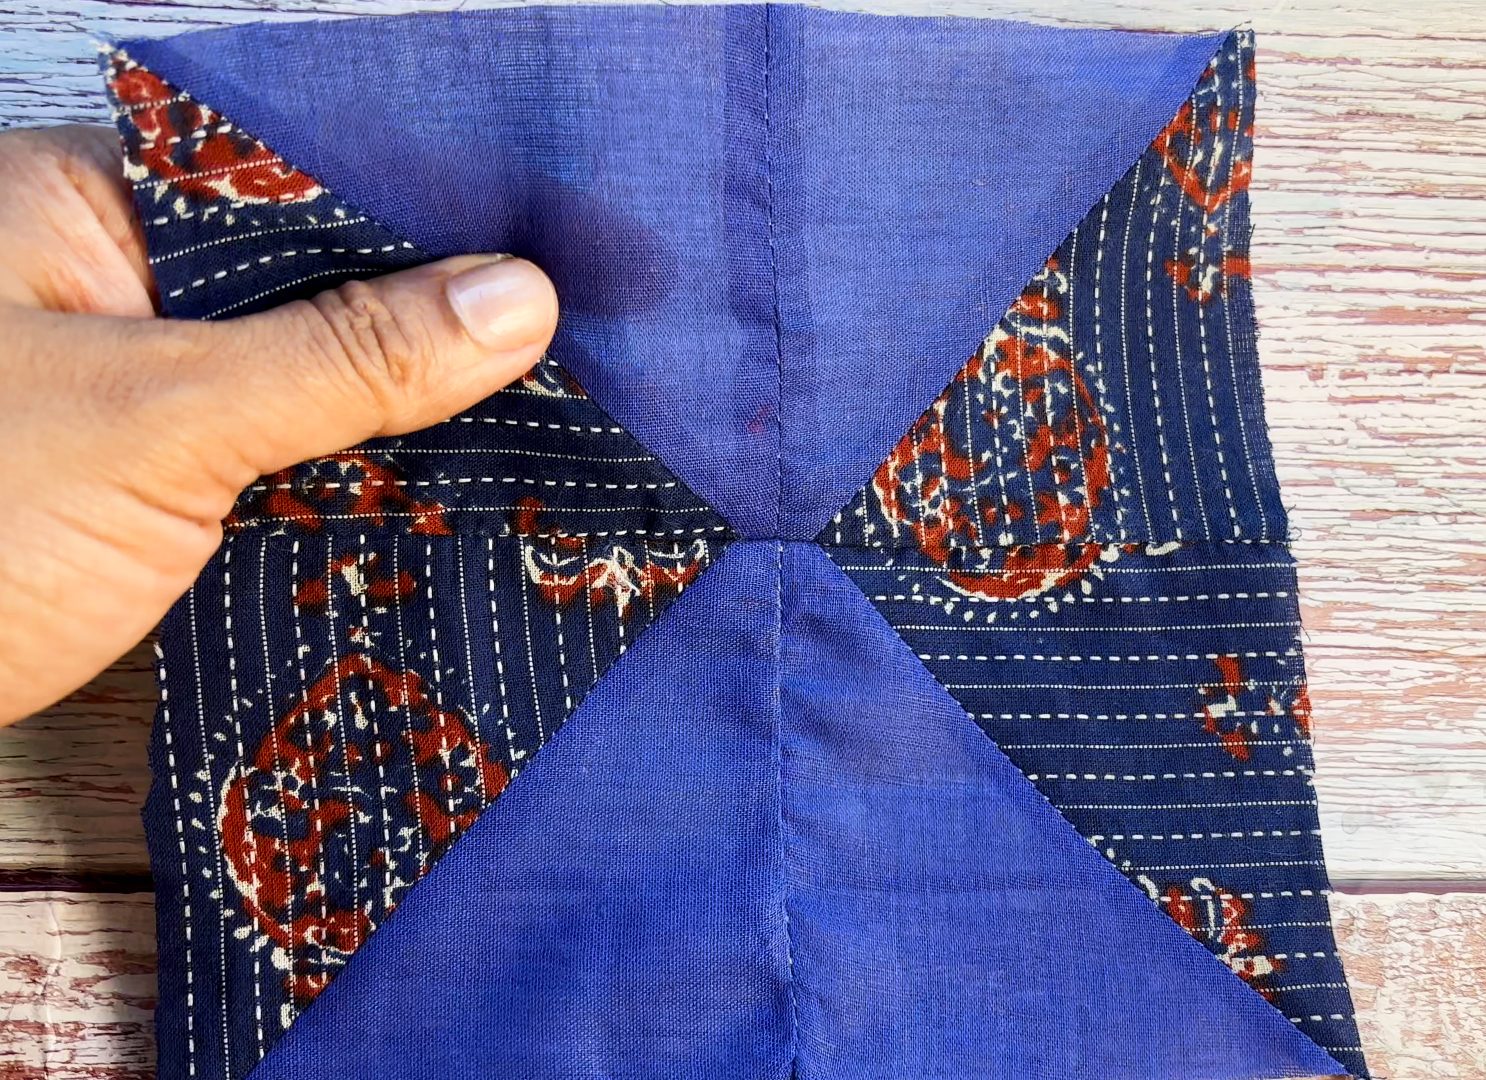
You will get two perfect squares, which is a half square triangle of one light and one dark fabric.
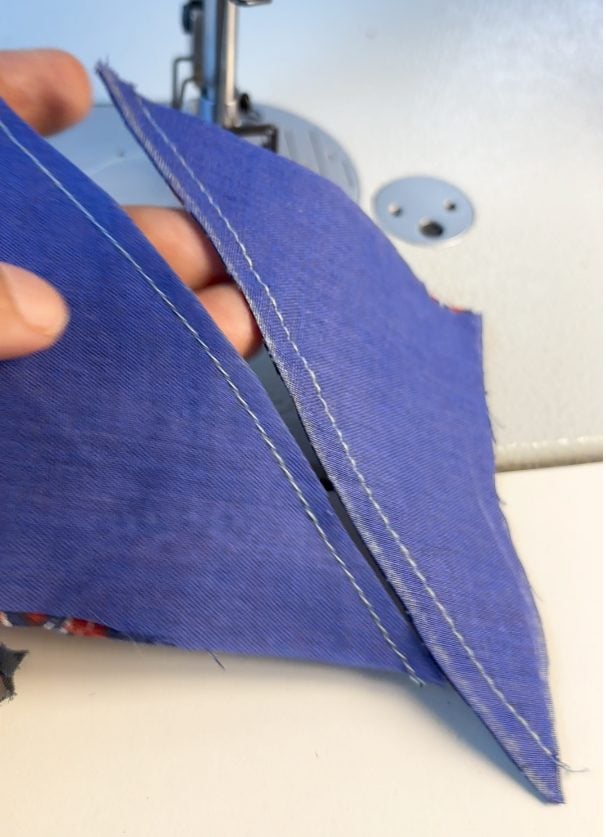
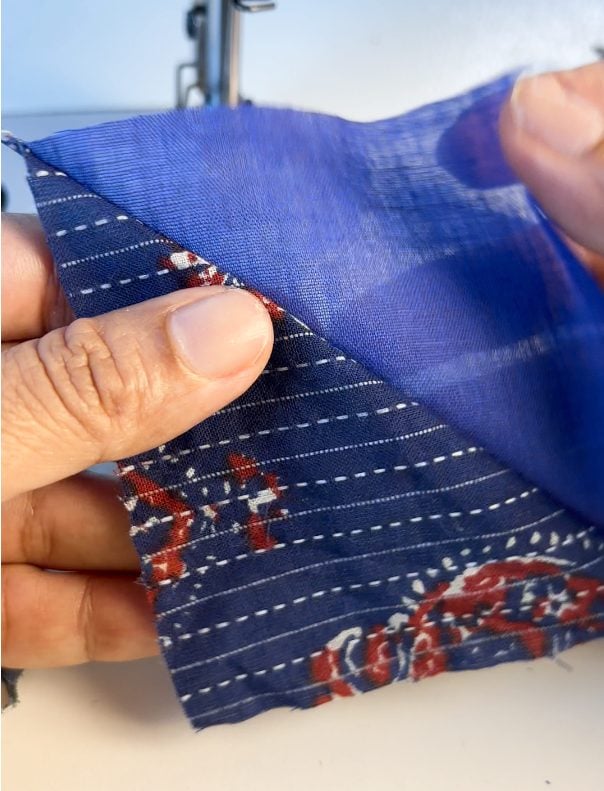
I always press seams open as soon as a piece is sewn – this makes the patchwork blocks look neat and helps the block look crisp. But if you have chosen a very light colored fabric and a very dark colored fabric, Press seams toward the darker fabric — hides shadowing.
Open up your piece to get this half square triangle (HST).
Some people would use the ¼” presser foot when stitching for accuracy of seam allowance. This is very important in patchwork.
When you do this with the 4 squares, you get 4 half square triangles like these –
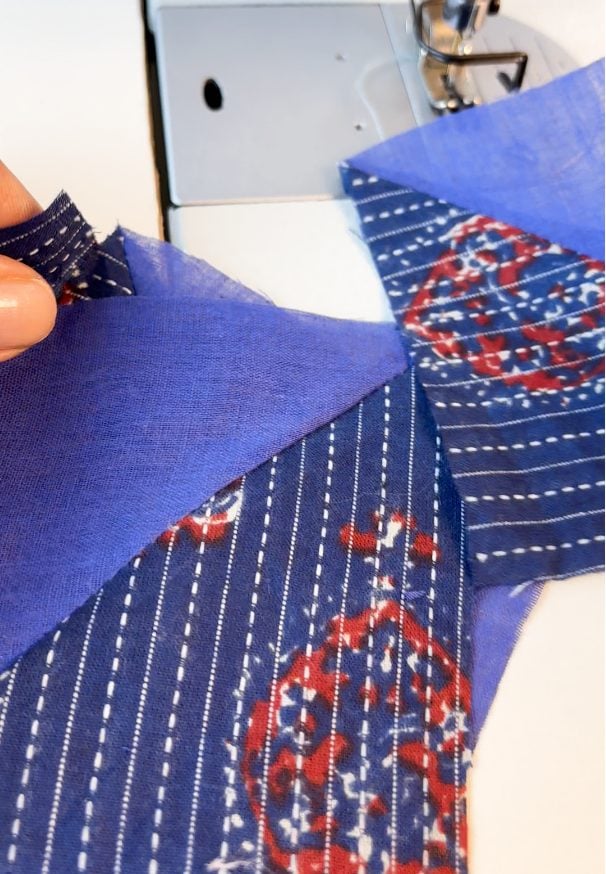
Match seam intersections carefully and pin before stitching. This will prevent each of your blocks looking wonky.
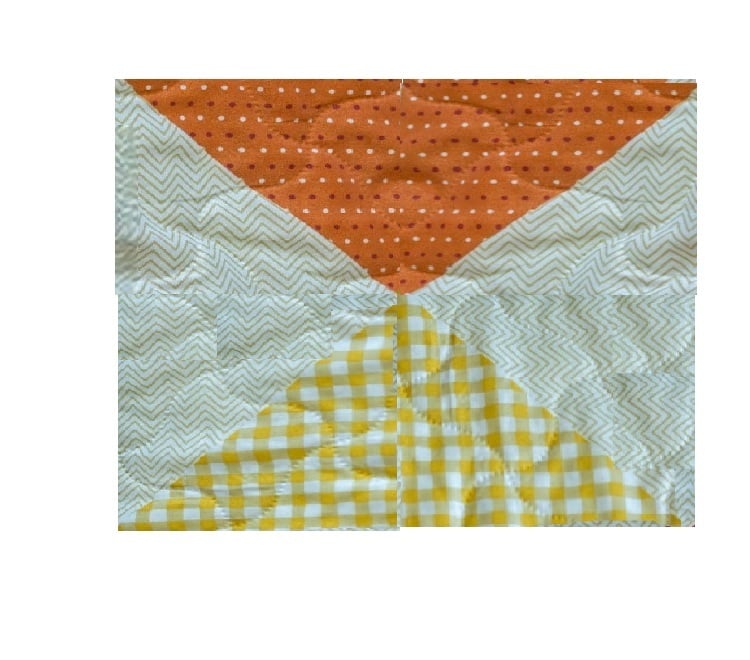
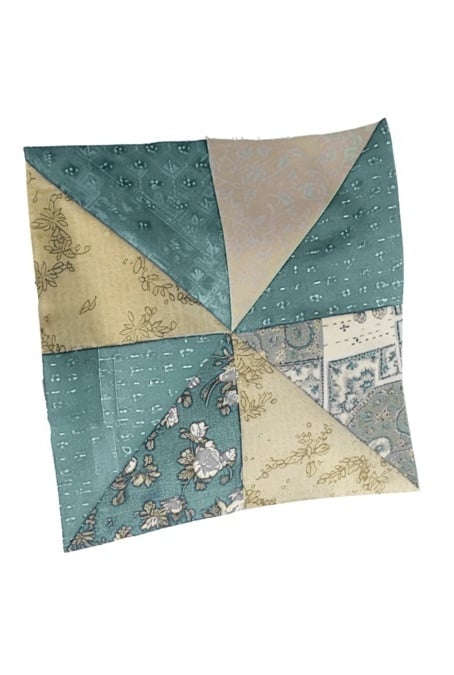
Join these squares so that you make a pattern like this .
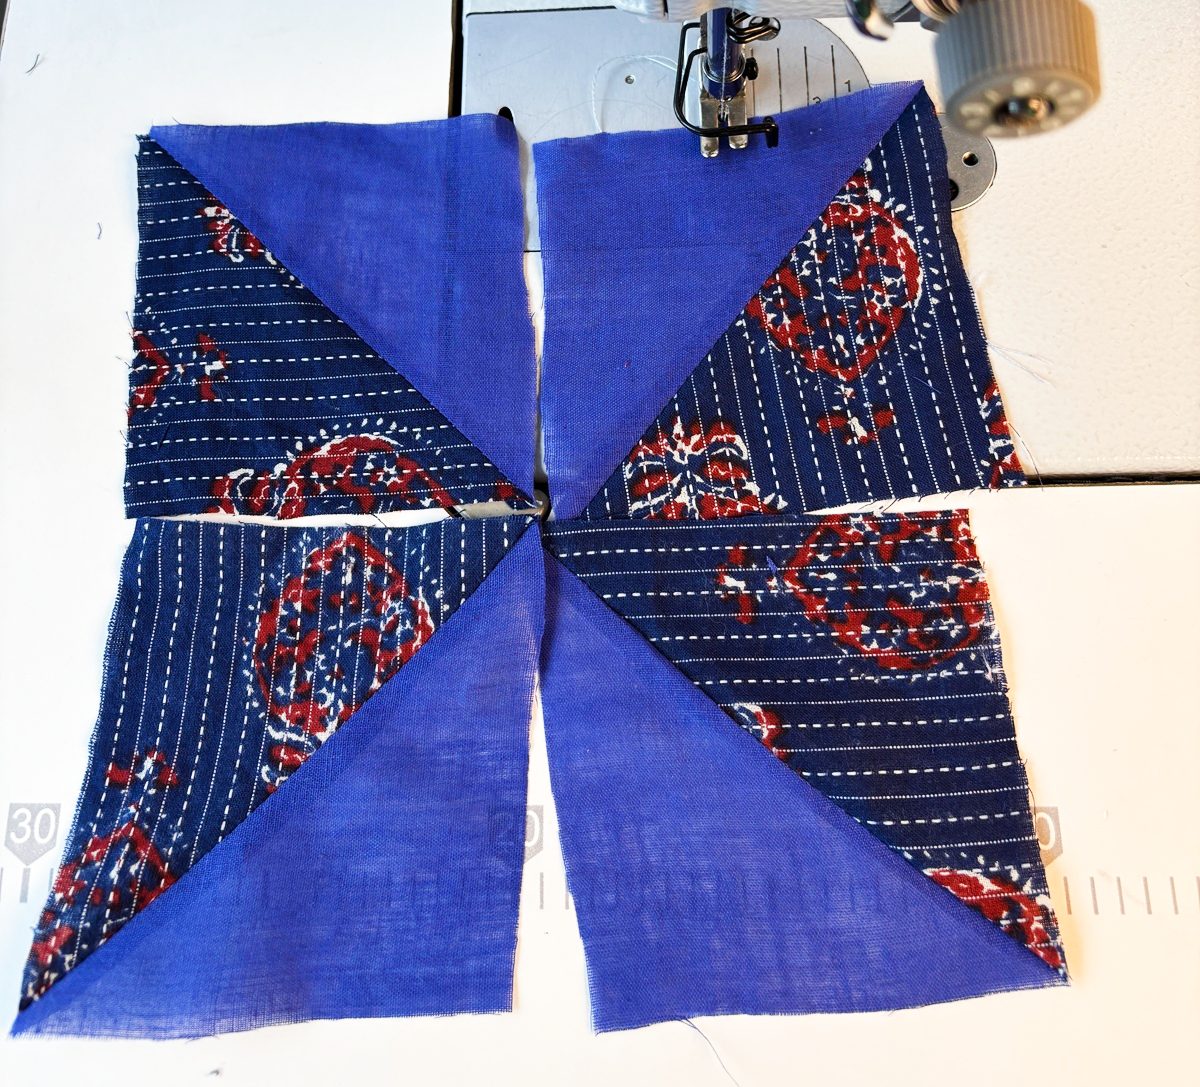
And, this is your yankee puzzle block.
Easy, isn’t it?

Related posts: Logcabin patchwork block