There is something about lace trims that calls out to the whimsical side of me. Whether it’s delicate eyelet lace, intricate guipure or Venice lace, scalloped edges, or classic crochet lace, they all look stunning to me. I would buy the prettiest out there and add it to all the fabric edges I have.
But if I were being practical, I’d first consider the fabric I plan to sew it onto. On lightweight, delicate, or open-weave fabrics, heavy lace trims like wide crochet lace can start to droop over time. It’s a disappointing reality, but one worth keeping in mind when making your choice.
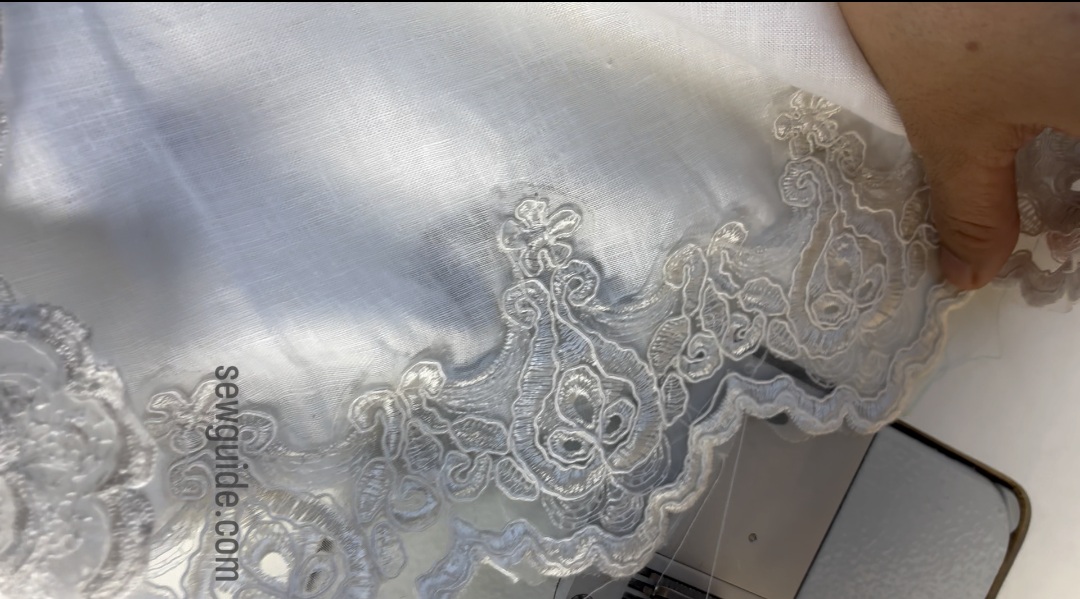
An intricate lace like this is often preferred for wedding gowns and christening dresses.

Narrow lace is preferred for delicate detailing. Thin crochet laces are perfect for edging lightweight fabrics.

Cotton lace trims are ideal for children’s dresses as they are breathable. However, shops are often filled with synthetic laces, which are durable and colorfast but lack breathability and may irritate baby skin.

You will have to buy stretch lace trims for stretch clothing. As for the color, If you buy same color lace as the fabric of your clothing, it will be more subtle and sophisticated. But that is my thinking. You can go for contrasting colors and get an eye-catching bold effect.
Wide laces can be cut to the width of your choice – especially the synthetic ones, as they do not fray at the cut edges. Entredeux lace is a ladder-like lace often used as insertion lace. It can be purchased at haberdashery shops, but if you have a large collection of trims, you might find one with an open weave that you can cut into a ladder-shaped design to create a similar effect.

From the rest of this same lace trim, you can cut a scalloped lace trim.

When you sew it to fabric edge, it will look like this.

Related posts : Add lace trims on neckline edge; Ideas for sewing lace trims to sleeve edges; 20+ different fabric trims ;10 best lace trims

SEWING A SIMPLE LACE EDGE

When you sew lace trims this way the back will look as finished as the front.
Step 1. Prepare the fabric and lace
Wash and press both the fabric and the lace trims to remove any creases and prevent shrinkage later.Trim and finish the raw fabric edge if necessary to prevent fraying. Cut the necessary length of lace for the edge.
Step 2. Finish the fabric edge
You can serge or zig zag the edges. Or simply turn under and stitch. What I have done is – Turn the fabric edge to the back 1/4 inch and stitched in place.

Step 2. Keep and stitch the lace trim on fabric

Keep the fabric right side up and place the trim right side down, 1/2 inch from the fabric edge.

Step 3. Turn the fabric edge

Turn the extra seam allowance to the back and top stitch the trim edge in place.

MethoD 2. Layered lace edge
This is a favourite method of adding more than one layer of lace along an edge with a small border in between

Watch the tutorial as a video:
Step 1: Attach the First Lace Trim (Extending Beyond the Edge)
Keep the wrong side of the fabric facing up.
Place the first lace trim wrong side down on top of the fabric, 1 1/2 inches inside the fabric edge.

Ensure the straight edge of the lace runs parallel to the fabric edge.
Stitch the lace in place.

Step 2: Fold the fabric edge over the lace stitching

Fold the fabric edge over the stitching line, encasing the raw edge of the lace within the fold.
Press the folded edge flat for a crisp finish.

Step 3: Turn the fabric to the right side
Flip the fabric so the right side is facing up.

The lace trim will now extend beyond the fabric edge, creating a decorative border.
Step 4: Attach the Second Lace Trim (Underneath the Edge)
Take the second lace trim and place it underneath the fabric edge of the folded fabric, aligning the straight edge of the lace with the folded fabric edge.

Stitch the second lace in place.

The first lace trim extends beautifully beyond the fabric edge, giving a decorative finish.
The second lace trim gives a layered effect. Once is nice, but Twice is paradise.
Method 3. Adding lace TRIMS in between fabric

Watch the video:
Method 4. Sewing scalloped lace TRIMS
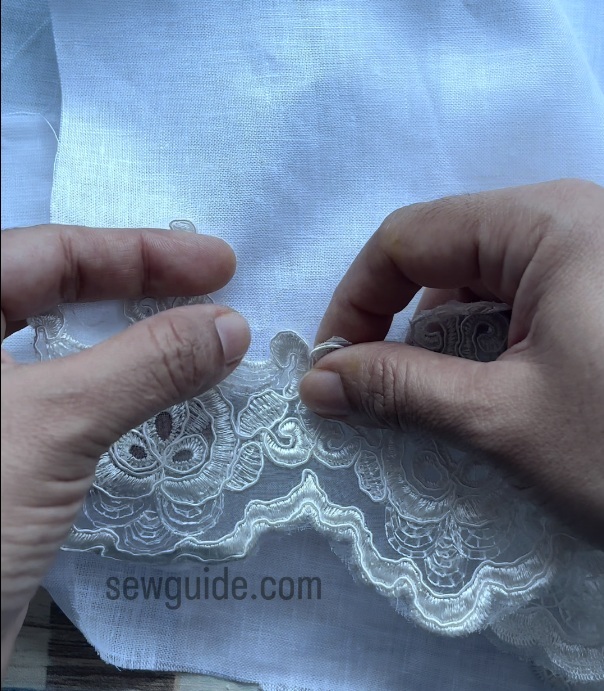
This is the method used to sew lace trims along wedding dresses and lingerie.
Take the trim and pin it over the fabric edge, first. Or baste stitch.
The trim is then top stitched using a tight zig zag stitch for woven fabrics and straight stitch over non-fraying fabrics.
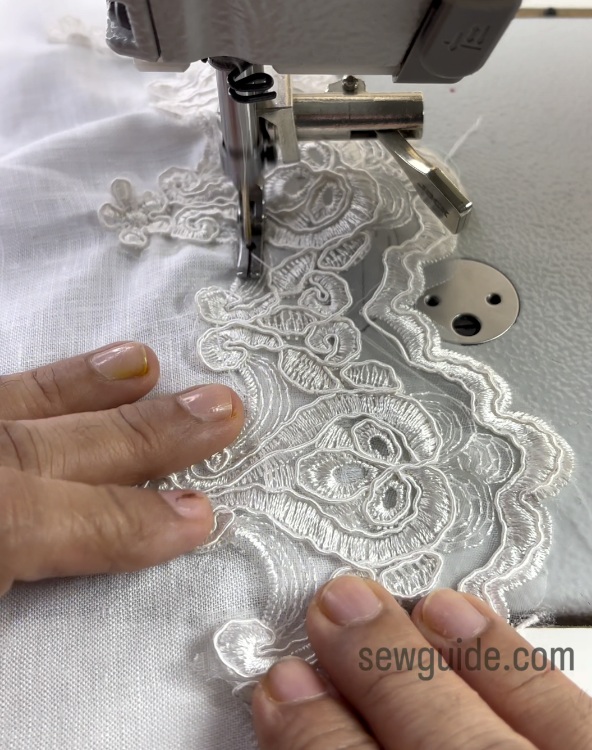
The contours of the lace trim is followed.
After this, the fabric underneath is trimmed beyond the stitching line.
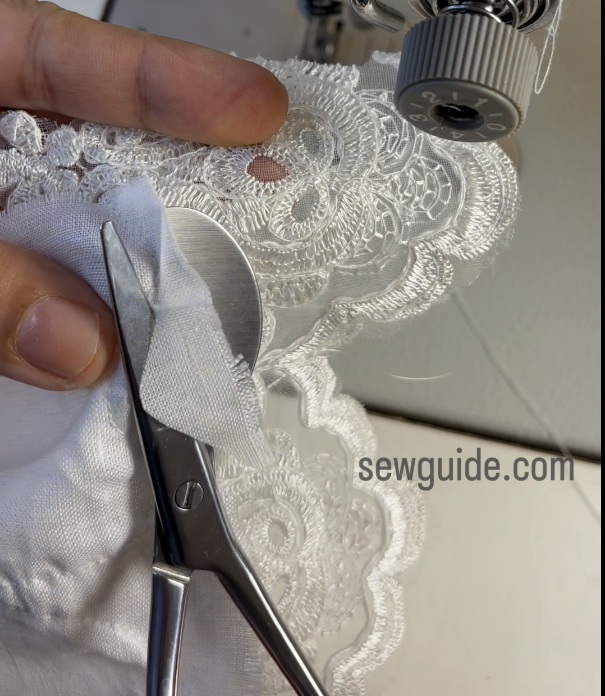
This reveals the lace trim properly on the front.
You can watch the video to see how it is done
Related post: Sew lace-trim inset with mitered corners on fabric edges; How to attach lace trims on necklines ; Fabric Trims & their uses in Fashion Sewing