Embroidery machine embroidered letters – it is a no brainer. If your embroidery machine is good enough and the file is optimised for stitching well, you are guaranteed beautiful looking letters on your t-shirts in no time. But what if you don’t have an embroidery machine. How to personalise your t-shirt with your own letters so that they look unlike any other in the whole universe. That is what I decided to check this time – that, though nothing can beat the precision of machine embroidery, your efforts without one can look even more charming.
The methods I used – Reverse appliqué, bobbin work, and layered raw-edge appliqué, all create dimensional lettering that looks intentionally handmade rather than machine-perfect.
Method 1. Embroidering Letters with sewing machine
Not embroidery machine, but your regular sewing machine. This is a very easy method. And it avoids extremely dense satin stitching, which may tear lightweight tees.
But you need a sewing machine with a metal bobbin and that too, an extra bobbin case. ( I guess you can try it out with the drop in bobbin machines too; the only issue is that with these machines you cannot adjust the bobbin tension, and thick thread used in this embroidery needs a lesser tension)
Also remember that your t-shirt is made of a thin jersey knit fabric and needs to be treated a bit differently unless you do not care about what happens to it. For jersey knits, use 75/11 or 80/12 ballpoint needle for machine stitching – this will prevent holes forming and slightly lengthened stitches (2.8–3.2 mm) to prevent tunneling.
Basically this method is called bobbin work and in this method, you wind a thick thread on the bobbin and stitch it on the reverse of the tshirt so that the bobbin thread stitches on the front of your t-shirt.
You can design the letters for embroidery on canva , which is the easiest way to design embroidery or if it is just a casual monogram draw it freehand. The easiest and most professional finish is to take printout of the design on a watersoluble embroidery transfer sheet – you just have to mirror the design and print.
You need some thick thread – the kind we use to sew jeans top stitching. And an extra bobbin case ; this extra is used so that you don’t damage your original one; you have to alter the tension of your bobbin case.
Decrease the tension of your bobbin case by loosening the small screw on the bobbin case.
What I have learned from years of sewing is that “you don’t disturb something that works” especially the tension of your sewing machine. So this “extra” one is a must, not an option. Wind your thick thread on your bobbin and insert it onto your bobbin case.
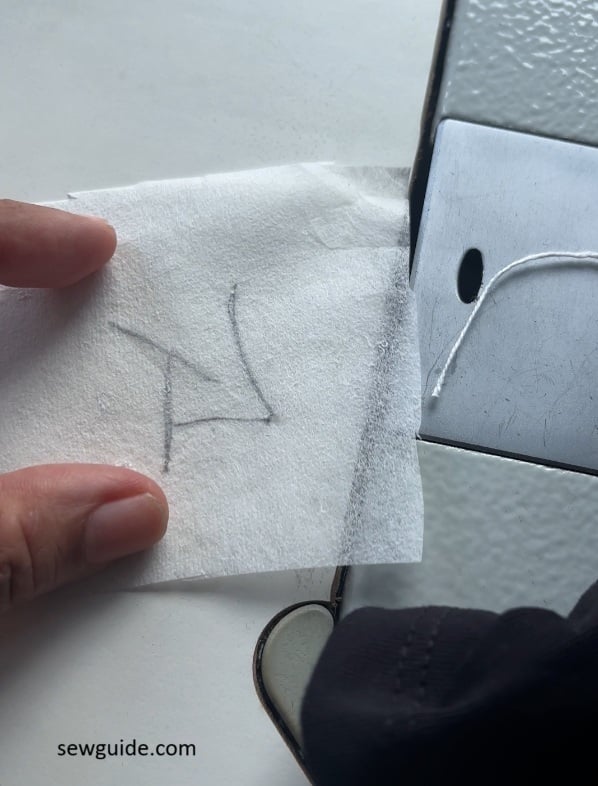
Write your letters or wording on a transparent paper or fabric – I suggest the paper backing for embroidery, it is transparent enough and easily tears off (When you write the letters on it, remember that it should be written big enough for you to run your sewing machine through it). You write the letters as you like it on one side, but you have to stitch on a mirrored version, so you flip it.
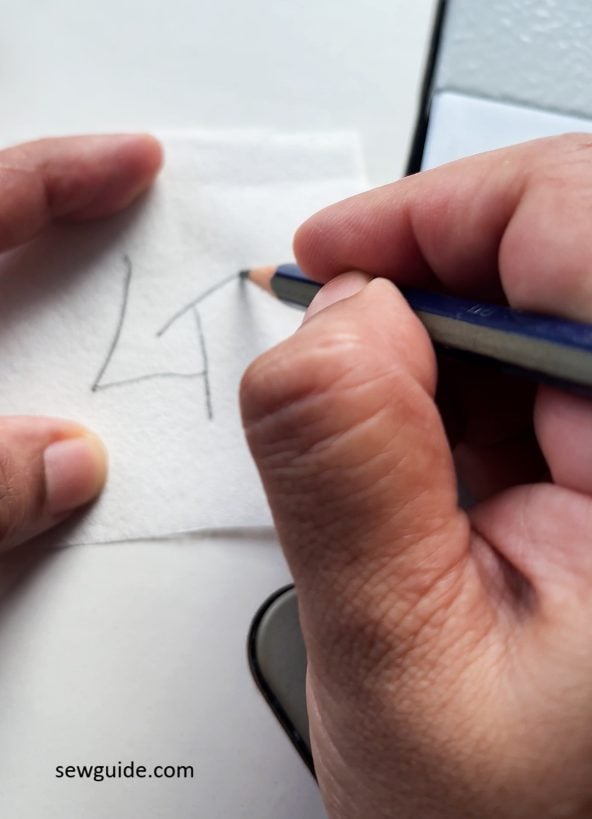
Turn it upside down
Keep on the back of your tshirt and start stitching over the letters (on the back side). (Before stitching, pin and then flip to ensure that the letters will appear you want it)
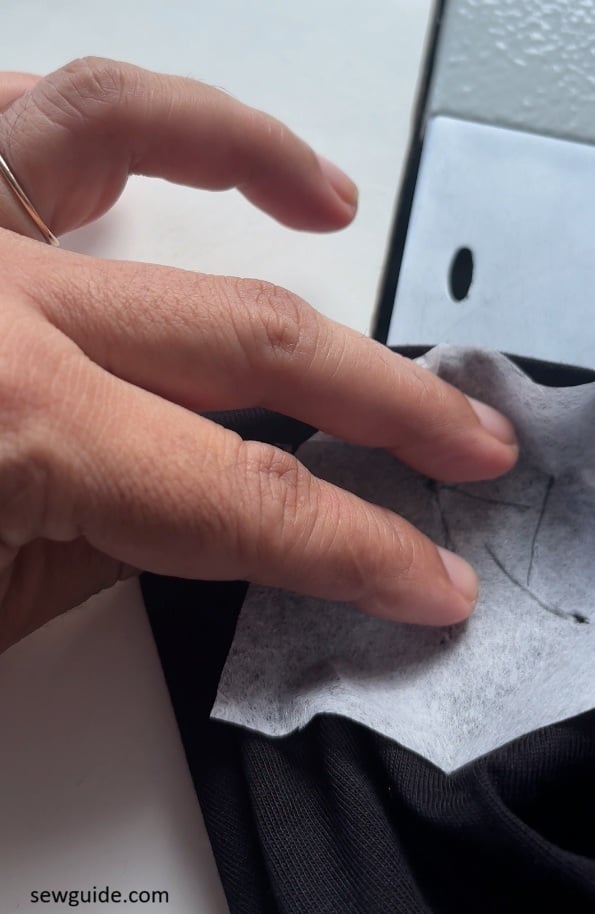
I used the normal straight line stitching lines for stitching over the letters. My paper tore when I stitched it, because I had a little bit of moisture on my hands. But that is ok, I could still see the letters.
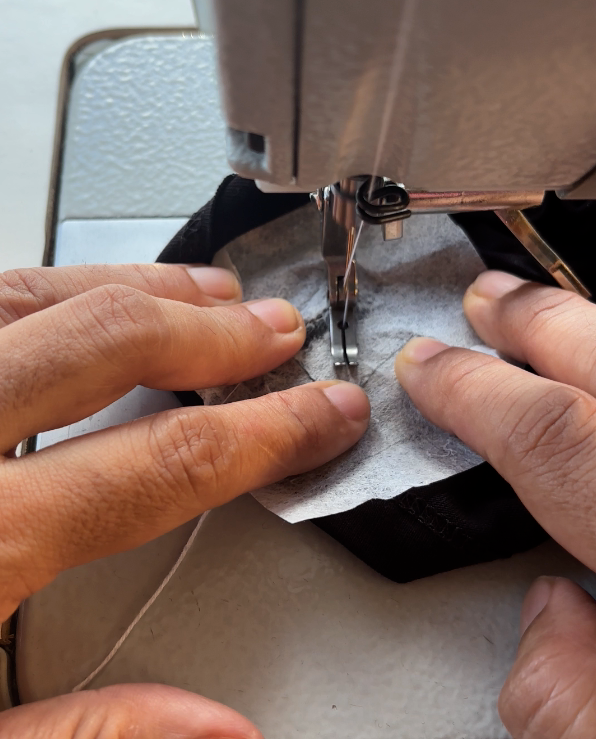
One thing you should never do as you stitch is to pull the fabric. Absolutely no pulling. Let the machine move the fabric – you can just guide the fabric.
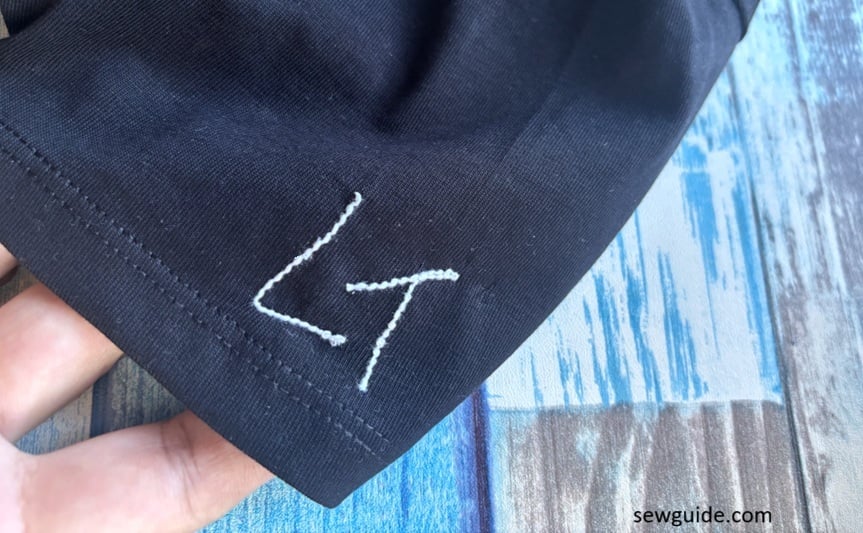
Tear out the backing paper and on the front of your tshirt- there it is – your embroidered letter, in a stitch that looks very pretty.

Cut off the extra thread. You may want to take the thick thread to the back and tying it off at the back, so that it wouldn’t unravel when you wash your t-shirt.
I would suggest to test this method on a scrap knit fabric first, before trying on your t-shirt.
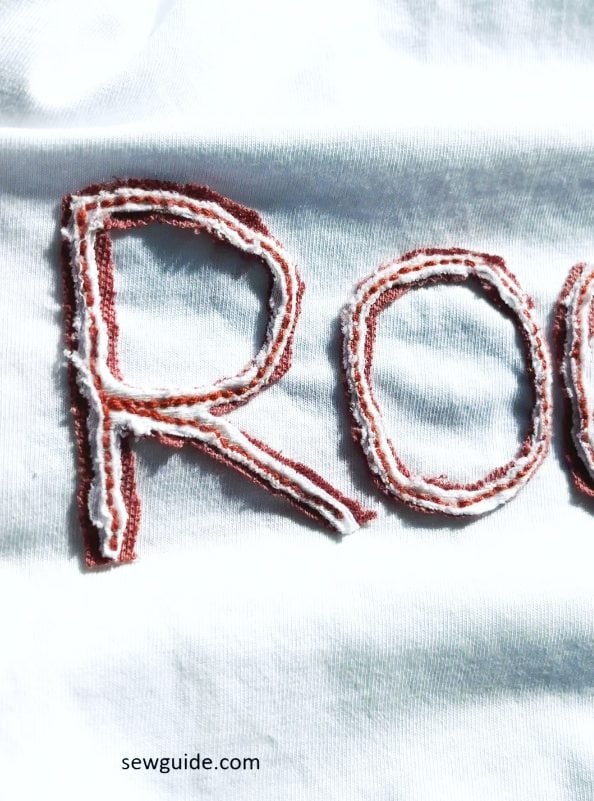
Method 2. Distressed raw-edge embroidered appliqué
This is a good way to use up your t-shirt scraps and create embroidered letters on your t-shirts that pop.
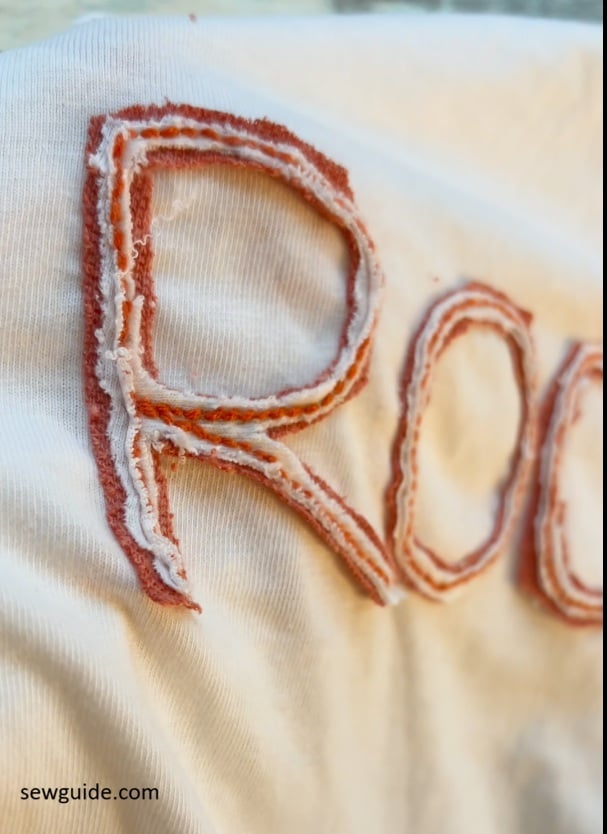
Here is what I did. Collected color coordinated knit fabric scraps. It is better to choose a contrasting color for the layering scraps. Atleast for the bottom layer. I used an orange colored knit scrap from an old tshirt as the last layer and chose a white as the top layer. My base t-shirt is also white.
( You can also use lightweight denim, cotton twill,chambray,canvas, or flannel for softer edges.)
So I decided to use the contrasting color thread to embroider. Choose a thicker thread than the thin embroidery floss or your sewing thread – they are going to disappear in the knit.
Draw the letters on the top most layer and then layer the fabric pieces on the exact place and then pin it there.
Do the embroidery – I just used a back stitch. I think simple is beautiful. You can also machine stitch, if you can do it free hand.
Watch the video:
Then, cut out the layers, one by one.
First the top layer is removed close to the stitching line, then the next layer is also removed a little extended – just a minuscule amount extra, not much. Enough to give some depth. About 2mm would give a nice fray. For more loft, you may use more layers and more edge, say 4mm.
( Do not trim too close to the stitch, unless you want the whole applique letter to come off)
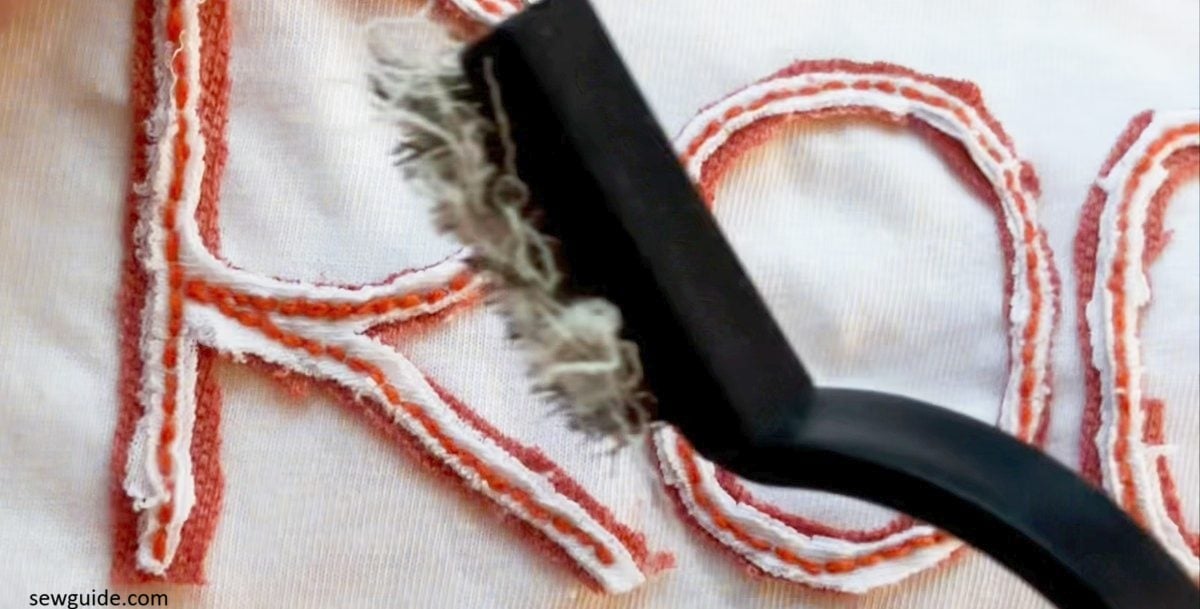
As a final step, use a brush (I am using my mini wire brush) to fluff the exposed fabric edges.
Brush with a stiff nylon brush or like me, use a narrow wire brush to create controlled fraying.
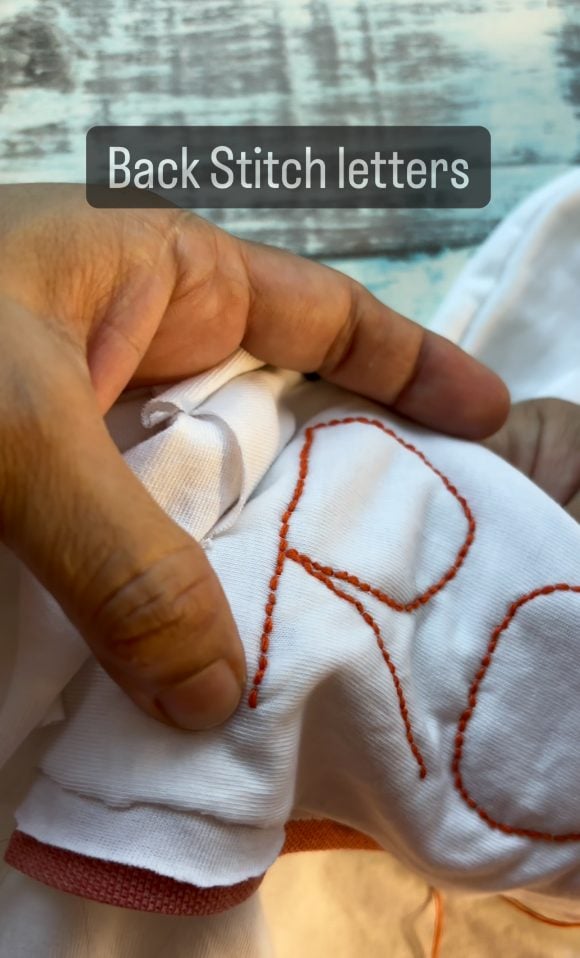
Method 3. Hand Embroidering the letters
Hand embroidering letters is the absolute beautiful thing.
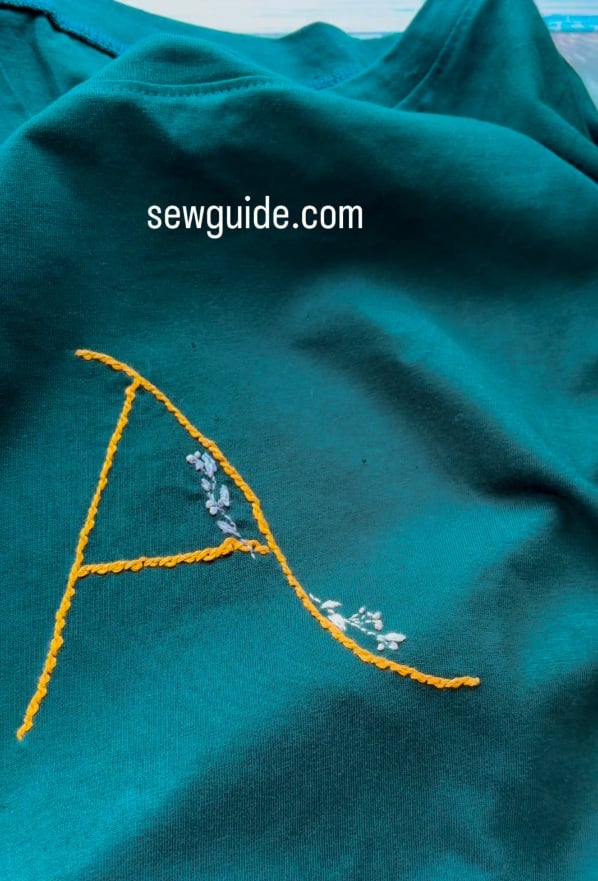
There are 2 things I am always afraid of when hand embroidering on t-shirt knits – one that my needle will leave holes and that I will stretch it out of shape. I always support the shirt with a middle finger beneath the hoop center. I also take care not to pull the stitches vertically upward. It is better to pull diagonally across the fabric – I mean, it is better not to pull at all too much anyways.
One would think that Hand embroidery is the least dangerous for fabric distortion in knits, but from what I have seen it is the opposite. Maybe because of the thread pulling or concentration of threads or the thickness of needle, the fabric always get pulled. You have to attach stabiliser to the back.
T shirts are made of thin jersey knit fabrics which are famous for being unstable. It is better to start off on a better note – stabilise the area with either a lightweight knit fusible, OR tear-away embroidery stabilizer. So when you embroider on top, you are not going to stretch it out of shape.
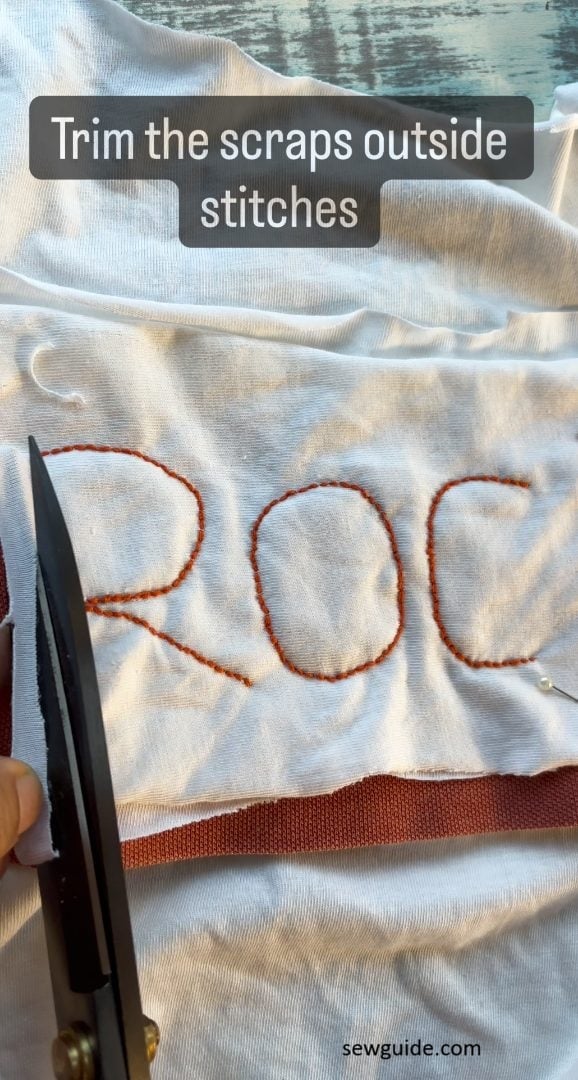
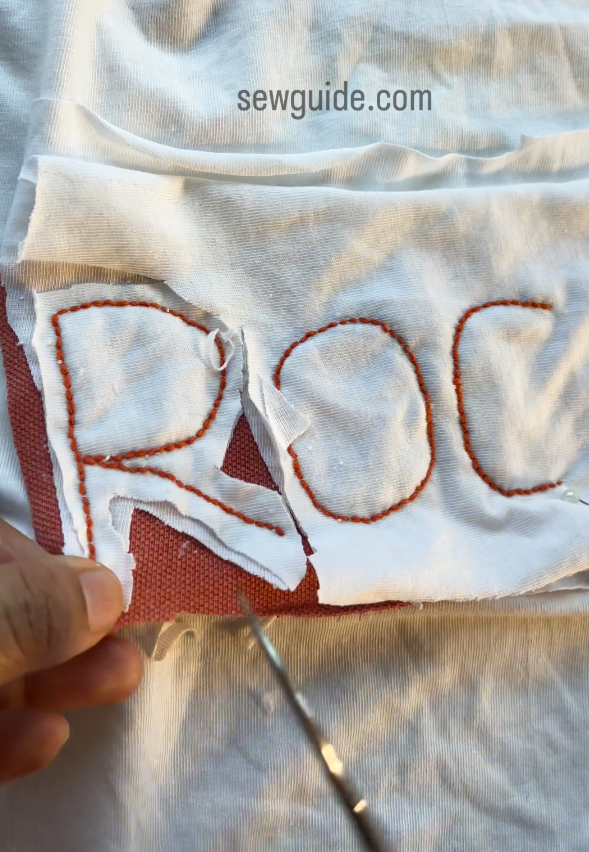
Method 4. Reverse Applique
You would have to be living under a textile rock not to have come across reverse applique. In reverse applique the extra dimension and texture is introduced to the clothing, by adding the right kind of fabric with the right kind of print, color, texture underneath.

Once the top layer is removed outside the stitching line, the lower fabric visually rises forward.
This is how it is done : You should first draw the letters on the t-shirt. Then layer a tightly woven scrap fabric behind the shirt and then, secure the letter outline using a tight backstitch; After that trim away the t shirt fabric leaving a narrow seam allowance around the stitched edge. You can find more details of this in the post on refashioning old tshirts.
There are so many other ways to stitch letters on t-shirts, but these are my favourite ways. You will have your own favourites. Mention them in the comments.
As I already said, cotton knits (which make up a lot of t-shirts) are sewn differently from cotton woven. Stitching cotton knits requires consideration about the stretch of the fabric.
Related posts: Methods for Embroidering letters on fabric ; Embroidering on your handkerchief; T-shirt embroidery


