
One would think Sewing clothes is not easy. I would think, Not.
Yes, there are complicated things in sewing – like collars, buttonholes, armholes. But what do you say about a piece of clothing without all these but is still very useful as a simple everyday wear. Something you can cut and sew easily. Here are two such top tutorials.
Easy everyday top for jeans and pants
Jeans and a nice top – how many of us have anything other this on our minds when we think of an everyday outfit ? Here is a sewing tutorial to sew such a ‘nice top’ to wear day in and day out. You just need 2 meters of fabric and some free time and of course your tools for sewing clothes

Sewing Pattern & Tutorial for a Top.
Step 1. Take body measurements
You need to take the measurement of the body around your bust, around your hip, around your armscye, around your arms where the sleeve (the top part and not the ruffle) ends, the length you need for your (top part) sleeve and the length of the ruffle. You can skip the ruffles if you do not want it.
Step 2. Cut the pattern pieces
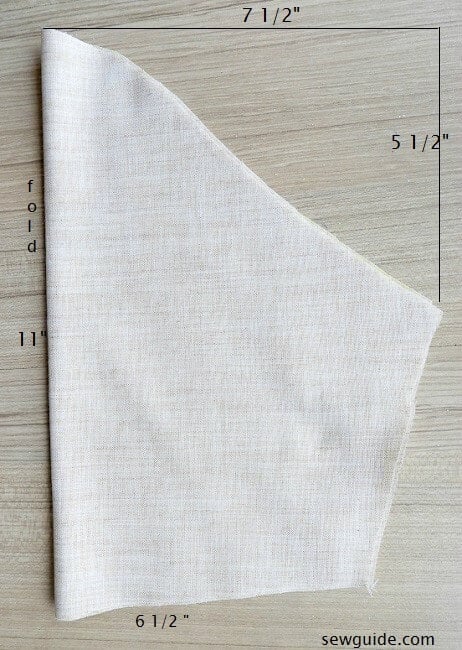
Fold 2 fabric pieces of length 26 inches by the middle and mark the pattern.


You can change the armscye measurement as per your body measurement. Cut the back slightly longer or front shorter if you want to but ensure that the side edges are the same length.
Sleeve pattern -cut two
The bottom edge of the sleeve can be changed according to your body measurement..
Ruffle pattern – cut two.

Step 3. Sew the back opening.
On the back a slit opening of about 4 1/2 inches has to be made and it will be fastened with a button and a thread loop.
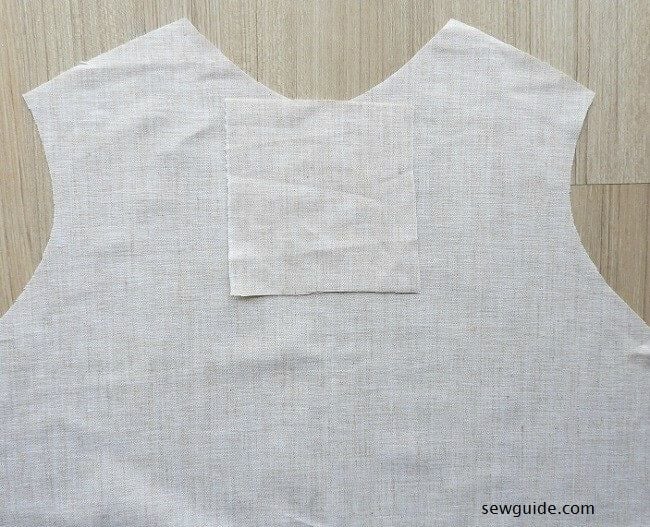
Keep a fabric piece of about 6 inches length and 4 inches wide (facing) and keep it on the center of the back bodice. Align the center of the two and pin in place.

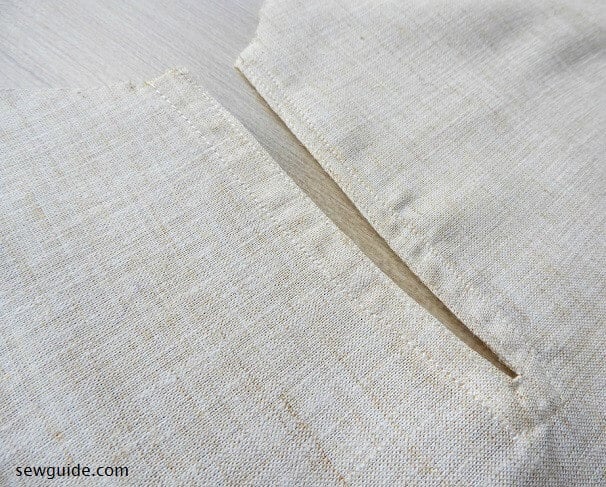
Mark a straight slit of 4 inches or so. Mark two lines 1/4 inches from the center line coming to meet the center line at the bottom tip. This is your stitching line. Sew through that line ( Do not sew on the center line at all). When you reach the end (tip) make a stitch or two across and then continue sewing to the top.
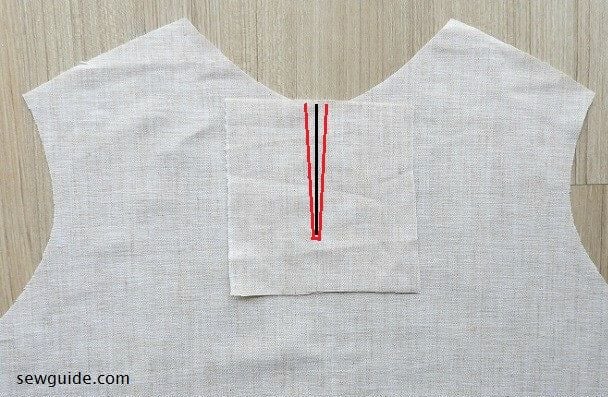
Cut through the center line carefully – ensuring that you cut till the very tip. Flip the facing to the back.
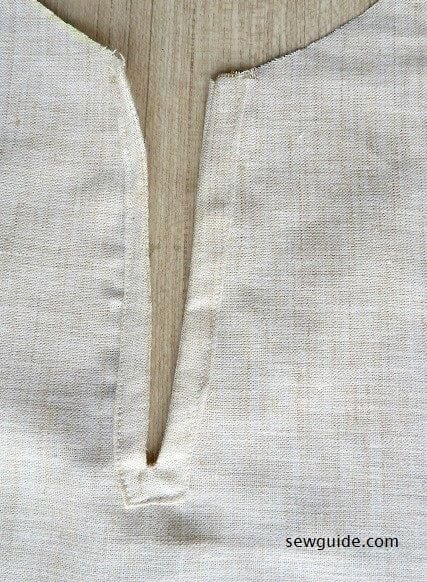
Trim the facing to about an inch around the slit. Fold and sew in place at the back. You may want to baste stitch before sewing with the machine or simply hand stitch it in place.
Step 4. Join bodices
Sew the two bodices together – front and back together, at the shoulder.
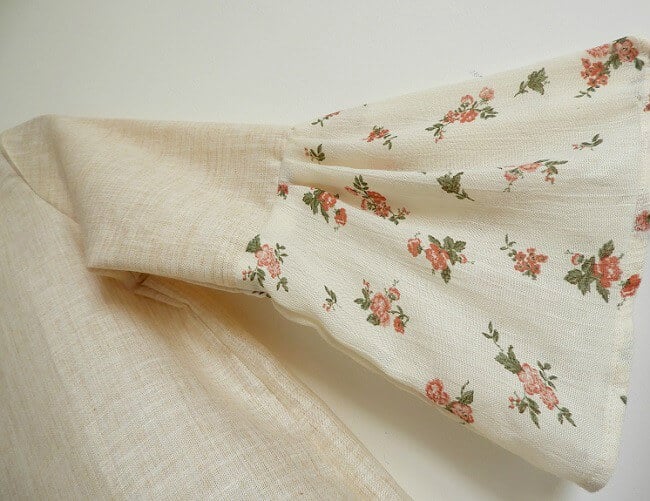
Step 5. Sew the ruffles to the sleeve
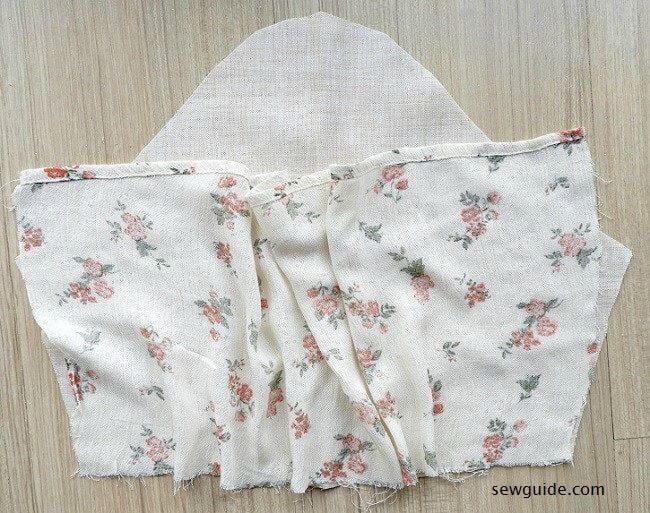
Finish the hem of the ruffle piece.Keep the piece on top of the sleeve and stitch together. You will have to gather the ruffle piece by the center.
Either gather beforehand or gather as you sew. If you are gathering as you sew, ensure that you join the either sides with no gather first and then sew the gather. Pinning helps. Here are some gathering tips.
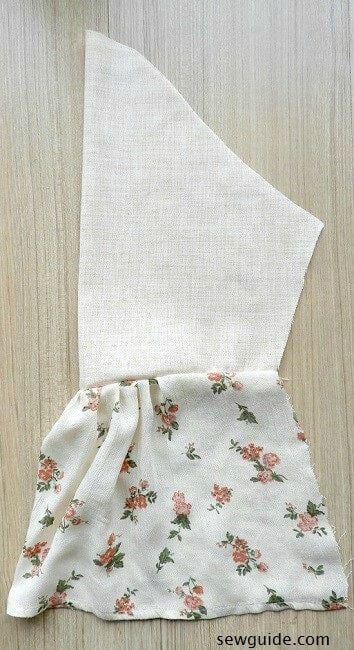
The finished sleeve will look like this – the length looks slightly more elongated in the picture.
Step 6 Join the sleeves to the bodice.
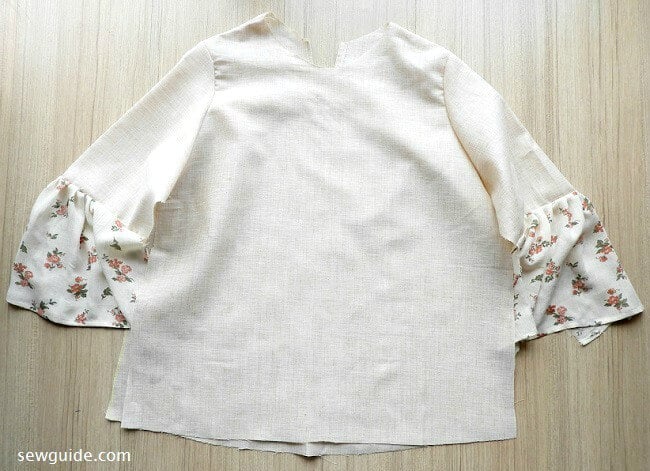
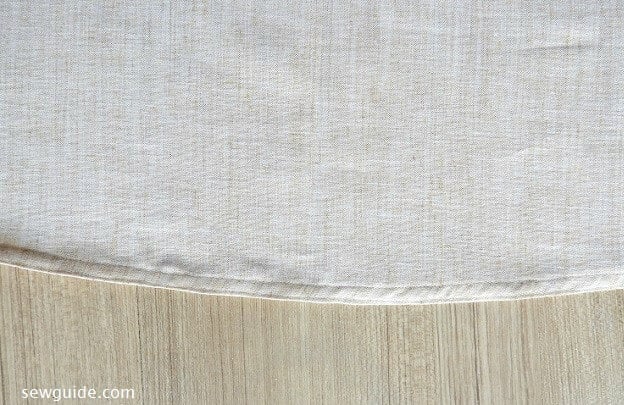
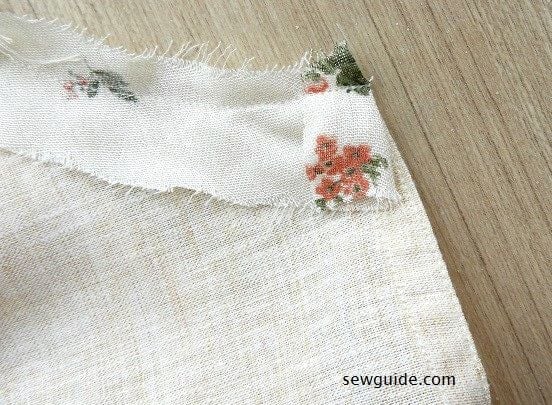
Step 7. Hem the bottom edges
You can finish the hem of the front and back by using a baby hem method. This is ideal gently curving hems.
Step 8. Sew the side seams

Step 9. Bind the neckline
But before that sew a stay stitching line along the neckline edge to prevent the neckline gaping.
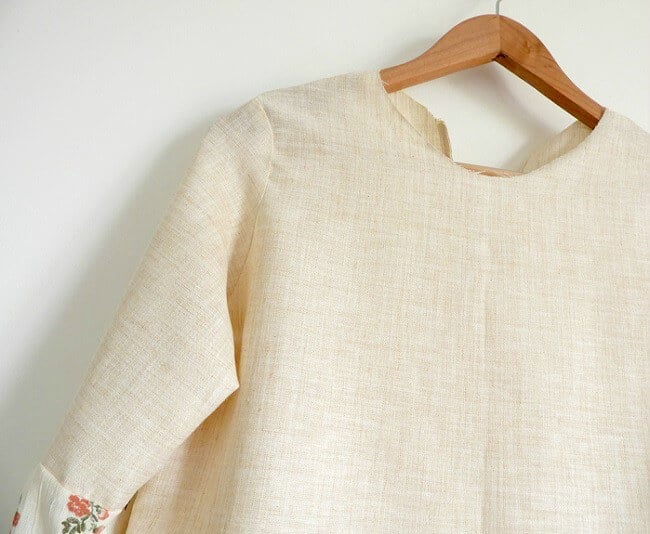
Finish the neckline – cut a bias binding tape and sew the binding.
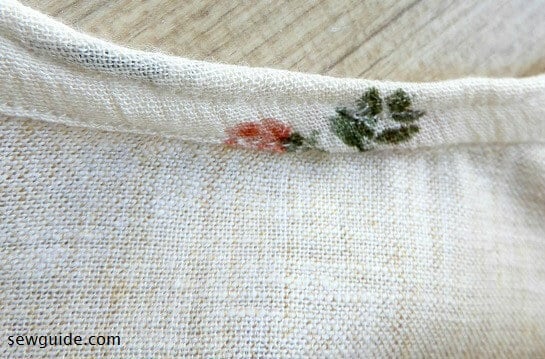
I kept the binding a little to the outside making a faux piping along the neckline edge . You can find tutorial to do real piping here.

Step 10. Sew the fastener on the back opening
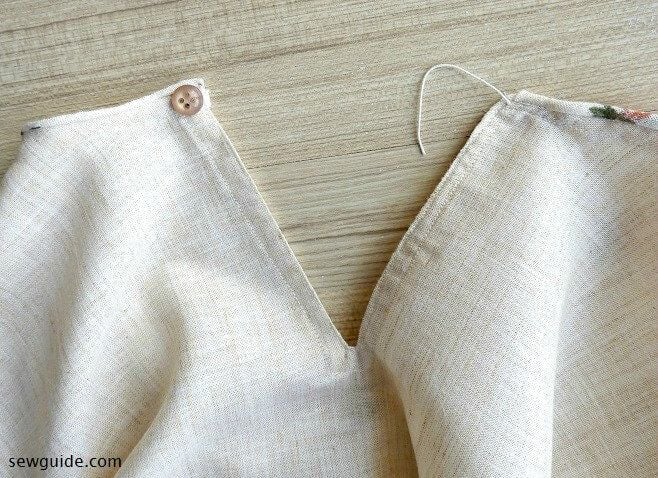
Method of sewing buttons and a thread loop for the button or use elastic thread as the button loop.
Finito. Now go and checkout more Free women’s clothes patterns.
Easy Everyday top
Here is a sewing tutorial to make a simple everyday Top.

Sewing pattern and tutorial for that every day top
You need to know how to mark and cut fabric properly, sew a straight line, cut bias strips and bind edges. You also need to measure your bust round and hip round.
Step 1 Cut out the pattern pieces
You can make this top in any dressmaking fabric. I am making in a cotton fabric. A drapey fabric like silk, satin, chiffon -all would do.
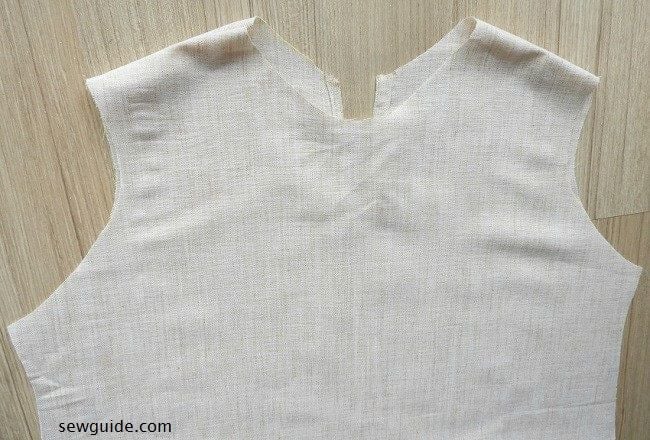
Cut out two 26″ long fabric pieces for your top; fold them by the middle. Below given is the pattern drawing – it is the same for the front and the back pieces except for the necklines.
On one piece, Mark the following markings (in the pattern picture below) for the front pattern except D-P. Form the armsyce in a soft curve. This is your front pattern.
On the next piece mark similarly, except do not mark D-E, instead mark D-P. This is the back pattern.

These are your two pattern pieces for the front and back.

You also need to cut out out bias strips for binding the armholes and neckline. Bias strips are needed because it has stretch to accomdate the curves of armholes and neckline.

Step 2 Sew the Shoulder seams of the front and back pieces
Keep the front and back pieces together right sides together and sew the shoulder seams.

Step 3 Sew the binding for the armholes
Take the binding strip you have cut on the bias for binding the armhole. Spread open the armhole as in the picture below.

If you want a visible binding (binding showing on the right side of the fabric as it does in mine) keep the top wrong side up and keep the binding strip right side down along the edge of the armhole as in the picture below.
Pin in place and then stitch in place with a 1/4 inch seam allowance.

Turn the binding to the front side. Fold the edge to the inside and top stitch the binding in place along the edge.Top stitch along the other edge as well.

Do the same for both sides. Remember to top stitch the binding neatly with an even edge and press in place.

Step 4 Sew the neckline binding

Length of the binding strip needed to bind the neckline should include the circumference of the neckline plus 2″ for overlaping. Cut the strip on the bias.

As you start binding turn the short edge to the inside and start stitching. This way when you finish the binding the overlaped edge would be turned to the inside as it should be.
Step 5 Sew the hem
Fold the bottom edges of the front piece and back piece to the inside twice and stitch in place.

Ensure that the length is same for both the sides. This is very important or else the side seams wouldnot match.
Step 6 Sew the side seams.
Join the side seams of the front and back.

It sure finished a lot faster than even a lazy person like me intended. Good. Let me go back to that book again.
Related posts : Sew a sleeveless top; Sew summer top; Sewing pattern for clothes ; How-to’s for a beginner in sewing .

Thanks, you for showing
thanks alot
This site is so informative
Plz send me free dresses pattern pdf with a4
Thank you
This is an excellent set of instructions. I have sewn for a lot of years and now want to totally get away from commercial patterns. I love the basic idea. I did make on change based on my personal preference: I cut the back a little wider, made it two pieces and added an invisible zipper so that it’s easier to get a woven over my head.
On your other page you said beginners shouldn’t use chiffon or satin?
Sarina, you’re website is such a great resource. I have learned to make my own clothes and add my own flourishes to make them unique. I never thought I would be able to draft my own patterns and can do this now.
Just wanted to ket you know what a difference you have made in my life. I really enjoy sewing for my family.
Hi Deb,
Thanks for the comment – made it worthwhile and inspires me to write more. Best wishes.
Great simple pattern. How would I add a bust dart for a better fit?
Thanks.
Looks easy. Will try but how much material will I need to make it??
Is this meant to be a pullover? I found your site, while looking for a simple top pattern for my 12 year old daughter. I’m going to make a muslin, to be sure, before we use her favourite fabric. Thank you for sharing this!
How to measure D.B 81/2?? How to measure is this armhole depth??
Hi Kripa
You an checkoout this post for clarification on armhole /armsyce measurement
Thank you so much for sharing.
Really appreciate, I have so many designs that I’d like to sew myself.
Many thanks.
Thanks a lot, is easy than I thought.
Nice method to stitch a simple top. Thanks a lot
Thanks Prasanna
I have just discovered your site and I loved the information I’m finding there. Thank you.
Thank you Pamela.