
There is a reason why skirts are some of the most beginner friendly garments out there – shapes are simple, the fitting is forgiving compared to tops and trousers, and you can just finish it fast and wear it proudly. I created this hub for every skirt tutorial on this site — gathered, circle, pleated, wrap, pencil, lehenga, lolita, reversible, and more, so that it is easier to get to. Each tutorial has step-by-step instructions, photos, and everything you need to cut and sew with confidence.
Skirt Tutorial Finder
Choose your fabric and draft a favorite skirt pattern with your measurements. You can make it with just a piece of fabric or multiple pieces with various embellishments, trims, fasteners, etc.
Just choose your fabric and draft a favourite skirt pattern with your own measurements. It can be made of just a piece of fabric or of multiple pieces with a variety of embellishments, trims, fasteners etc.
Don’t forget to checkout if that skirt will suit your bodyshape or not and the different silhouettes you can design for your skirts.
How to draft skirt patterns that suit you
To draft a pattern for skirts, the basic measurement you need are –
Waist – Measure around your natural waist and add 1 inch (3 cm) for ease.
Hips – Measure around the fullest part of your hips and add 1–2 inches (3–5 cm) for ease.
Length – Measure from your waist to where you want the hem to fall. If you have a pear-shaped body or a prominent bottom, take the front and back length separately — the same measurement front and back will cause the back hem to ride up.The average skirt length is 30 inches (70 cm).
Waist to hip – Measure straight down from your waist to the fullest part of your hip. This determines where your pattern needs to accommodate the hip curve.
Flare – The amount of flare is calculated as an angle when drafting. A 20° angle gives a gentle everyday flare; 60° gives a dramatic full flare. The flare you choose will determine how much fabric you need.

Skirt Block Pattern
Draft a basic skirt block; Not a finished garment but the foundation of everything; once you have a block drafted to your measurements.

Basic Skirt Sewing
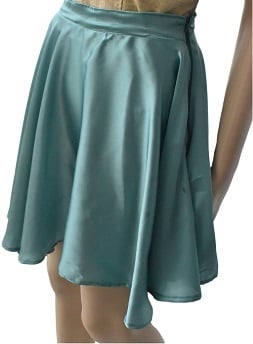
Sew a classic skirt; A relaxed, straight-cut skirt that sits between the fitted pencil and the flared A-line — practical to sew, easy to wear, and a wardrobe staple


Wrap skirt
No zip, no fastening— adjustable in fit and one of the most beginner-friendly styles you can make.

Pencil skirt
Slim, fitted, and knee-length pencil skirt — darts, a back vent, and an invisible zip.


Easy Pull on skirt
No zip, no button, no fuss — just an elasticated waistband that makes this the most wearable skirt in your wardrobe

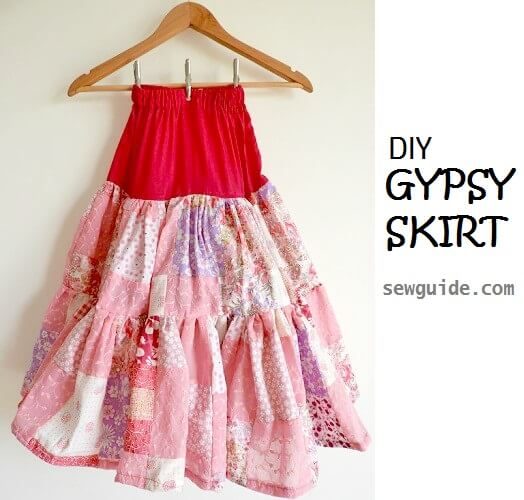
Gypsy skirt
Tutorial to sew tiered, flowing skirt with multiple gathered layers that gets fuller towards the hem

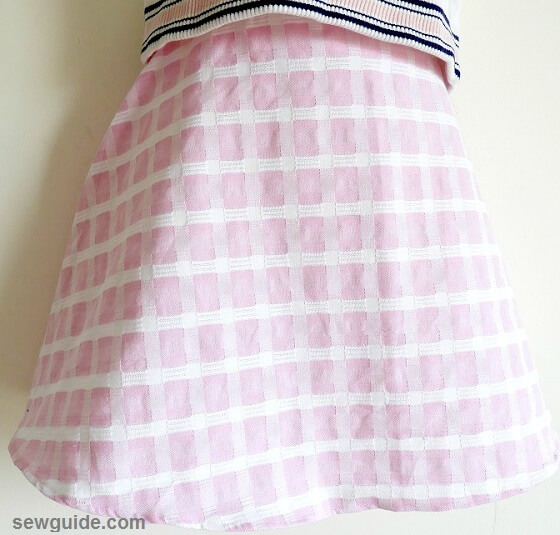
Yoke skirt
Tutorial to sew simple flat-front waist skirt with a yoke – it is gathered in the back for easy fit

Lolita skirt
Tutorial to sew a voluminous skirt with layers. This was worn over a petticoat for dramatic fullness


Related posts :

Checkout the post on hemlines and skirt lengths : 9 important names .

Opening
In a skirt, usually, the opening is kept on the side seams, though center-back openings are also common. Center-front openings are also used, though rarely.
Hems
The hem is usually a turned under edge – a 2 1/2 inch extra is added to the bottom edge for this turned under hem.
Pockets
Side seam pockets are the most commonly used pockets for skirts. Patch pockets are also used.
Waistbands
Usually, a waistband of 1 1/2 to 2 inches is given to skirts. The width will be the waist round ( measure around where you will tie the skirt without any belt) plus 1 inch extra. If there is an extension for a stud or buckle, add 1/2 inch extra.
Trims
You can add frills, lace, ribbon, etc., as trims to give an extra edge. You can add a sash and tie a bow on the front for a cute look.
Which fabrics to sew the skirts with
| Skirt Style | Best Fabrics to Use |
|---|---|
| Pencil Skirt | Ponte Knit, Wool Suiting, Stretch Denim, Scuba, Corduroy |
| Maxi Skirt | Rayon Challis, Bamboo Jersey, Tencel, Cotton Voile |
| A-Line Skirt | Quilting Cotton, Linen, Mid-weight Denim, Canvas |
| Circle Skirt | Cotton Sateen, Poly-Crepe, Rayon, or Scuba |
| Gathered Skirt | Cotton Lawn, Chambray, Batiste, Double Gauze |
| Wrap Skirt | Linen Blends, Viscose, Silk Crepe de Chine, Poplin |
| Pleated Skirt | Gabardine, Synthetic Suiting, Tartan Wool |
| Tulip Skirt | Ponte, Scuba, Medium-weight Crepe |
| Tiered Skirt | Cotton Voile, Swiss Dot, Lightweight Linen, Seersucker |
| Mini Skirt | Denim, Faux Leather, Twill, Jacquard, Velvet |

Thanks for finally writing about > How to sew skirts – FREE DIY SKIRT PATTERNS
– Sew Guide peluche dinosaure
this is amazing, thank you.
Well, I have a problem
Hi I just found .site and I have just made my first str. aight skirt.I would like to make a flouncy skirt which is straight until the hips where it swings when you walk. Do you have any advice on this please? But the rest of your very clear instructions will certainly keep me busy in this trying time.
Thank you so much.
Keep safe and well.
I see this site as the best for any sewing topic. You suggested to measure front and back separately for big bottom and Hip people. Back will be definitely longer than front.
How do you see them together at the side?
You are really sweet to say that about the site.
The side will be the same. As you fold and cut you just make the middle part some 1 inch or so higher
Hellow hi,Its me clare.I love all the sawing patterns.really interested in sawing skirt but need to cut the pattern,
Coates had a pattern on their website in October 2018 for making a skirt from a poncho; I believe they called it a “zipper poncho skirt.” I didn’t save it a word doc (my fault!), but just bookmarked it instead. Now, of course, the link is dead.
Does anyone else have a copy of that pattern, please?
I’ve Googled everywhere, but can’t find it. Thanks.
Hi Carla
Can you join some of the popular sewing groups on facebook and ask this question. You will probably get your answer very fast.
Thanks so much this is very useful
Thanks Angel
Not so detailed for me as a beginner
Hi Olamide
Sorry if you found it confusing – You can start with simple elastic waist skirts and then go from there or a simple top like this one.
Please am I allowed to print directly from your email, in other for me to be reading gradually when am less busy or better still is there book for it so we can download it . The tutorial is helpful thanks alot
I am sewing a gathered skirt. The pattern says to cut three of same piece. The piece is cut on fold. Two of the pieces are sewn with a zip. Does this mean the side seams wont be on the sides of finshed skirt?
Hey thumbs up.I like this tutorial.
Thank you so much for gathering all this information together. You make it possible for me to actually tackle projects that otherwise I would just wish about.
Hi Willow
Thanks for the wonderful comment.
hello hi its me mary i want all the sawing patterns
You are Amazing …
I’ve applied your bodice and sleeve patterns for my teenage daughter, it was very neat and exact as I wanted your page is easy, straight to the point, clear steps and marvelous explanation with helping images.
I very much thank you ,,, right no I’m working on a skirt project..
Keep up the great work.
thanks a gain
Hi Sonam
Thanks for the comment and the kind words
Never mind, I just couldn’t get it straight in my head.
I’m confused. You say on the handkerchief skirt to layer both squares right side up. Next sew together at circle. The confusing part is where you say pull the bottom part to the back through the circle. Won’t the fabric layers then be right side to wrong side?
I was a little confused by what you were asking but have now worked it through in my head (probably as have you by now). Both right sides will be visible but the raw edges around the waist will now be concealed between the layers, ready to topstitch or finish as desired.
Hey
The tutorials look nice
Rupa